

Introduction: Toughbook CF-U1 Readily Available SSD Mod


So I own a pair of Panasonic Toughbook U1s. One is the older MK1 spec, the other a MK2 Ultra with every option.
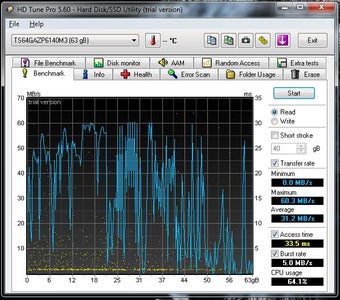
The issue was, they are slow, horribly slow. Not so much the specs though. MK2 for example is a 1.6GHZ Intel Atom with 2GB RAM and a 64GB SSD. The SSD was the issue.
Benchmarks are attached. One is the 64GB, the other is the faster 16GB SSD from the MK1 in the MK2.
I knew there must be some way to improve on this. Information on these little computers is very limited and parts are even more so. It has a weird tiny ZIF connector for the SSD, and no one had anything published on the main board side so I went digging.
Step 1: Research


I took the MK1 apart and found the connector on the board.
After looking at it, comparing it, then testing it with an Ipod to CF zif kit, it worked!
That done, I set out ordering parts.
Here's that list: [I got it off EBAY, these are Amazon.com links]
M-SATA to ZIF Adapter
http://www.amazon.com/SMAKN%C2%AE-mSATA-PCI-E-40pi...
Samsung M-SATA SSD
http://www.amazon.com/Samsung-850-mSATA-2-Inch-MZ-...
3M Mounting tape
http://www.amazon.com/Scotch-414-DC-Extreme-Mounti...
That's it, time to mod. Some kits come with a cable, you will need 50mm of cable to do this mod.
Step 2: Dig In!


Start with the hard drive. Two screws and it will slide out. Remove any SD card in the side and then take out the batteries.
There's two silver screws under the fingerprint reader/cover. It lifts then slides off towards the top.
After that's gone there's 8 screws holding the back on, see the pictures.
Depending on your model you may have a WWAN board. This needs to come out. Simply remove the 3 screws and carefully unplug the cable to take it out of the way.
Unplug the HD cable, I gutted out my HD holder and just tucked the cable back under the board in the PC.
Before we get too far I have found adding a 4UF cap to the MSATA adapter board really helps stability. See the picture, I used a non-polarized cap here.
Once space is made you can install the Msata card and cable to the computer. Simply attach the zif cables in the right directions very carefully, these connectors are kinda delicate.
Once that is done, rotate the assembly and attach with the mounting tape, that's it, job done. The cable should fold on it's own to make the turn, if it's too short it wont make it. In mine the new board touches the bottom mounting post for the back cover but clears fine.
Step 3: Testing and Installing Windows

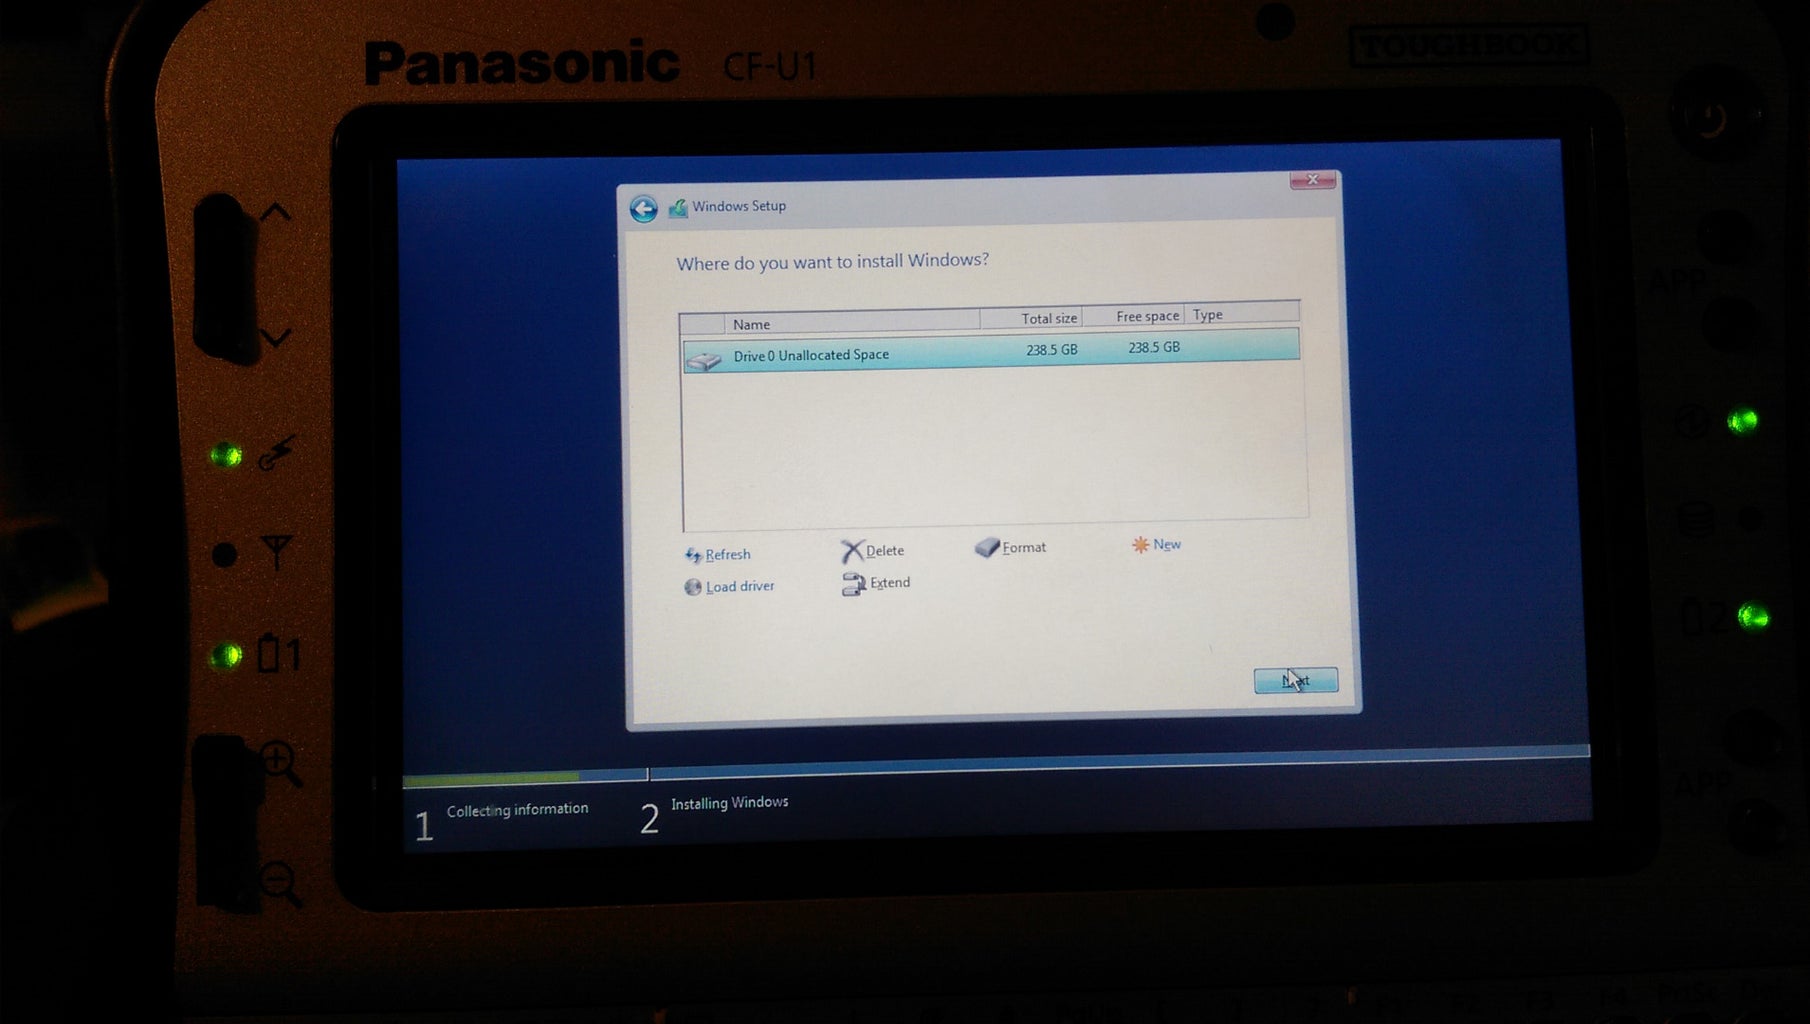


That all done, case closed and device installed the BIOS should see it.
As you can see from the benchmark it's a huge improvement. Overall it just feels like a better computer.
I hope this helps someone!
Now install Windows and enjoy the speed! Mine is much more usable, it feels like a more modern PC now. I use it for GPS mostly.
Step 4: A Follow Up

After some freezing issues came up I found that the 256GB Samsung SSD I used was known to do that with certain chipsets. I got a 128GB one from Ebay for $35 that works better, no locking up but slightly slower. Not that it matters, it out performs anything stock and is at least double the space.
Also after some more digging I found the chipset that converts SATA to PATA for the adapter can have issues with TRIM on certain drives. TRIM can be disabled and run manually which will be of great help since windows seems to run it with all large file operations leading to the freezing.
Here [Mywindowshub.com] is a link that describes how to disable TRIM and run it manually.
Good luck!
Step 5: Modify the MSATA to Keep It From Reading Low Temperture

OK so these have a thermistor on them. At least stock they do. I finally revisited this and found a termistor on the 1st pin that goes to ground. This drops resistance as it heats up so I put a 5k resistor across it and now it boots every time, no issues!
I used a 40 pin ZIF connection and two cables. I added a 4.7K Ohm resistor to the line closest the top of the toghbook. This is where the thermistor is in stock setup. Then I ran a wire from ground to the other end of the resistor giving it a good 40c or so signal so it never hangs up on warming up the hard drive.
I have designed a 3D printable cover for the former drive slot if you want to remove it completely. Find it here:
https://www.thingiverse.com/thing:4766485
Here's a recent video of me making the mod inside a MK2: https://www.youtube.com/watch?v=9syGVhpcqGY


