

Introduction: ULTRASONIC SENSOR HC-SR04


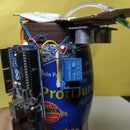


As the name suggest that it uses ultrasonic sound waves to perform task .Yes it is , it uses ultrasonic sound waves to measure distance sense obstacle etc. It is a electronic circuit or a device which is generally used now a days to perform various task. These sensors are famous and common for project purpose. These sensors can be attached to various microcontrollers to make a project.
Nowadays we see blind stick, automatic doors, radars which uses same or better version of ultrasonic sensor to do these jobs the on which I am using is the basic one and easily available in the market.
Step 1: DESCRIPTION

Ultrasonic sensor is a sensor which is built out of two LM324 ic and a MAX3232 ic a Transmitting transducer and a receiving transducer and various other components.
Sensor has four pin VCC,GND,TRIG,ECHO which is used to send and receive pulse signals to the MAX3232 ic.
Transmitting and receiving transducers sends ultrasonic waves for a couple of microseconds and receiving transducer sense these waves back and the microcontroller calculate the distance based upon the time taken.
*NOTE:- THIS SENSOR IS BASED UPON ULTRASONIC SOUND WAVES AND DEPENDS UPON VARIOUS FACTORS LIKE HUMIDITY, TEMPREATURE AND OTHER WHICH RESULTS IN CHANGE OF THE VALUE OF THE SENSOR.
This sensor gives the output of pulse type means it sends the microcontroller the time taken by the waves to hit the object and come back. It can measure a distance of about 4meters depending upon the library used for calculating data. But it has a minimum distance at which no object should be plave or the sensor will give unwanted distance and that is 2cm.
Step 2: FEATURES AND APPLICATIONS
- High speed data calculations
- Easy to use
- Detection angle of about 120 degrees
- Gives nearly accurate distance
- Pulse type data type
- Low price
- Can be used in doors and blind stick
- Security purpose
- School projects
Step 3: SENSOR SPECIFICATIONS


Step 4: COMPONENTS NEEDED
- Any microcontroller preferably Arduino Uno for beginners.
- A breadboard
- Jumper wires
Step 5: CIRCUIT DIAGRAM

First take the power lines onto the bread board from microcontroller
VCC/5v-->+ line and GND--> - line.
Then connect the sensor on to the bread board and connect power to the sensor from powerlines using jumper wires.
Now connect TRIG PIN OF SENSOR TO MICROCONTROLLER DIGITAL (PIN 3) and ECHO PIN OF SENSOR TO DIGITAL(PIN 2) OF THE MICROCONTROLLER.
Step 6: LIBRARY
I have used the ultrasonic library for the calculation purpose whose link in here
https://github.com/JRodrigoTech/Ultrasonic-HC-SR04 ULTRASONIC HC-SR04 library or you can use Arduino library manager to download it
Step 7: CODE
//put this code in the ide of arduino from this line
#include
Ultrasonic ultrasonic(9,8); // (Trig PIN,Echo PIN)
void setup() {
Serial.begin(9600);
}
void loop()
{
Serial.print(ultrasonic.Ranging(CM)); // CM or INC
Serial.println(" cm" );
delay(100);
}
Step 8: WORKING
As the code starts it initializes
the pin to which the sensor sends its data then the microcontroller waits for the data to be received as soon as the data is received
Ultrasonic waves are send in pulse of 10 microseconds and are received by the receiver and the Arduino calculate the distance based on the time taken by the waves to return back to the sensor.
Step 9:


Now we have got the PCB design and it’s time to order the PCB’s.
For that, you just have to go to JLCPCB.com, and click on “QUOTE NOW” button.
JLCPCB are also sponsor of this project. JLCPCB (ShenzhenJLC Electronics Co., Ltd.), is the largest PCB prototype enterprise in Chinaand a high-tech manufacturer specializing in quick PCB prototype and small-batch PCB production. You can order a minimum of 5 PCBs for just $2.
To get the PCB manufactured, upload the gerber file you downloaded in the last step. Upload the.zip file or you can also drag and drop the gerber files.
After uploading the zip file, you’ll see a success message at the bottom if the file is successfully uploaded.You can review the PCB in the Gerber viewer to make sure everything is good. You can view both top and bottom of the PCB.
After making sure our PCB looks good, we can now place the order at a reasonable price. You can order 5 PCBs for just $2 but if it’s your first order then you can get 10 PCBs for $2.
To place the order, click on “SAVE TO CART” button.
My PCBs took 2 days to get manufactured and arrived within a week using DHL delivery option. PCBs were well packed and the quality was really good.
*NOTE:- If you need pcb gor this project than contact me or write me in the comment.


