

Introduction: Upload Arduino Sketch to STM32F407 Board


I ordered this compact STM32F407 board on Ebay recently, here is one way to get it to work.
All you need is any cheap Serial USB adapter, the Arduino STM32 library from Roger Clark and the free flasher software from ST attached here.
Or you can download it from here (requires an email address) :
Attachments

Step 1: Install STM32 Libraries for Arduino
I downloaded the STM32 libraries for Arduino from Roger Clark's Github :
https://github.com/rogerclarkmelbourne/Arduino_STM...
Then unzip in the Arduino hardware folder.
Restart the Arduino software, select the correct hardware :
Generic STM32F407V series
Then write a simple sketch :
void setup() {
  pinMode(PC8, OUTPUT);
}

void loop() {
  digitalWrite(PC8,HIGH);
  delay(10);
  digitalWrite(PC8,LOW);
  delay(10);
}
Press on the "Verify" button (not the upload button). This will compile your sketch.
The binary file is now located in the Temp directory, you can see the path in the Arduino debug Window. (You might have to enable File->Preferences->Show verbose output)
The path is something like :
C:\Users\...\AppData\Local\Temp\arduino_build_146449\example.ino.ino.bin
Step 2: Wiring


I connected these pins from the Serial USB adapter to the board :
3.3V	3.3V (I guess connecting the 5V to 5V would work too)
GND	GND
RXD	PA9
TXD	PA10
Add a jumper on "BOOT 1" pins (last row)
Step 3: Uploading Sketch


Plug the USB adapter in the computer before starting the Demonstrator GUI.
Step 4: Testing

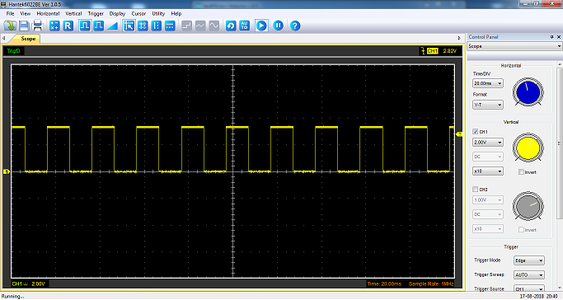
You now need to change the jumper's position to BOOT 0 and reset the board to run your sketch.
The reset button is the one near the micro USB plug.


