

Introduction: Voltmeter With Arduino
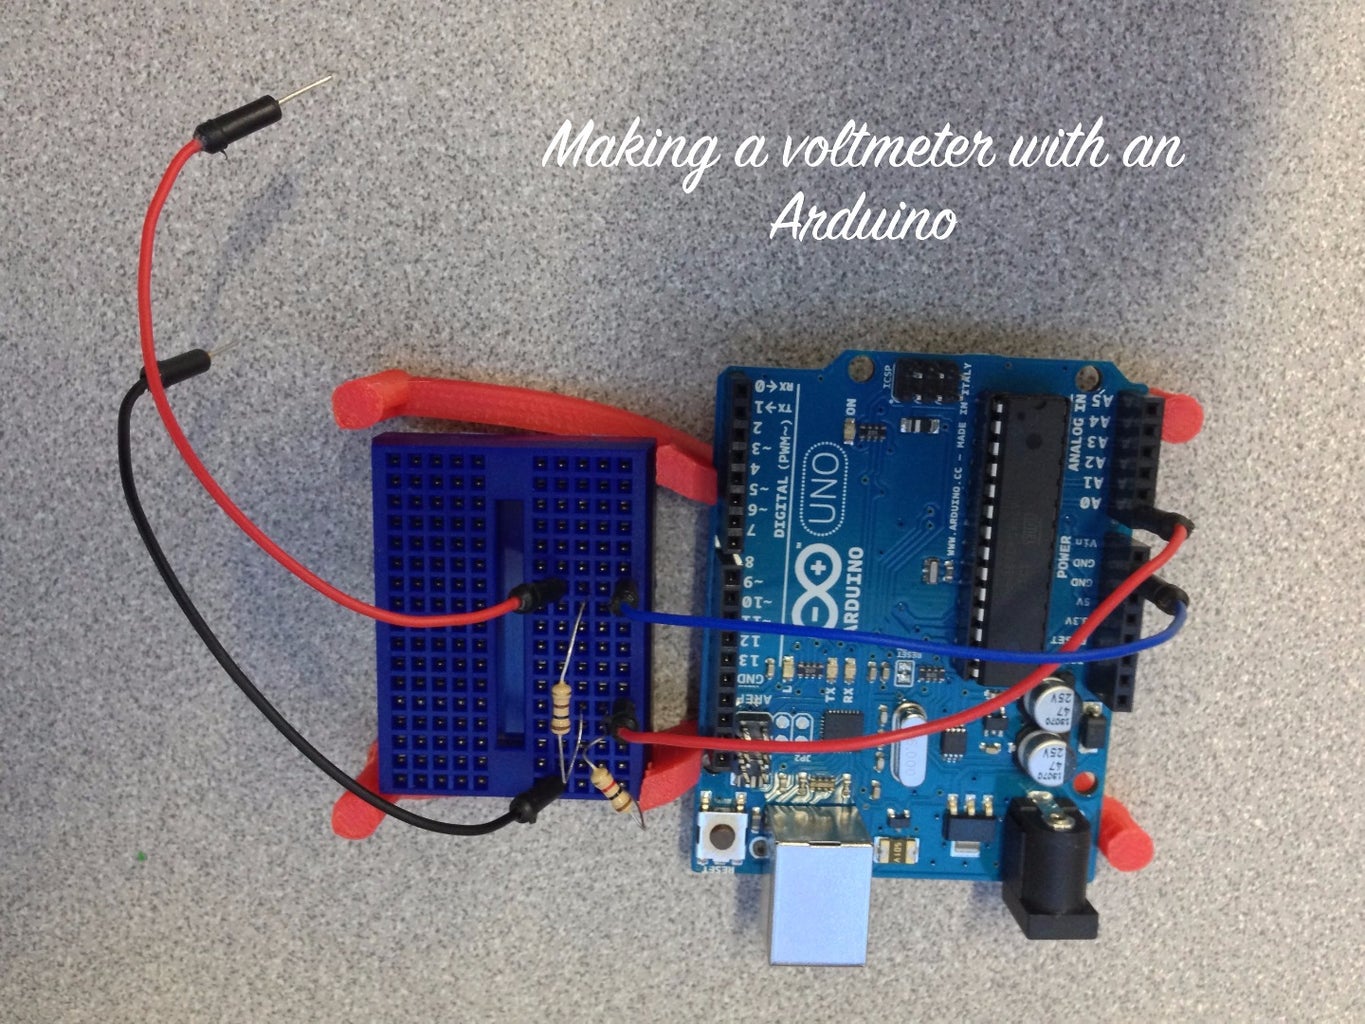
This tutorial shows how to make a voltmeter using an Arduino, breadboards, and resistors. The voltmeter is programmed in a way that the output is displayed on the computer. Users simply put the negative end of the battery on the black wire, and positive end of the battery on the red wire.
Originally, I planned on completing the project with a Raspberry Pi. I was going to connect the Raspberry Pi to my computer's MATLAB to do some computations and coding, however, the Raspberry Pi was unable to connect to my computer for some unknown reason. A teacher then suggested me to switch to an Arduino.
Step 1: Required Materials
1. Arduino Uno
3. Breadboard
4. Jumper wires
6. (Optional) 3D printed Arduino and breadboard holder**
*Can substitute with other resistor values. However, must change some values in step 3 (code).
**3D print source: http://www.thingiverse.com/thing:63900
Step 2: Build the Circuit

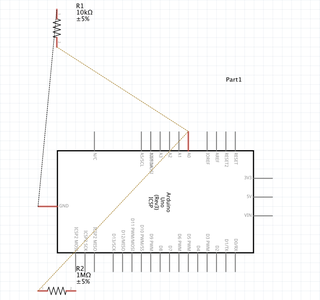

Follow the circuit diagram as above to wire the circuit. The two wires is for connecting to the circuit.
The resistor does not necessarily have to be the ones as described in step 1 (10k Ω and 1k Ω). Any value of resistors would work as long as the code in step 3 is changed properly.
Step 3: Coding the Arduino
//arduino voltmeter

/**
Copy the following code into the Arduino IDE. Compile and run it.
**/


 float vPow = 4.7;    //amount of power supple into arduino. Should be 5V, but through USB cable usually less than 5
 float r1 = 1000000;  //1000 kOhm resistor [change this if used a different resistor value]
 float r2 = 100000;   //10 kOhm resister [change this if used a different resistor value]<br>

 void setup() {
   Serial.begin(9600);    //speed = 9600

   // Send ANSI terminal codes
   Serial.print("\x1B");
   Serial.print("[2J");
   Serial.print("\x1B");
   Serial.println("[H");
   // End ANSI terminal codes

   Serial.println("--------------------");
   Serial.println("DC VOLTMETER");
   Serial.print("Maximum Voltage: ");
   Serial.print((int)(vPow / (r2 / (r1 + r2))));
   Serial.println("V");
   Serial.println("--------------------");
   Serial.println("");

   delay(2000);   //wait 2000 ms before starting
 }

 void loop() {
   float v = (analogRead(0) * vPow) / 1024.0;   //when reading analog values, divide by 1024
   float v2 = v / (r2 / (r1 + r2));

   // Send ANSI terminal codes
   Serial.print("\x1B");
   // End ANSI terminal codesr</p><p>   Serial.print("Voltage (Volts) = ");
   Serial.println(v2);


 }
Step 4: Completed
The project is now completed! Thank you so much for reading!
**This project was completed in my school's robotics class. For more projects, check out http://www.berbawy.com/makers/


