

Introduction: Wearable Gaming Glasses and Wireless Gaming Glove


In order to increase the realism and fun when players playing the game and create a fighting atmosphere, wearable gaming glasses and wireless gaming glove were made.
Step 1: Components


Wearable gaming glasses
- Circuit Playground Express
- USB wire
Wireless gaming glove
- Circuit Playground Express
- Li battery
- 5 channels RF transmitter and receiver bits
- Arduino bit
- 3M glove
- 3D printing box holding the battery
- Wire bit
Step 2: Wearable Gaming Glasses


- 3D print the glass.stl.
- Using 3M adhesive tape to attach the circuit playground express to the glass
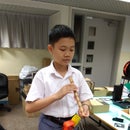
Step 3: Wearable 3D Gaming Glasses

Step 4: Principle - Accelerometers


....Accelerometers are electromechanical devices that are able of measuring static and/or dynamic forces of acceleration. Static forces include gravity, while dynamic forces can include vibrations and movement. Accelerometers can measure acceleration on 1, 2 or 3 axes..... (From http://www.kostasalexis.com/inertial-sensors.html)
.....There is a powerful MEMS accelerometer in the very center of your Circuit Playground. This part is the LIS3DH, a 3-axis (X, Y and Z) sensing accelerometer. Accelerometers are the sensors in your WiiMote, phone, and other electronic devices that can sense tilt, gravity, motion and 'tap' effects....... (From adafruit: https://learn.adafruit.com/circuit-playground-lesson-number-0/accelerometer)
Step 5: Assembly of Components


Assemble the 3D gaming glasses and then attach the circuit playground express by using 3M adhesive tape.
Step 6: Ardunio Coding - Glasses As Mouse

// We downloaded the accel_mouse.ino and loaded the program to circuit playground express. But, we needed to modify the coding for making wearable gaming glasses.
https://github.com/adafruit/Adafruit_CircuitPlaygr...
// Circuit Playground Accelerometer Mouse
Example
// Tilt Circuit Playground left/right and up/down to move your mouse, and
// press the left and right push buttons to click the mouse buttons! Make sure
// the slide switch is in the on (+) position to enable the mouse, or slide into
// the off (-) position to disable it. By default the sketch assumes you hold
// Circuit Playground with the USB cable coming out the top.
// Author: Tony DiCola
// License: MIT License (https://opensource.org/licenses/MIT)
#include
#include
#include
#include
// Configuration values to adjust the sensitivity and speed of the mouse.
// X axis (left/right) configuration:
#define XACCEL_MIN 0.1 // Minimum range of X axis acceleration, values below
// this won't move the mouse at all.
#define XACCEL_MAX 8.0 // Maximum range of X axis acceleration, values above
// this will move the mouse as fast as possible.
#define XMOUSE_RANGE 25.0 // Range of velocity for mouse movements. The higher
// this value the faster the mouse will move.
#define XMOUSE_SCALE 1 // Scaling value to apply to mouse movement, this is
// useful to set to -1 to flip the X axis movement.
// Y axis (up/down) configuration:
// Note that the meaning of these values is exactly the same as the X axis above,
// just applied to the Y axis and up/down mouse movement. You probably want to
// keep these values the same as for the X axis (which is the default, they just
// read the X axis values but you can override with custom values).
#define YACCEL_MIN XACCEL_MIN
#define YACCEL_MAX XACCEL_MAX
#define YMOUSE_RANGE XMOUSE_RANGE
#define YMOUSE_SCALE 1
// Set this true to flip the mouse X/Y axis with the board X/Y axis (what you want
// if holding with USB cable facing up).
#define FLIP_AXES true
// Floating point linear interpolation function that takes a value inside one
// range and maps it to a new value inside another range. This is used to transform
// each axis of acceleration to mouse velocity/speed. See this page for details
// on the equation: https://en.wikipedia.org/wiki/Linear_interpolatio...
float lerp(float x, float x0, float x1, float y0, float y1) {
// Check if the input value (x) is outside its desired range and clamp to
// those min/max y values.
if (x <= x0) {
return y0;
}
else if (x >= x1) {
return y1;
}
// Otherwise compute the value y based on x's position within its range and
// the desired y min & max.
return y0 + (y1-y0)*((x-x0)/(x1-x0));
}
void setup() {
// Initialize Circuit Playground library.
CircuitPlayground.begin();
// Initialize Arduino mouse library.
Mouse.begin();
}
void loop() {
// Check if the slide switch is enabled (on +) and if not then just exit out
// and run the loop again. This lets you turn on/off the mouse movement with
// the slide switch.
if (!CircuitPlayground.slideSwitch()) {
return;
}
// Grab initial left & right button states to later check if they are pressed
// or released. Do this early in the loop so other processing can take some
// time and the button state change can be detected.
boolean left_first = CircuitPlayground.leftButton();
boolean right_first = CircuitPlayground.rightButton();
// Grab x, y acceleration values (in m/s^2).
// Modification
// The original coding is changed from motionX and motionY to motionZ and motionY.
float x = CircuitPlayground.motionZ();
float y = CircuitPlayground.motionY();
// Use the magnitude of acceleration to interpolate the mouse velocity.
float x_mag = abs(x);
float x_mouse = lerp(x_mag, XACCEL_MIN, XACCEL_MAX, 0.0, XMOUSE_RANGE);
float y_mag = abs(y);
float y_mouse = lerp(y_mag, YACCEL_MIN, YACCEL_MAX, 0.0, YMOUSE_RANGE);
// Change the mouse direction based on the direction of the acceleration.
if (x < 0) {
x_mouse *= -1.0;
}
if (y < 0) {
y_mouse *= -1.0;
}
// Apply any global scaling to the axis (to flip it for example) and truncate
// to an integer value.
x_mouse = floor(x_mouse*XMOUSE_SCALE);
y_mouse = floor(y_mouse*YMOUSE_SCALE);
// Move mouse.
if (!FLIP_AXES) {
// Non-flipped axes, just map board X/Y to mouse X/Y.
Mouse.move((int)x_mouse, (int)y_mouse, 0);
}
else {
// Flipped axes, swap them around.
Mouse.move((int)y_mouse, (int)x_mouse, 0);
}
// Small delay to wait for button state changes and slow down processing a bit.
delay(10);
// Grab a second button state reading to check if the buttons were pressed or
// released.
boolean left_second = CircuitPlayground.leftButton();
boolean right_second = CircuitPlayground.rightButton();
// Check for left button pressed / released.
if (!left_first && left_second) {
// Low then high, button was pressed!
Mouse.press(MOUSE_LEFT);
}
else if (left_first && !left_second) {
// High then low, button was released!
Mouse.release(MOUSE_LEFT);
}
// Check for right button pressed / released.
if (!right_first && right_second) {
// Low then high, button was pressed!
Mouse.press(MOUSE_RIGHT);
}
else if (right_first && !right_second) {
// High then low, button was released!
Mouse.release(MOUSE_RIGHT);
}
}
Step 7: Video - Wearable Gaming Glasses

Wearable gaming glasses demonstration
Step 8: Repository
Step 9: Wearable Gaming Glove


Step 10: Making the Wearable Gaming Glove


Component:
- circuit playground express
- wire bit
- RF 5 channel transmitter bit
Connect A1 , GND and Vout of the circuit playground express to the 5 channel RF transmitter by using the wire bit which is cut into halves.
Step 11: Battery Connection


Connect Lithium Ion Polymer Battery - 3.7v 500mAh to the adafruit circuit playground express by using a genuine JST connector.
Lithium Ion Polymer Battery come pre-attached with a genuine 2-pin JST-PH connector as shown and include the necessary protection circuitry. Because Lithium Ion Polymer Battery has a genuine JST connector, not a knock-off, the cable won't snag or get stuck in a matching JST jack, they click in and out smoothly.
Step 12: Assembly

- 3D printing the box for holding the lithium Ion battery.Do not direct adhesive the lithium Ion battery to the circuit playground express and the glove. It is very dangerous since the broken lithium Ion battery is explosive.
- Adhesive the box to the glove.
- Adhesive the circuit playground express to the box.
Step 13: RF Transmitter Bit to Arduino Bit to RF Receiver Bit


- Power bit connect to 5 channel RF receiver bit
- 5 channel RF receiver bit connect to Arduino bit
- Arduino bit connect to 5 channel RF transmitter bit
Connect the USB power to both the power bit and the Arduino bit. Both of the ports should be connected to the 5V USB power. Otherwise, the circuit cannot function properly. The Arduino bit analyses the received RF signal from the wireless glove. If the received RF wireless signal is the "hot fire", the Arduino bit controls the scratch game that street fighter will release the hot fire. In addition, the Arduino bit gives the control signal to the vibration receiver by using RF 5 channel transmitter. The player can feel the vibration as the attack.
Step 14: Selecting Different Channels for the RF Communication

The wireless communication from the RF transmitter bit of wearable gaming glove to the RF receiver bit attached to Arduino bit should occupy one channel. In addition, the wireless communication from the RF transmitter bit attached to Arduino bit to the the RF receiver bit attached to vibration bit should occupy another channel. There are five channels which can be assigned. For example, channel a and channel b were selected in this project.
Step 15: Vibration Receiver


Vibration receiver = Power bit + 5 channel RF receiver bit + vibration bit + bargraph bit
The vibration receiver receives the signal from the Arduino bit that the vibration receiver can be installed in the jacket, trousers, glove or shoes. The player can feel that the attack from the enemies which means that the player will feel the vibration. In addition, the bargraph bit will be on.
Step 16: Install LITTLEBITS SCRATCH WITH ARDUINO
- Install ARDUINO arduino-1.8.5-windows
- Install JAVA jre-8u144-windows-x64
- COMPILE AND LOAD littleBits_Scratch2.ino into Arduino bit
- execute scratch2LittleBits
- In SCRATCH , import (SHIFT+ FILE) scratch2LittleBitsDEF.json
Step 17: Learning Material - Video and Menu (The Reference)
Step 18: Coding - Circuit Playground Express
// load and compile hot_fire_final.ino into circuit playground express.
// min_light, max_light and time_count varies because of the different environments.
uint8_t min_light = 30;
uint8_t max_light = 100;
uint8_t time_count= 1000; //2 seconds
// The circuit playground express detect the light intensity. If the finger cover the light sensor of the circuit playground express for 2 seconds and then release the finger, the circuit playground express will send the "hot fire signal" to the Arduino bit through the transmitter bit and receiver bit. In addition, when finger cover the light sensor of the circuit playground express, the 10 leds light up that it like storing the power into the attracting glove.
while ((CircuitPlayground.lightSensor() < min_light) && (count >= time_count)) {
delay(200);
count = count + 200; }
if ((CircuitPlayground.lightSensor() < min_light) && (count >= time_count)) {
Serial.println("It is greater than or equal to time_count");
// 10 Pixels leds light up
// Generate rainbow colour of the 10 leds
do {// light pixel
CircuitPlayground.setPixelColor(pixeln++, CircuitPlayground.colorWheel(25 * pixeln));
if (pixeln == 11) {
pixeln = 0;
CircuitPlayground.clearPixels(); }
Serial.println(CircuitPlayground.lightSensor(), DEC);
delay(100);
}while (CircuitPlayground.lightSensor() < min_light);
// All the white led light up and the pin 6 set to HIGH for 200ms and then LOW. Then, it will wait for about 2.2 seconds.
if ((count>=time_count)&&(CircuitPlayground.lightSensor() >=max_light)){
Serial.print("Fired!!!!!!!!!!!!!");
for (int i=0; i <= 255; i++){
CircuitPlayground.setPixelColor(pixeln++, CircuitPlayground.colorWheel(25 * pixeln));
if (pixeln == 11) {
pixeln = 0;
CircuitPlayground.clearPixels(); }
delay(10); }
digitalWrite(6, HIGH);
delay(200);
digitalWrite(6, LOW);
// turn the LED on (HIGH is the voltage level)
delay(1000);
for (int i=0; i<=10; i++){
CircuitPlayground.setPixelColor(i, 255, 255, 255); }
delay(1000); // wait for a second
// turn the LED off by making the voltage LOW
delay(1000); // wait for a second
// CircuitPlayground.clearPixels(); }
CircuitPlayground.clearPixels();
delay(200);
Step 19: Coding - Arduino Bit

- Link for downloading littleBits_Scratch2.ino.
- https://github.com/electronicadivertida/scratch2Li...
COMPILE AND LOAD littleBits_Scratch2.ino
Step 20: Coding - Scratch

Downloading scratch2LittleBits
- https://github.com/electronicadivertida/scratch2Li...
- scratch2LittleBits
- littleBits extension for Scratch 2.0 OFFLINE, thanks https://github.com/khanning/scratch-littlebits-ex... Connect littleBits to Scratch 2 Stand Alone.
- Executing scratch2LittleBits
Downloading scratch2LittleBitsDEF.json
- https://github.com/electronicadivertida/scratch2Mu...
- In SCRATCH ,import (SHIFT+ FILE) scratch2LittleBitsDEF.json
- Open the file street fighter V scratch program which can be downloaded in scratch MIT with glove
Step 21: Video - Playing the Game

Wireless gaming glove - hot fire demonstration.
The finger covers the light sensor of circuit playground express and then the finger releases. The rainbow light and then the white light will be on.
Wireless gaming glove controls the scratch game - Street fighter V.
Wireless gaming glove connecting the scratch game - another game.
Game competition

Participated in the
Wearables Contest


