

Introduction: Wooden Planters From Reclaimed Decking


When our deck was redone I ended up with excess old weathered redwood decking. I felt bad just letting it go and it just so happened that we needed planters on one side of the house. And so this project began
Step 1: The Plan

I had seen this pattern before so I cannot claim ownership. It is an attractive approach to what otherwise might be a boring planter. Keep in mind most 2 x 6 boards are actually 1.5 x 5.5. So in order to make the pattern work while stacking the boards is to subtract 3" from each alternate layer. I opted to go 4 boards high or 22". The other measurements can be amended to suit your taste.
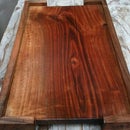
Step 2: Decking Material


I used weathered redwood decking, some newer planks as well as left over treated wood for the corners. I cut 12 of each of the following measurements: 10", 13", 16" and 19". The corner 2 by 4s were cut at 23". In retrospect I would have gone with 22" to make screwing the floor planks easier.
Step 3: Assembling the Planters


There is a logical way to do this and once you get the hang of it it flows very quickly. I used 1.5" galvanized outdoor screws. Layer as you like: small, large, small, large planks or, the reverse. The corners should be flush. Its ok if they are off a bit though. Voila, all 3 are done!
Step 4: Screwing the Bottom & Paint


As I mentioned before I wish I had kept the corner posts at exactly 22". This would have made the bottom boards a lot easier. I was able to find left over 1 x 6 boards which I cut at 12".
Once finished, I decided to paint them white. The future home of these planters is already flush with with redwood: the fencing and the wood chips. I decided to add a splash of color(s) and white it was. I used left over primer in this case. On the boards that were weathered I decided to leave some of the cracks and holes visible for dramatic nice effect.
Step 5: Adding Handles and Plastic Lining


You will have to move these at some point, so handles are in order. I had left over yellow rope. I cut 12 pieces each 2" long, and burned the ends to stop them from fraying. The yellow on white is a great contrast. Gives it a modern look. I drilled 1/2" holes, inserted and tied the ends.
Next came adding plastic lining. This will prolong the life of the planters. I used standard black garbage bags and stapled them. Next I pulled them out and cut holes for draining. We are nearly there.
Step 6: Planting and Placing


In this case I planted bamboo, you can plant whatever suits you, I recommend a plant that has some height and good color. Once planted, add some kind of mulch or rocks on top for a nicer finish and preventing evaporation. Hope you enjoyed this! Comments and questions are welcome.

Participated in the
Instructables Outdoor Projects Contest

Participated in the
Workshop Contest


