

Introduction: Using the Symmetry Tool in SketchBook Pro to Design Clothing


The symmetry tool is a really unique feature to SketchBook Pro! It cuts your drawing time in half, which allows you to create all sorts of neat designs fast!
I especially love drawing clothing with the symmetry tools. Here's how you might do that.
Step 1: Tool Overview

In SketchBook Pro we have two different lines of symmetry to use- X and Y.
They can be accessed from the top toolbar.
If the top toolbar is hidden, you can go to Window -> Toolbar to bring it up.
Y symmetry will mirror your strokes as you draw vertically. Click this button to activate it:
It's perfect for drawing clothing and faces!
The X symmetry will mirror your strokes horizontally. Click this button to activate it:
I might use this to create a neat reflection, like in water!
Step 2: Drawing Clothing!

With the symmetry Y turned on, I'll use the pencil tool to sketch out my clothing. It's easy because I only have to draw one side and SketchBook Pro takes care of the rest!
Step 3: Cleaning Up the Sketch

My sketch is cool, but I want nice lines.
I'll duplicate the sketch, and use a careful hand to add nice lines.
To duplicate a layer, you'll need to make sure the Layer Editor is open. You can access it by selecting Windows -> Layer Editor. It looks like this: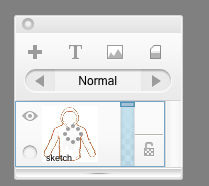
hover over the layer and click in the circle to bring up the pop-up menu.
Hold and drag over the option that says "Duplicate."
I'm using a black pencil brush and going around the edges of the artwork to make the lines are smooth and nice.
I'm constantly going back and forth- erasing and re-drawing to keep the lines clean.
This part of the process takes a long time for me, which is why the symmetry tool makes it faster!
Step 4: Nice and Smooth

Now that the lines are all done, I want to add some color.
I'll create a layer just for that and make sure it's under my line art. To create a new layer, press the "+" button at the top of the layer editor: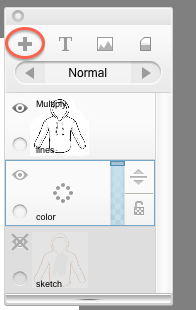
You can then use the arrow button to re-order the layer.
I'm going to put it underneath my lineart, so I can color underneath! 
Step 5: Color!


First I lay down a base color. I use a really big base brush and fill in my lines. (Don't forget to make sure you're on the color layer!)
I think I'm going to make this a cloud themed hoodie, so I'm picking a pretty blue color from the copic marker library as my base.
Then I use white to add clouds, and green to put some cute grass at the bottom.
Step 6: Final Details


Every good piece of clothing has a story, so here's mine: this hoodie hides THE STORM WITHIN. The outside is happy and bright, and the inside conceals your true nature.
So I add some extra shading & details, and put some text on the my hoodie to help describe it. This way, if someone wanted to make my hoodie real, they'd understand exactly what I wanted!
Things such as material type & quality are very important. Is something soft or shiny? Velvet or fleece? These choices could have a real impact on the final product, even if its the same basic design.


