

Introduction: Robot Minion - Plant Watering Robot


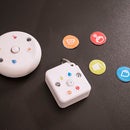

This is a Ardunio based robot that tells you with audible voice if your plant needs a water. You just turn it on, stick him in a dry pot and you should do as the robot tells you. First it will ask to pour water on plant. Then it will learn what is a good moisture for a plant and after that it will start to monitor your plant's moisture levels. But it will not waste energy by speaking when nobody is around, instead it will speak only if someone is going by it. It detects if someone is in a near proximity by it's infrared motion sensing eye. Finally it uses rechargeable battery that you can charge via micro usb cable. It will also tell you when it needs to be charged and when it has full battery. Whole robot is encased in custom 3D printed shell that is painted to resemble a minion.
Watch video above to see robot in action.
Step 1: Acquire Necessary Components


First you should order parts for your robot:
- 3V Atmega168 or 5V ATMEGA328P micro-controller with at least 4 Analog and 3 Digital GPIOs. Also original Ardunio Nano and Ardunio Micro can be used but they will be more expensive.
- Ardunio Mini Pro 5V - http://www.dx.com/p/pro-mini-atmega328p-5v-16mhz-d...
- Ardunio Mini Pro 3V - http://www.dx.com/p/pro-mini-atmega168-module-3-3v...
- 3.5 USD
- FTDI Basic Program Downloader USB to TTL FT232RL for Arduino
- Need only a single chip in order to program unlimited number of Arduino modules
- 4.5 USD - http://www.dx.com/p/ftdi-basic-program-downloader-...
- YL-38 / YL-69 moisture sensor
- 2.3 USD - http://www.dx.com/p/soil-hygrometer-humidity-detec...
- I would recommend better capacitve part that would be more resistant to corrosion
- PIR - HC-SR501 IR Motion sensor
- WTV020-SD AD4 audio player
- 5.5 USD - http://www.dx.com/p/wtv020-sd-micro-sd-card-mp3-ga...
- Micro SD card - very small will work.
- Any 3V low power speaker (preferably 4cm or smaller diameter in order to fit in 3D printed casing)
- TP4056 3.7V Lithium Battery Micro + Mini USB Charger Module
- 2 USD - http://www.dx.com/p/tp4056-3-7v-lithium-battery-ch...
- Or more fancy version on SparkFun - 8 USD - https://www.sparkfun.com/products/10401
- Prototyping PCB
- Power Switch + Wires
- Some tiny screws for holding it together (visit to home depot)
- Any 3.7 Li-ion battery (the larger the longer it will work without recharging)
All of these components can be found on SparkFun or AdaFruit, but since I live in a peripheral city of the Empire (in far eastern Europe), I tend to use cheaper suppliers that do not charge as much as gadgets for shipping.
In total components cost between 25-35 USD if you buy each component at minimal amount without discounts. 3D printed casing is also not included in price, but you will see that there are alternatives what to use instead of 3D printed casing.
For batteries you also have options. You could build it cheaper if you do not add charger unit etc. See options in next step.
Next acquire all datasheets:
- WTV020-SD
- http://letsmakerobots.com/files/WTV020_manual_V1.3...
- Extremely useful resource (download software to create AD4 files):
- ATMEGA328P
- YL-38 / YL-69 moisture sensor
- PIR - HC-SR501 IR Motion sensor
- Li-On charger
Step 2: Put Together Hardware


Connect all components as shown in Fritzing Scheme and pictures. You can use either 3 x AAA batteries or rechargeable battery as listed in previous step.
Here's layout of components as a list:
- WTV020-SD (rember to read this http://www.buildcircuit.com/how-to-use-wtv020sd-mu...)
- 4 (+), 5 (-) -> Speaker
- 16 -> VCC
- 8 -> GND
- 10 -> A2 Ardunio (digital com cable)
- 1 -> A0 Ardunio (reset)
- 7 -> A1 Arduion (clk)
- PIR - HC-SR501
- D Output -> D10 Arduino
- You can calibrate sensitivity using potentiometers as shown in image of module
- YL-38 moisture sensor
- A0 -> A3 Ardunio
- Desolder power LED
- LIPO charger MCP73831T
- Desolder Charging LED
- Custom soldering point at charging LED (as shown in photo) -> A6 Arduino
- Arduino
- Desolder power LED
- Just to remember D13 is a onboard LED - very useful for debugging
- Add header pins in order to connect FTDI programmer to USB
- I highly advice to use Linux (even via VMware with USB forwarding) to program chip from Arduino IDE, because Windows especially many times do not work correctly
If you follow carefully steps to create AD4 audio files and they do not work on WTV020-SD then you should solder special line into a chip as shown in image from SD card min 6 to GND. Do this only if it does not work and you are sure everything is OK with files (use files from GitHub for testing), because most likely something else could not be working.
Yo can also modify code in GitHub just to make some tests in order to see if everything is working. Remember to include in Ardunio IDE Wtv020sd16p.zip library.
Attachments

Step 3: Upload a Software


All source code and other digital materials are available on GitHub:
https://github.com/evaldsurtans/robot_minion
If you use FTDI/FT232RL programmer adapter to USB I recommend using Linux/Ubuntu (even running on VBox/VMWare player with USB forwarding) for Arduino IDE, because especially on Windows 10 FT232RL drivers might do not work correctly.
In code there is a commented compiler comment #define DEBUG. If you uncomment it then you can see working of code via serial monitor over USB. (Serial monitor is built-in Arduino IDE)
In order to save battery I used sleep mode and WDT interrupt. (see function enterSleep())
Good materials about sleep modes and interrupts you can find here:
http://donalmorrissey.blogspot.com/2010/04/sleepin...
http://tae09.blogspot.com/2012/10/arduino-low-powe...
In order to check battery level I used internal CPU voltage at 1.1V (you can scale it yourself if you have 3.3V or 5V Mega Microcontroller). See function readVcc().
In order to debug battery very useful might be Arduino built-in D13 LED (see commented part in code)
In order to control audio playback module WTV020 I used library Wtv020sd16p.zip (make sure you install it in Arduino IDE from ./arduino_libraries).
Audio files were processed with Open Source Audio editing software Audacity.
Filters to create minion sounding voice are below:
Effect > Change pitch +50%
Effect > Low Pass Filter, 6-24dB, 1000-1200Hz
Effect > Amplify > OK
Optionally:
Effect > Leveler > Heaviest, -70dB > OK
Effect > Leveler> Heaviest, -70dB > OK
Make sure that in Audacity project settings are for 12000hz, 16bit and mono channel is used.
Then you can use AD4Converter or USBRecordingNbk1.3.0 from ./sounds_tools (GitHub)
Format SD card to FAT16/32 format. Nothing else should be on SD card except 0000.ad4, 0001.ad4... files (./sounds_source)
Make sure you read this as well: http://www.buildcircuit.com/how-to-convert-mp3-and...
Step 4: Make a Casing


First you have at least 2 options that I can offer how to make a shell for a robot minion.
1. You can use soda can, cut top off, cut hole for eye, paint it with water resistant paint and place inside robot's guts inside like shown in a video. It will cost you almost nothing. I am sure you can think other ways as well to create some sort of shell to resemble a minion.
2. You can do fancy 3D printed shell. Either print it on your 3D printed like I did it on Zortrax M200, I also use MassPortal 3D printers. It is printed using Lego plastic a.k.a. Z-ABS. Or you can order it through http://www.shapeways.com, but I would not recommend to order model that you have not tested before. If you exact same configuration as mine robot, you can order it using STL file from GitHub https://github.com/evaldsurtans/robot_minion
I also have Blender 3D model inside source. If you are more familiar with other 3D CAD software you can export to it and then modify it.
If you are using Blender here are some important tips:
- Set blender to metric units (easier to measure parts)
- When exporting STL export it to 1000 scale
After you are finished definitely either FIX your STL file with:
- 3D builder https://www.microsoft.com/en-us/store/p/3d-builder...
- Or cloud 3D builder https://tools3d.azurewebsites.net/
This step is necessary to process normals of polygons in a way that your model gets filled walls instead of hollow ones. Blender in most cases when model is sculpted with details will not produce such models when exported to STL.
Next you can import it into 3D printing software, simulate printing process and make sure that it will print it as you wish.
Finally when you have 3D printed model be very patient when scraping of support structures! I broke my shell in couple of places because I was not patient enough when getting it out of temporary plastic structures.
Then when you have a shell ready I would advice to grind it carefully or rub rough parts with Acetone that dissolves Z-ABS material. Do not use it too much.
After that you should spray paint your shell with some primer that holds to plastic / lego.
Next you should paint it with water resistant paints. I did it with spray paints and painter's tape, but I definitely do not recommend it! I would advise to paint details with small brush, because with spraying always paint gets behind a tape and it will give you headaches.
At the end I advise to put spray good lacquer over it in order to make it look good for long time while you will be using it for your plant in a moist environment.
Step 5: Put All Together


Finally when you have tested guts and finished shell put all components in to right places and secure them with hot glue! It will hold very strong on Z-ABS plastic.
I definitely advise also advise to put much hot glue on custom charger signal cable, because most likely it will not hold strongly with a solder to charger PCB where SMD LED were placed before.
At the end you screw both pieces together with appropriate size small screws. I used 4 tiny salvaged screws at about 1.5mm diameter x 4mm length and 2 small bolts 2mm x 6mm for bottom part.
If you modify 3D model I advise to use some sort of design with bots, because if you will have to disassemble it many times for debugging 4 screw points will wear out.
Step 6: Robotize Plant


Now you can choose your plant, turn on robot and stick robot in a dry soil. Then listen what robot tells you to do. Depending on battery size and type it might take couple of weeks before it asks you to charge him again. (I will update exact power consumption measurements later).

Participated in the
Maker Olympics Contest 2016


