

Introduction: Build a Farmhouse Table


A farmhouse table has a wonderful aura of warmth and history. After completing my window seat, I decided to build one. A table is a relatively simple project and here's how I built mine.
If you are interested in building a window seat, you can read about it here >> https://www.instructables.com/id/Build-a-Window-Seat-with-Storage/
Step 1: Making the Table Legs


In my design, I considered 3 different types of legs made from 30" long cedar 4x4s. (You could use other types of wood including gluing three 2x4s together to make solid legs.) The simplest design was to cut the legs to length and use the 4x4s square. Second was to taper the two inside surfaces and third was to taper all four surfaces. I ended up tapering all 4 sides on my bandsaw. The cut line begins 4" from the top and removes 1/2" at the bottom. Pic 2 shows how little I removed. I wanted the legs to have "shape" while remaining stout in appearance and this slight taper seemed about right. Pic 2 also shows the levelers in the bottom of these legs which were salvaged from a previous project. I decided to leave the levelers and shortened the legs a bit.
My table saw cannot cut a leg this thick without making 2 passes so I tapered them on my bandsaw. The bandsaw leaves a rougher finish and that looked even better on this rustic table. I made a quick and dirty jig to cut the legs which you can see in pic 3. The jig has a runner which slides in the miter track of the bandsaw table. Two hold downs were sufficient to secure the leg to the jig. I anchored an L-shaped block & a long block for positioning the leg on the jig. Once you've cut away 2 sides, the long block is no longer accurate and it becomes necessary to line up your mark on the bottom of the leg with the edge of the jig before clamping.
Because these legs were salvaged they had old screw holes in them which were filled prior to painting. In retrospect, it probably would have looked cool to just leave them. I lightly sanded the legs with 100 & 150 grit sandpaper which smoothed them without removing all the saw marks. One coat of chalk paint and 2 coats of clear Briwax was used to finish the legs. Briwax yellows the finish a bit which aged the paint nicely. Between coats of Briwax I sanded through the paint on some of the edges with 100 grit paper to show wear.
Step 2: Making the Table Aprons


Table aprons are the boards that make up the sides of the table base and connect the legs. They are also called table skirts. Dimensions are 3 1/2" wide and 22 1/4" long across the ends and 62" long down the sides. For a 34x72 inch table and 4x4 legs, these apron lengths inset the legs roughly 2" on all sides. The wood is 3/4" to 1" thick rough-cut wood from our old barn. The red color was a little stark so I sparsely brushed a coat of chalk paint on and waxed again with Briwax.
I decided I would attach the table top using metal clips (pic 3) and cut a kerf for the clips in the back of the aprons. Clips let the tabletop expand and contract which prevents splitting and warping. The kerf cut is roughly 1/4" deep.
Step 3: Assemble the Table Base


To inset the aprons 3/4" from the outer surface of the legs I made a spacer from 2 pieces of plywood. This little jig made it easy to keep the distances uniform and also secure the apron to the leg while fastening. Pic 3 illustrates how the jig, apron and leg are clamped together for fastening. Each apron end is held by three 2 1/2" pocket screws. The pocket holes were made using a Kreg pocket hole jig. I assembled the short ends first and then the rest of the table base making sure the kerf (for clips) was along the top edge. Since this is a long table I also added a cross piece in the middle of the table using pocket screws.
Step 4: Make Your Table Top


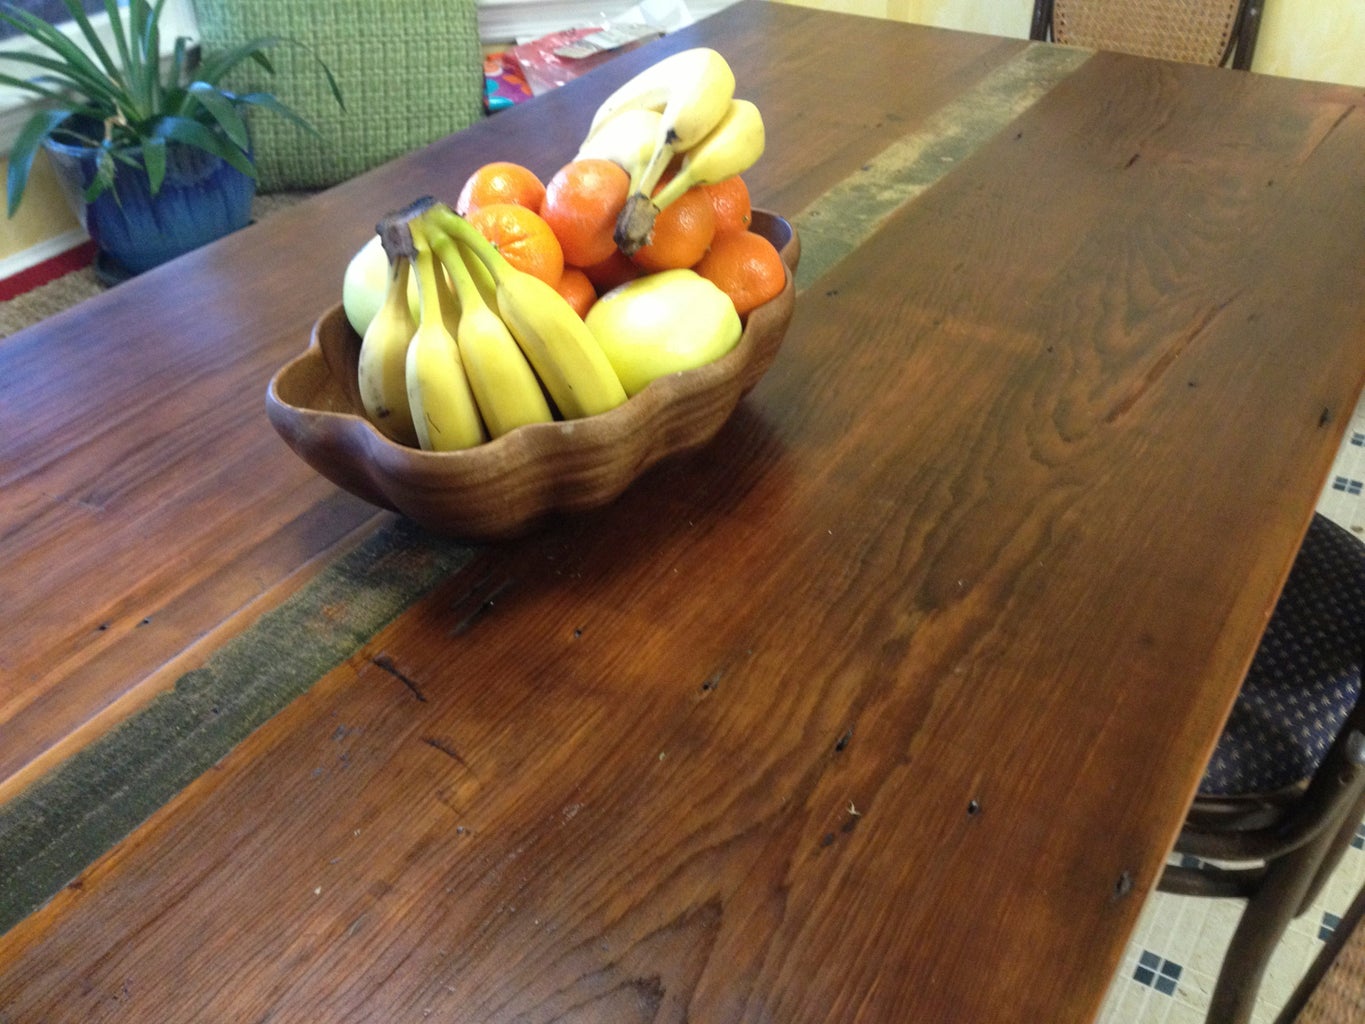
This table is a little narrower than I would have liked for it's length (34x72), but it's perfectly sized for the space we are using it in. At 72" long, I would have preferred something closer to 40" wide but this works for us. The top is made from 16" wide soffet boards from a house I helped tear down when I was 10 yrs old (no, it wasn't the house we were living in). The old boards have been in the barn for 40 years and needed to be used. The center painted board is also from the same house.
WARNING: Take appropriate precautions when cutting and sanding old wood with paint on it. Old paint may contain lead. Make sure you do not inhale dust while you are working with painted wood and wash your hands frequently. If you have children who might chew on the wood, it would be best not to use it.
Per usual, I used pocket screws to fasten the table top together after applying glue to the edges. Pic 3 shows the underside of the table. A straight edge clamp and a circular saw were used to trim the ends of the top. The blue masking tape helps limit splintering from the saw. To see if the table was square, I compared the diagonal measurements across the table top. Diagonal measurements on a square or rectangle should be equal if the piece is square on all corners. It's not very critical on a rustic, distressed table since the table's charm comes from it's imperfections.
There was one crack which required stabilization to prevent further splitting. On an old piece of wood there is nothing more beautiful than a contrasting butterfly inlay to lock the pieces together. Alternatively you could glue and clamp the split, however it is hard to get enough glue into the crack and an inlay looks much better. I used a piece of bloodwood and an inlay jig on my router for the butterfly. This was the first time I've tried inlay and it was very easy. While the butterfly is beautiful & interesting, it acts functionally as 2 opposing wedges to prevent the crack from widening. The last pic shows the finished product.
Step 5: Finishing the Table.


Since this 130 year old wood is painted on one surface I wanted to make sure it was sealed on all sides. This old paint most likely contains lead. It is always a good idea to seal both surfaces of a table top anyway to minimize warping from different rates of expansion and contraction. Prior to sealing the top, it was sanded with 100, 150 and 220 grit sandpaper. Two coats of Bullseye sealing shellac were applied to the top and bottom of the table top. Two coats of Bullseye amber shellac and one coat of Bullseye clear shellac was applied to the table top after sealing. Two coats of clear Briwax was rubbed into the top and buffed out for the final shine.
I hope this instructable has given you some ideas for making your own farmhouse table! I look forward to your comments and suggestions for improving. Thanks!

Participated in the
Furniture Contest


