

Introduction: Solar Class: Solar Panels


Class table of contents:
- Solar Balloon
- Solar Engraving
- Solar Panels (you are here)
- Solar USB Charger
- Solar Powering Microcontrollers
Are you ready to generate electricity with solar energy? Let's do it! Discover how solar panels work and how they are used in practical applications.
Step 1: Photovoltaic Cells
A solar panel is made from an array of photovoltaic cells, which generate an electrical current when exposed to light. Photovoltaic cells are made from two types of silicon semiconductor stacked together in wide flat layers sandwiched by a solid conductor on back and thin gridded connectors on the front (so light can directly contact the silicon).
The photovoltaic effect was discovered in 1839 by French scientist Edmond Becquerel, and by the 1880s, the first solar cell. The material used was selenium, which had been recently discovered to have photoconductive properties, which means it becomes electrically conductive when exposed to light.
Another 1880s observation catapulted solar technology forward: the photoelectric effect. Light hits a surface of a material and the photons knock the electrons out of place, freeing them to flow through a conductor. But it wasn't until the 1950s that more-efficient silicon was used in commercial solar cells, and it remained so prohibitively expensive that its applications were limited mainly to satellites.

Research steadily improved solar power's efficiency and reduced cost. Modern solar panels are made from crystalline silicon with two types:
- n-type silicon has an excess of electrons
- p-type silicon has a deficiency of electrons
Photons hit the layer cake and electrons are knocked out of their spot at the n-p junction. They are then free to move through the top conductors and into a circuit.

You can perform a fun experiment to demonstrate this effect with a few LEDs, a solderless breadboard, and a multimeter. LEDs are diodes, which are also made of two types of silicon layered together to allow electron flow in one direction. They behave similarly to photovoltaic cells (but much less effective at generating power), and we can measure the electricity they generate. Learn more about diodes in Randy's Instructables Electronics Class.

Wire up a handful of LEDs (6-8) in parallel on a solderless breadboard.

Attach the probes of your multimeter to the positive and negative terminals and measure the voltage. Alligator clips can be handy here to free up your hands. Shine a bright light on the LEDs and watch the voltage increase!

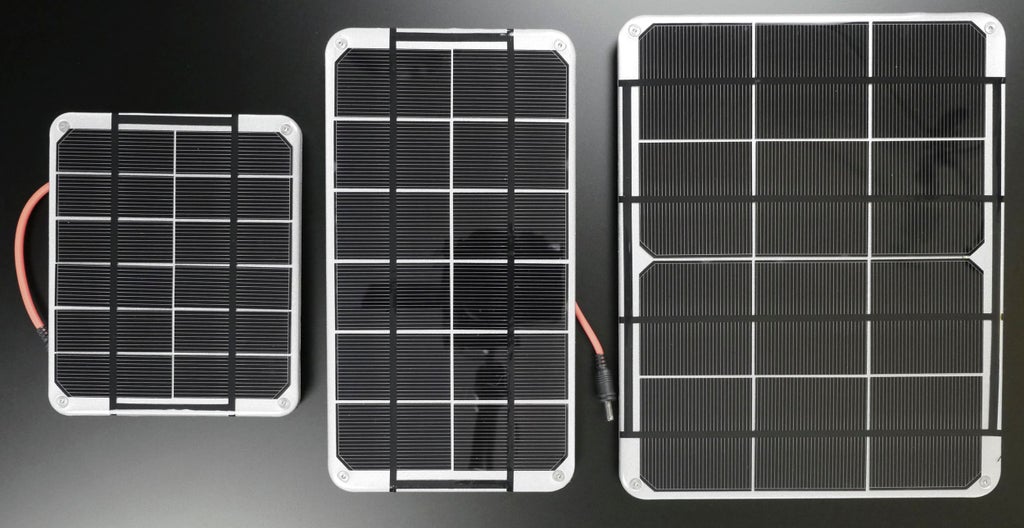
Solar panels are available in a variety of different voltages, depending on how many photovoltaic cells it contains. The more cells, the higher the voltage. The larger each cell is, the more current it can generate. Projects in this class use the rugged 6V solar panels made by Voltaic, available in 2W, 3.5W, 6W, or 9W. The formula for Watts is Volts times Amps, so the 2W panel can generate 2W/6V = ~333mA of current at it's maximum (when it's the sunniest).
But the solar panel's output is far from consistent. Shade from a tree or building, clouds, where you live, time of day, and the current season are a few factors that will affect the performance of your solar panel. To make the best use of this fluctuating power source, solar panels are almost always used to charge a battery rather than power devices directly.
Step 2: Batteries & Charge Controllers
Depending on the scale of your solar goals, various different types of equipment are required to make use of the power from solar panels. For small DC electronics, a small charge controller circuit and lipoly battery is all you need to get started.

To pick a battery and panel size, you can determine the rough power consumption of your device by adding together its components' current usage. For example, the PowerBoost in the upcoming Solar USB Charger Lesson will draw as much current as your USB device wants, typically 1000mA. If I choose a 2200mAh battery, I can charge my device for 2200/1000 = 2 hours total, or at least complete 2-4 device charges, or a week's worth of 15 minute end-of-day sips.
Under optimal sunlight conditions, a 2W solar panel (2W / 6V = 330mA) can charge a 2200mAh battery in about seven hours (2200/330). A 3.5W panel can charge the battery in 4 hours (2200mAh / (3.5W / 6V)). But in reality, the charge rate will be slower due to changing conditions as you move your solar panel around, or as clouds roll by.

For large projects like powering an off-grid home or adding solar power to your vehicle, you'll need a few more components to get up and running, such as a charge controller, mounting hardware and cabling, battery inverter, and deep cycle battery or several. Here are a few vendors selling panels and kits for off-grid solar:
For any large scale solar panel installation, including on-grid solar systems, you should be sure to consult the applicable professionals in order to properly install solar panels and their requisite electrical wiring. If you don't know what you're doing, find someone who does to help! Don't take this lesson as an endorsement of any dangerous activities outside your skill level. Rechargeable batteries require their own safety precautions— you should take care not to leave your project unattended or expose your battery to extreme temperatures or physical abuse.
Step 3: Solar Panel Wire Extension


You may wish to extend or change the connector on your solar panel's wire. Here's an effective way to cleanly splice the cable to install a different connector and/or extension. make sure you're using wire that is the appropriate thickness/gauge for the maximum current of your solar panel.

Apply a large piece of heatshrink tubing over the slack of the wire. Strip and tin the inner wires, and apply smaller bits of heat shrink to one side.

For the cleanest end result, cut the wires asymmetrically as shown. Solder the inner wires, matching red to red and black to black (or white to black as in my case), then heat up the heatshrink tubing to insulate the solder joints.

Repeat to insulate the entire junction with the larger piece of heatshrink tubing, and you can hardly tell there was any wire surgery!

Class table of contents:


