Introduction: 100% 3D Printable Belt
Into 3D printing? On a budget? Like belts? well, this 100% 3D printable bet may just be what you're looking for, and besides being 100% 3D printable, this belt also offers a few features that you don't get with traditional belts.
super special features include:
One time adjustability. Choose the size of your belt and never have to adjust it again (but if you need to you still can).
Cheap. Being 3D printable this belt costs next to nothing to print.
Wow factor. With this 100% 3D printable belt all your friends will be like "Whoa dude" "WOW how did you get that bro" and will be on their knees begging you for one just like it.
Customizable. You can use a HUGE variety of colors and make cool patters since it is 3D printable.
No extra tools. This belt is 100% 3D printable so no there's need to run to the store and buy parts.
Designed in fusion 360 so you know it is of the finest quality.
And yes, it is comfortable. Don't believe me? try it out yourself by following my instructible.
I'd love to win this contest and be able to get myself a new 3d printer or other manufacturing tools I can use to bring my designs to life.
Supplies
100% 3D Printable but tools can help with assembly.
you will want:
a soldering iron (optional)
pliers (optional)
drill (optional)
snips (optional)
a 3d printer
Step 1: 3D Print
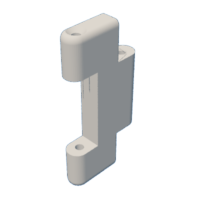
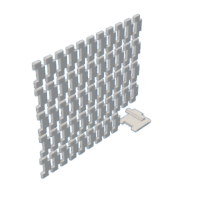
3D print the files above. you can print all the pieces in one go on an ender 3 sized 3d printer with the file beltv4 or print the pieces individually with the other files available. make sure your printer is calibrated because it will have to print small holes. I do not recommend using a brim when printing as I found out they are a pain to remove. I also recommend printing two of the link files as a test to see if you need to scale it up slightly to allow for the pieces of filament that go through them.
Step 2: Prepare for Assembly
if your printer is calibrated well enough you can skip this step. if it is not and you didn't scale your print to fit then you can use a small drill bit and widen the hole in the links to allow for the piece of 3D filament which you will use to secure them together.
Step 3: Assembly Pt1
put two links together like so.
Step 4: Assembly Pt2
cut a piece of filament that you will use to connect the two links.
Step 5: Assembly Pt3
Insert the filament into the hole to connect the links. Repeat until you reach about 2 links smaller than your waist length.
Step 6: Assembly Pt4
Do the same with the two clip pieces as you did with the links. To get the clip to slide nicely you may need to file it down a bit.
Step 7: Final Assembly
Use a soldering iron to melt the ends of the filament making it flat with the links (this also helps lock the links in). I used blue filament so you can see what I'm doing but it looks better with the same color filament.
Step 8: Youre Done
Congratulations!!! You did it a 100% 3d printable belt. Now you can go live your dreams and never have to worry about getting a belt again.

Participated in the
Wear It Contest


