

Introduction: 3D Pinhole Camera


This is a project on how to make a pinhole camera which can take a 3D photo. The 3D effect is achieved by taking 2 photos which are slightly apart. After developing the photos, the images are looked at close up with a card separating them. Your brain then somehow merges them into a single 3D image.
Supplies
Empty beverage cans
Black spray paint
Direct Positive Photographic paper
Photo Developing solution
Card to separate the two photos
Step 1: Remove Top and Bottom of Can


Use a file to remove the top and bottom of the aluminium beverage can. This doesn't take as long as you may think.
Step 2: Make a Lid


Make a lid by cutting the bottom off another aluminium beverage can of the same diameter. Cut about 25 millimeters up from the bottom and smooth the edge by trimming with a pair of scissors.
Step 3: Center Piece


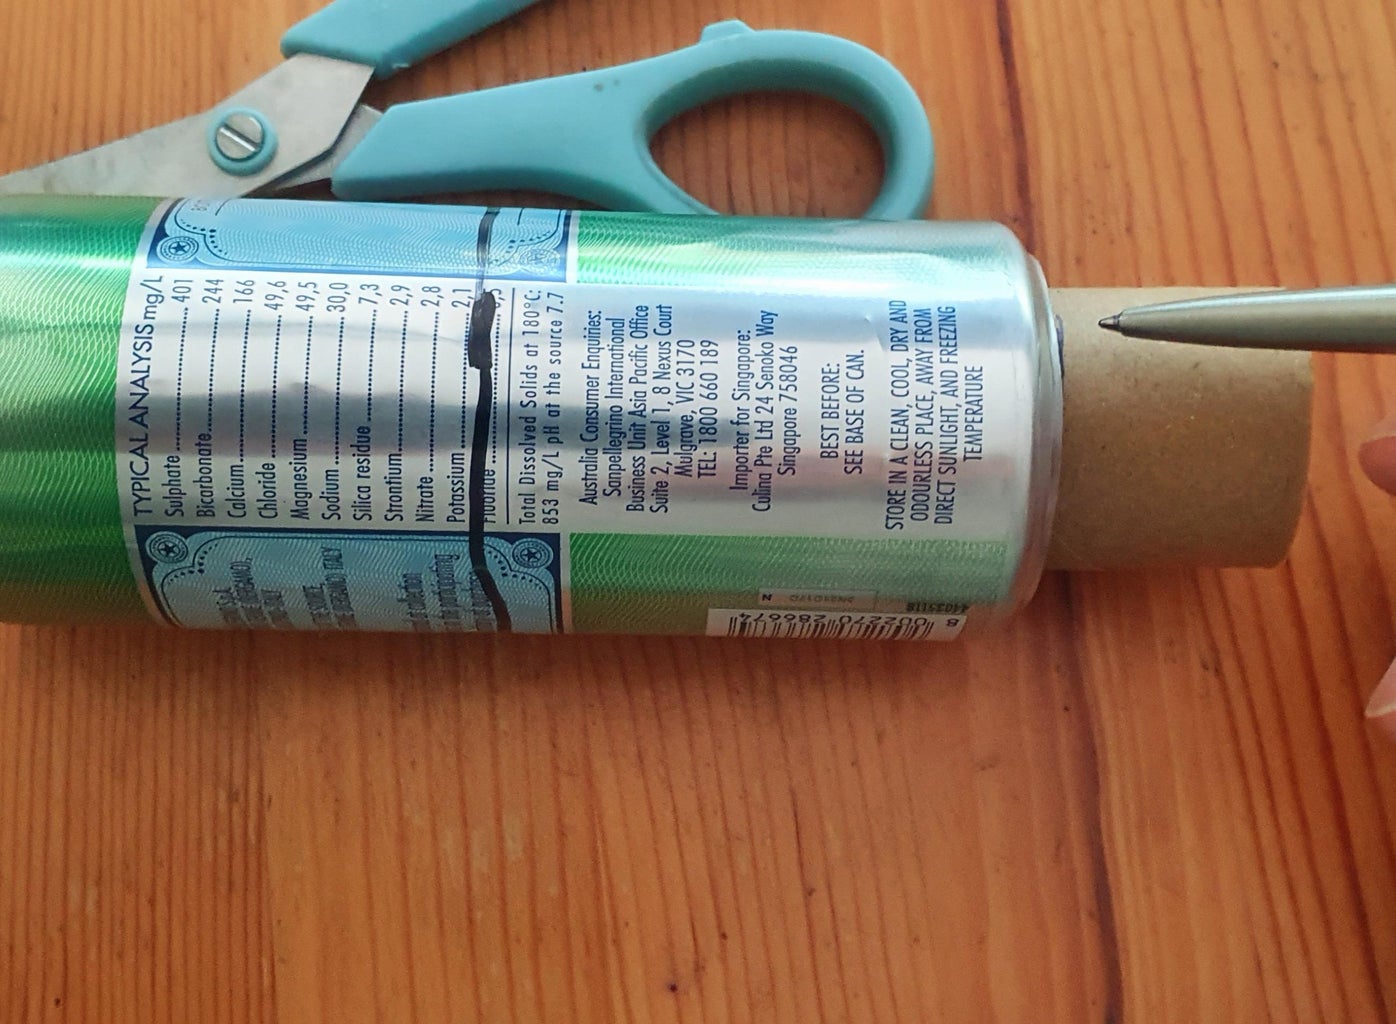


A middle divider is made by cutting a disk out of a suitable material. I used a piece of plastic but aluminium sheet from a beverage can could also be used. Fit into the can, halfway, and attach with some black tape. This will divide the can into two and allow two separate photos to be taken of the same image and hence creating a stereographic image.
With some 240-grit sandpaper, sand where the two pinholes will be made in the can. This will make the metal thinner and help to create a better pinhole.
Step 4: Pinhole


Make a pinhole into the can where you have earlier sanded. If you only put the tip of the pin through the can, the hole will be smaller, and this will create sharper imager then a larger diameter hole. If you put the whole bin through the can the resulting image maybe a little soft around the edges and will have a shorter exposure time than a very small hole. Lightly sand the other side of the pinhole to make it smooth.
Step 5: Paint It Black

Spray paint the inside of the 'camera" mat black. You may like to make several pinhole cameras at the same time so you can take more photos.
Step 6: Shutter


A shutter is made with a double layer of black insulation tape and then placed over the pinhole.
Step 7: Photography
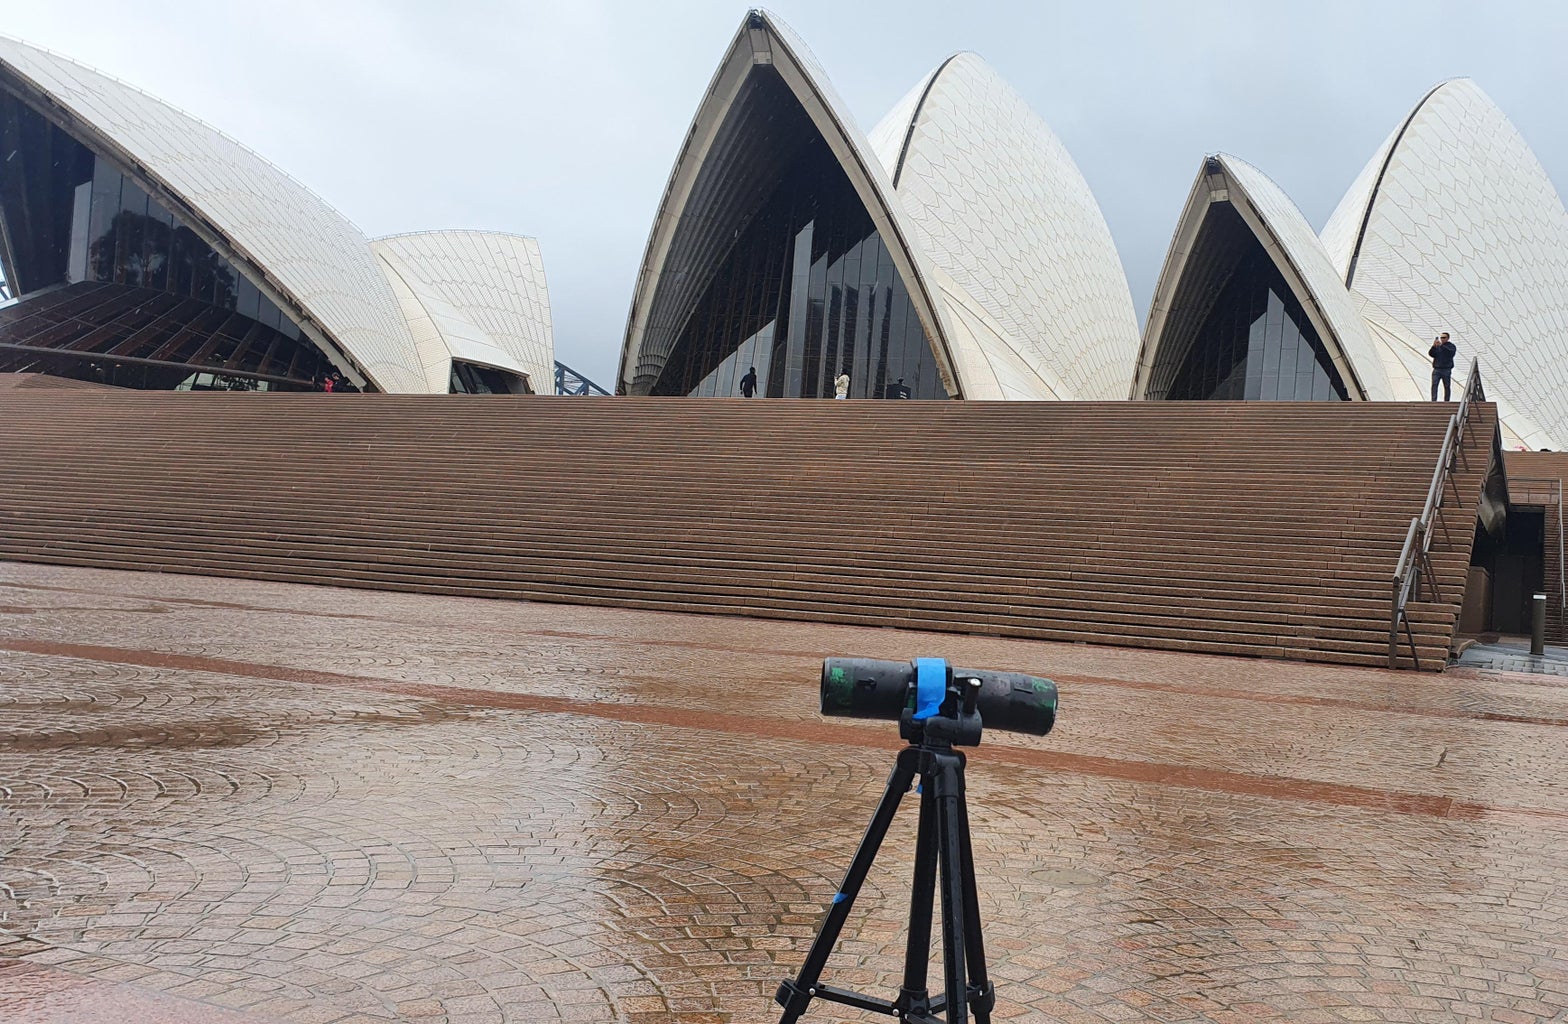


Load a couple of pieces on photographic paper while in a dark room. I have been using Ilford Harman Direct Positive paper and cutting a 4x5in sheet into quarters. This way the photo is viewable after developing without converting the negative image into a positive one. Cutting the photographic paper sheets into quarters allow more photos to be taken and I have found this size fits well in a small soda can (200 - 250 mL).
Place the 3D camera on a tripod and remove the shutter tape covering both pinholes. After taking the photo replace the tape over the holes.
To gauge exposure times, I use a phone app called 'Light Meter - Lite'. I have found the following setting on the app will give a good approximation on how long to take the photo for: Sensor Meter with setting: f/256 and iso 125.
Typical exposure time on a brightest day: 30 seconds. While late afternoon 2 minutes.
Step 8: Develop


Develop, Stop and Fix the photos in a darkroom (I use my bathroom as it has no windows and have placed black card around the door to stop stray light coming in)
As the photos are small, I tend to develop a few photos at once to save time.
Once dry, align a photo pair to create a 3D image and place a frame made from paper around them.
Here's some other links about pinhole photography:
Step 9: Gallary


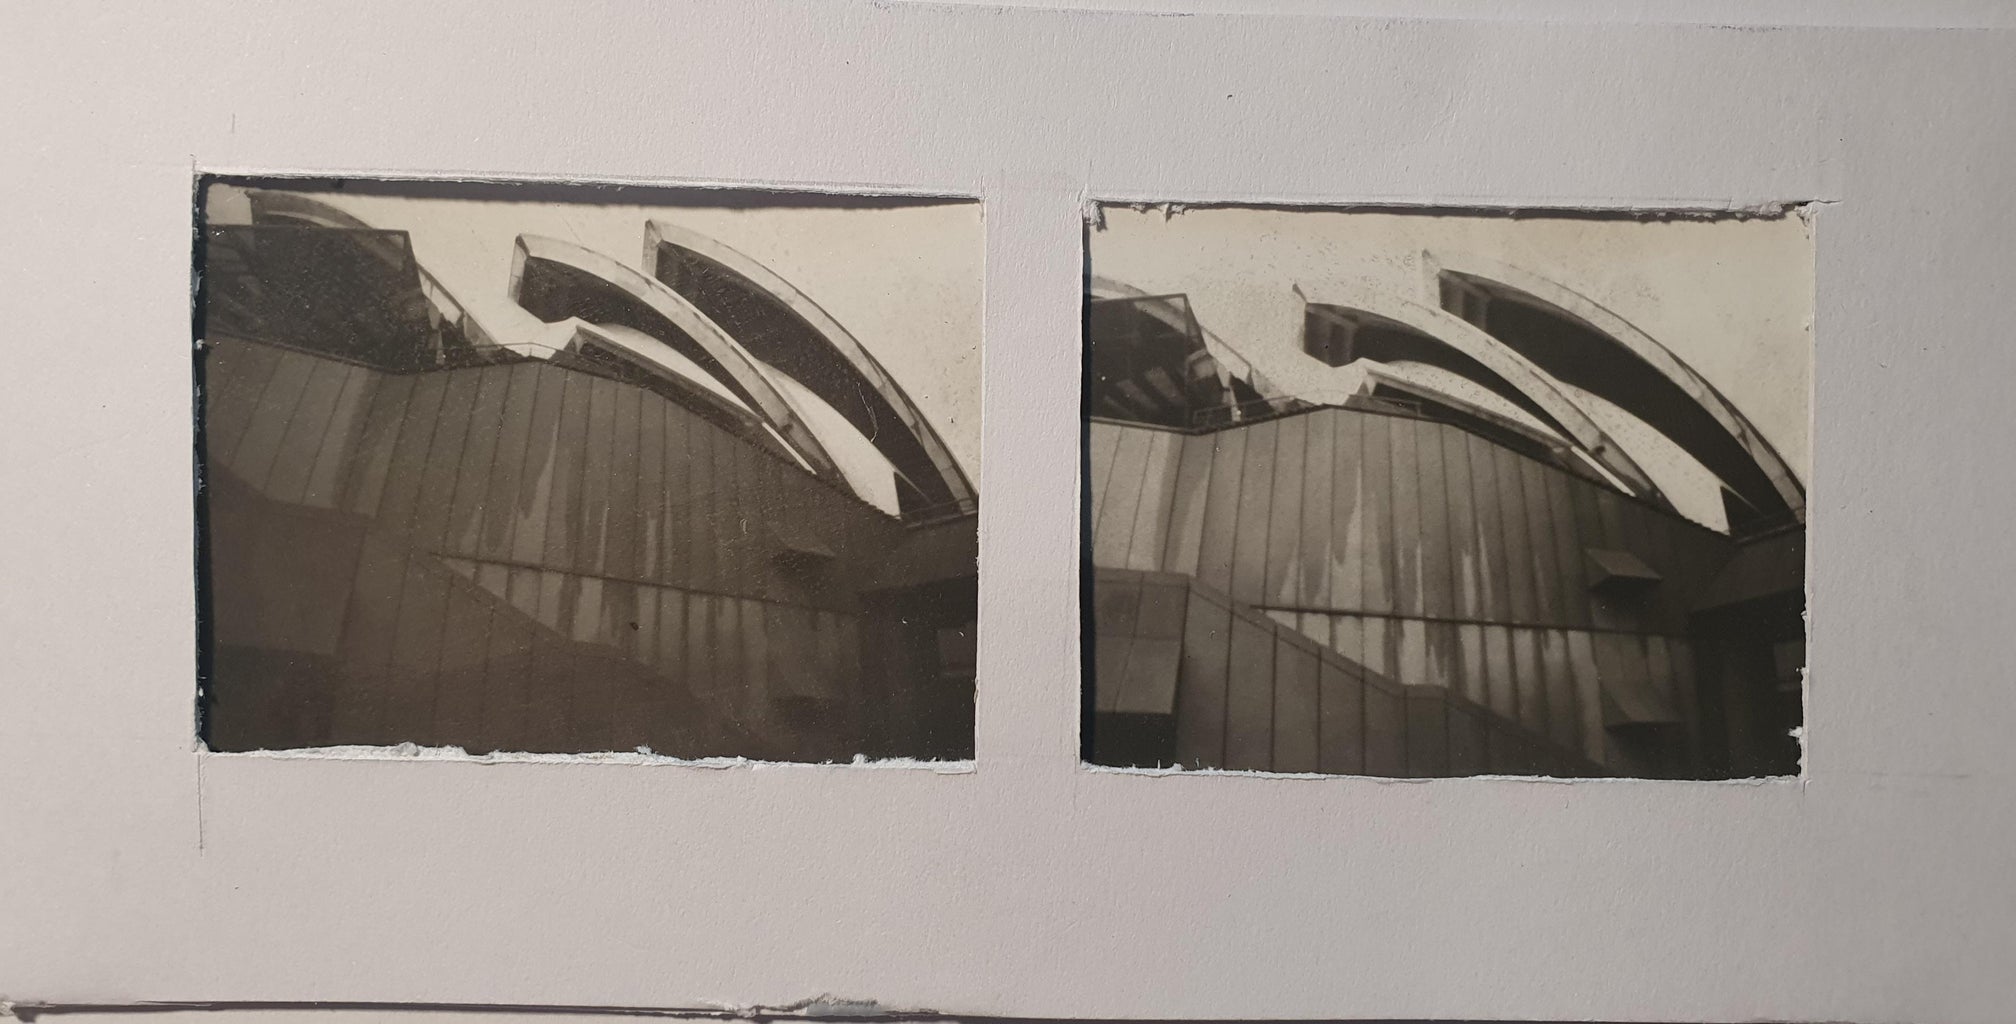


Here's some 3D photos, use a 3-inch by 5-inch piece of card to separate the two and look in closely.
Step 10: Optional: Light Trap
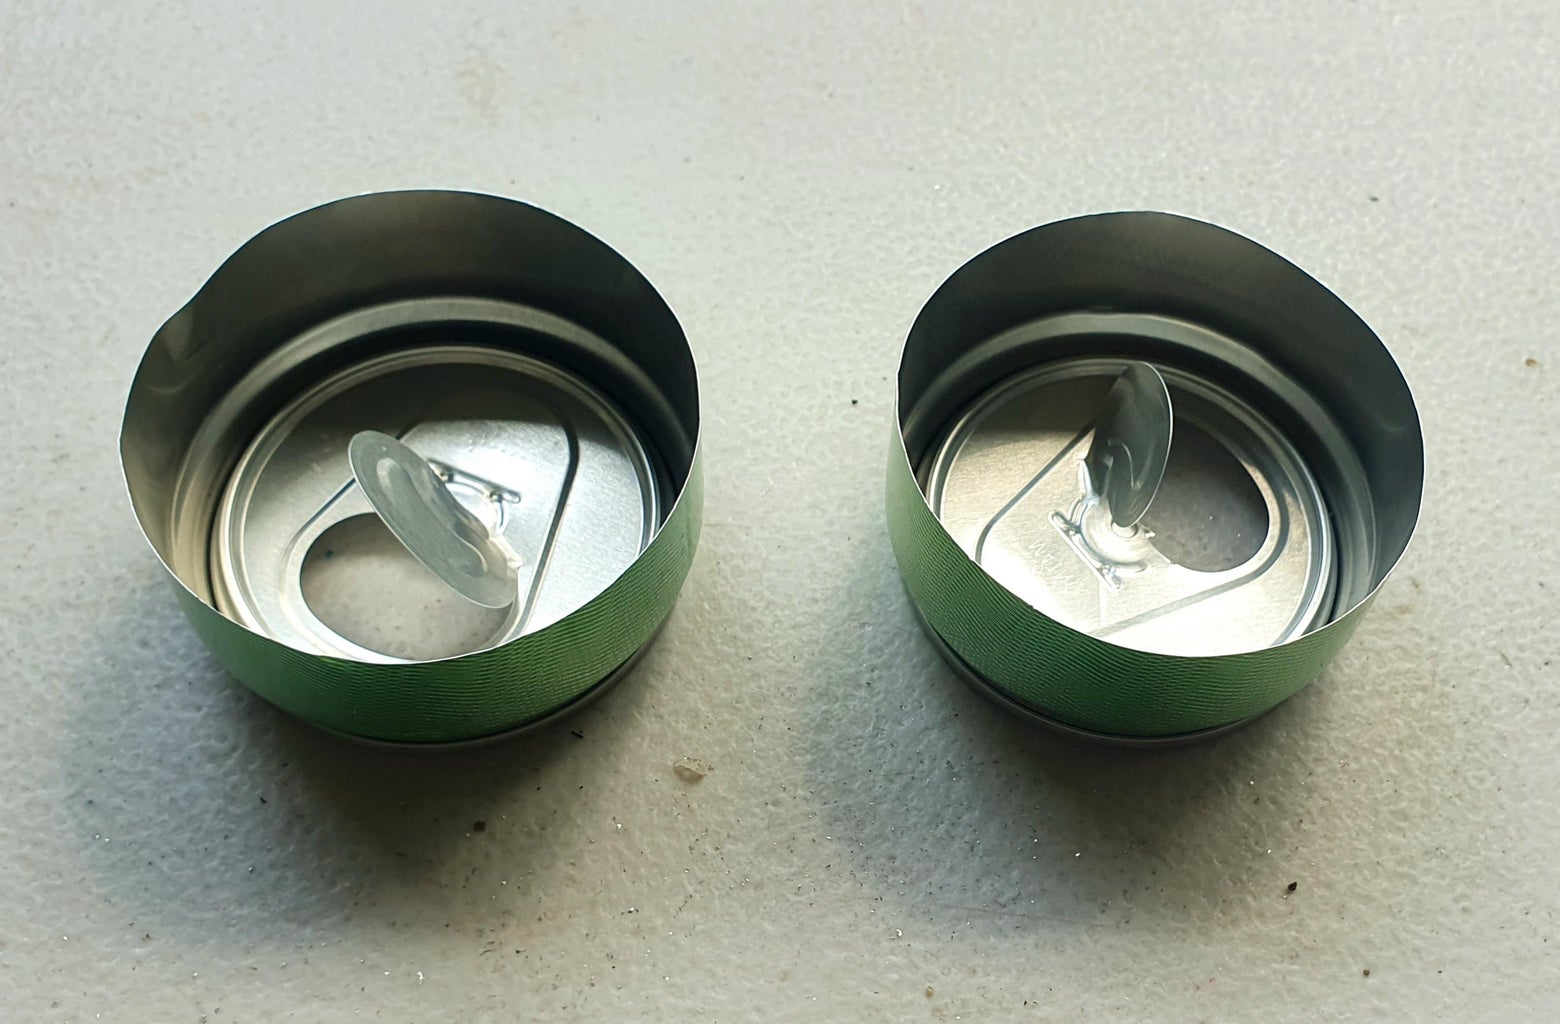


If you don't want to develop you photos in a darkroom, it is possible to do so in the can by first fitting a light stop as described below.
https://www.instructables.com/Develop-in-the-Can-Pinhole-Photography-No-Darkroom/
I also experimented making a simplified light trap just using two can tops with no breather tube or tape, just having the lower opening bigger than the upper one, it worked fine.
Step 11: Photos Developed in the Pinhole Camera Cans


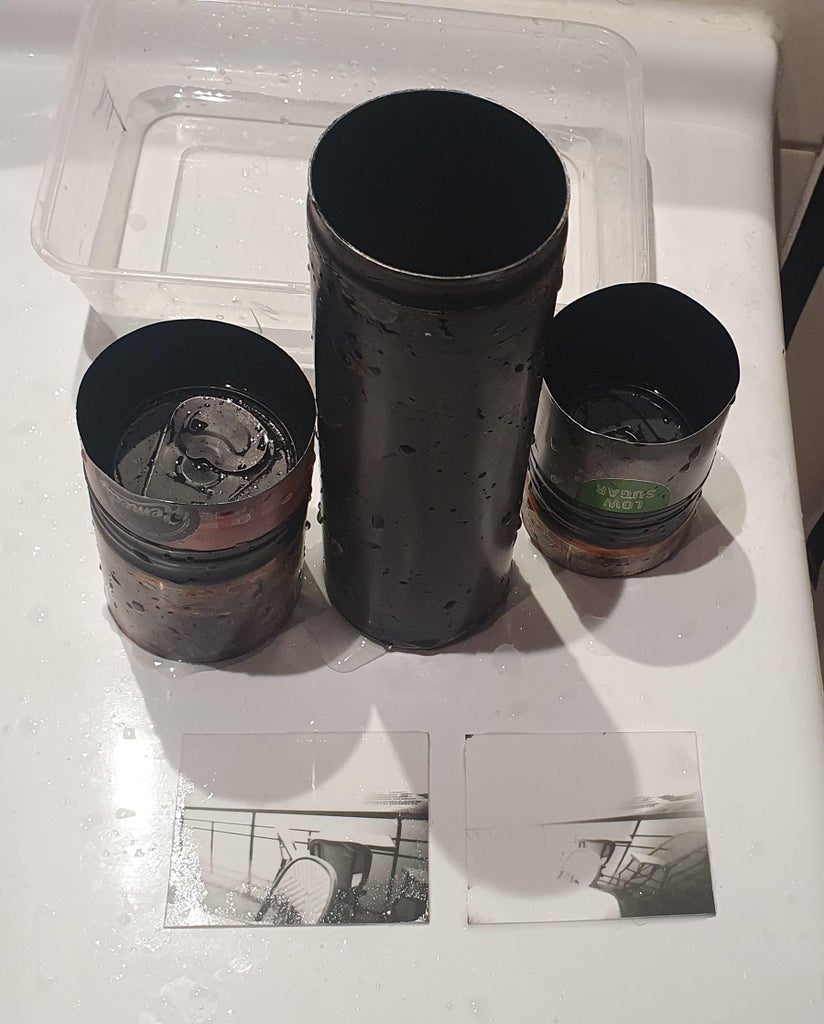

Here's some photo's which were developed in the cans (with light traps) after been taken on a wet summer day. Sometimes one of the two photos will have exposed more than the other due to having a slightly different sized pinhole.

Participated in the
Anything Goes Contest


