

Introduction: 3D Printable Map


I will show how to print a part of the world map in multiple colours. All pieces of the map have a name containing its row and collumn. The parts for which you might want to use this guide are 1.5, 2.4, 2.5, 3.3, 3.5, 3.7.
The folders of regular pieces contain just a single file. The folders of multicolour pieces contain this same file and a folder named 'multicolour'. All necessary files are in that folder.
Inside of the multicolour folder is a main-part as well as (multiple) sub-parts. The subparts can be printed like regular pieces, we will continue with the main-part.
You will need the following:
- Slic3r - I use this to cut and edit the STL files. If you don't use this slicer, you can download it without having to create a profile for your printer.
- Any slicer you use for slicing.
- A repeatable homingsequence - You will need to home multiple times during the same print.
- A way to home your 3D printer without touching/damaging/moving the part on the bed.
Step 1: Cut the Main File
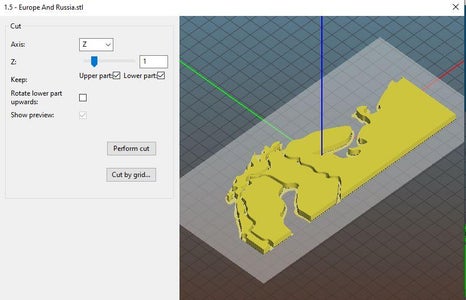
I use part 1.5 as an example.
- Open 1.5_Main_Part.stl in Slic3r
- Select the object
- Use the cut option with the settings in the picture
Step 2: Export Base and Countries
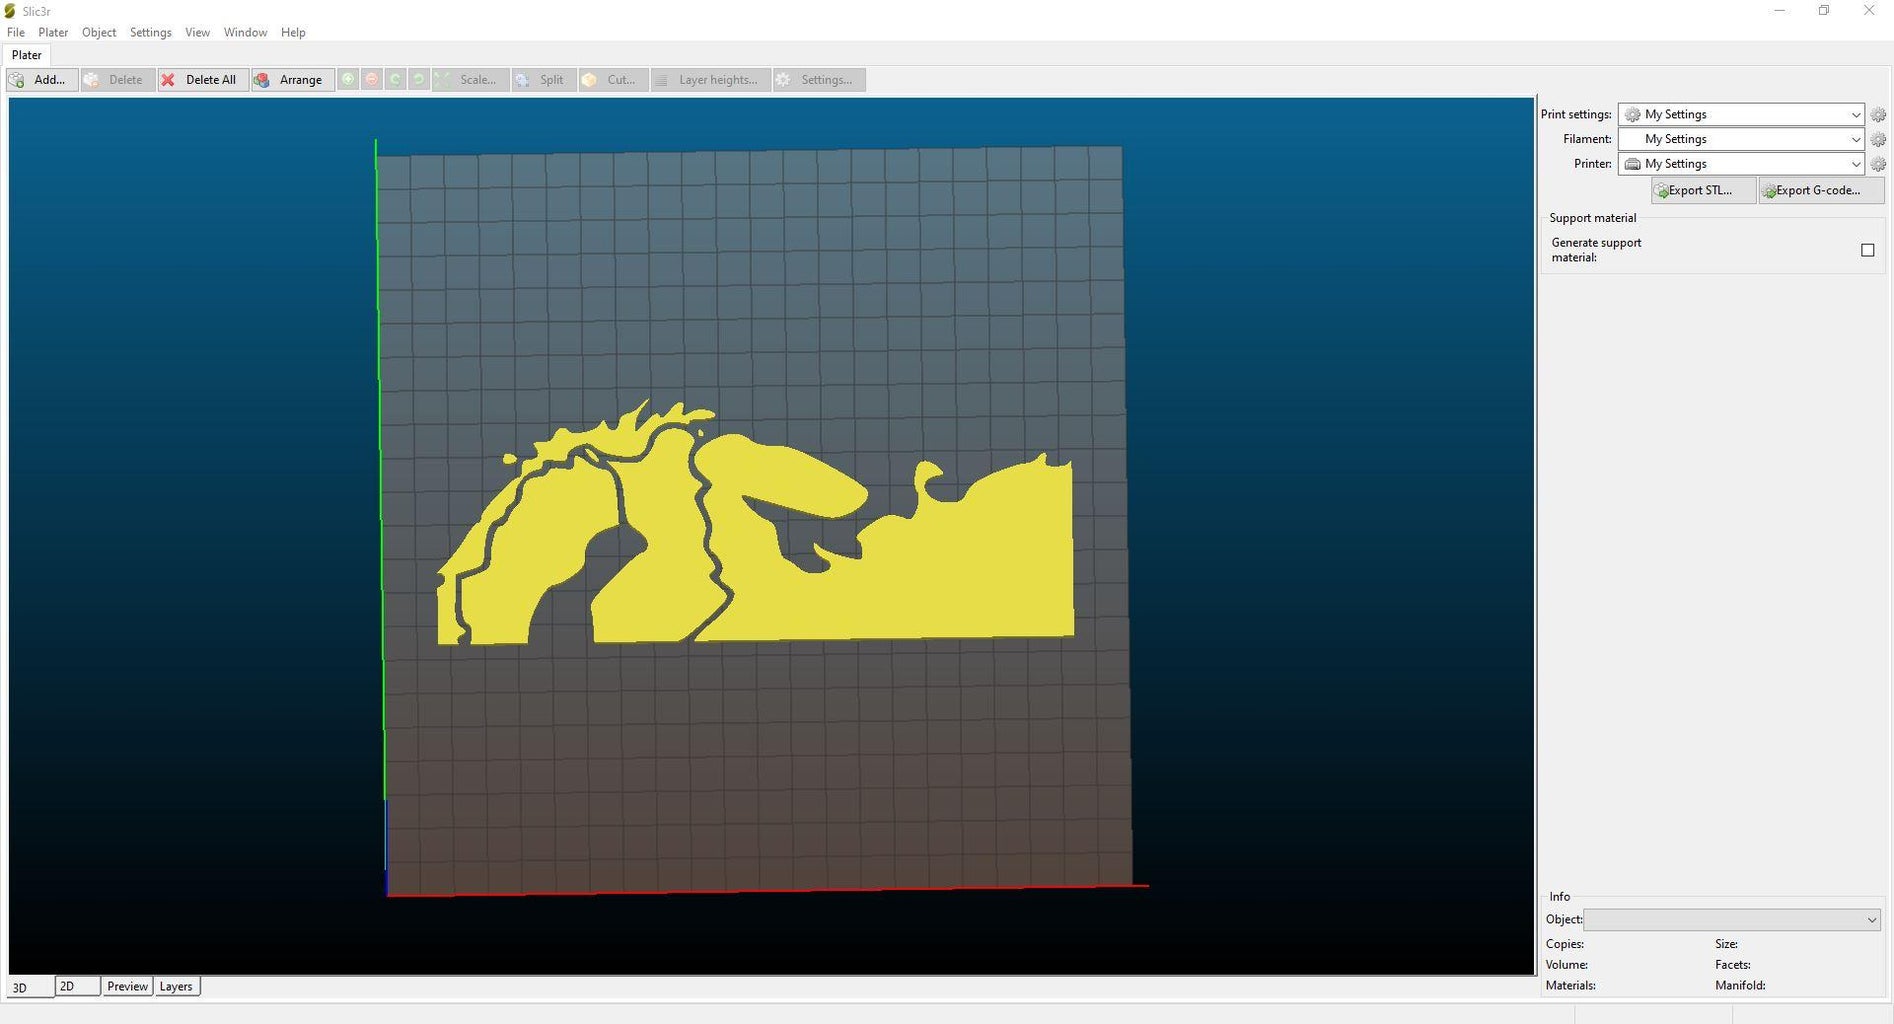

- Right click the base of the part (the solid part) and click 'export object as STL'
- Name it something like 1.5_Base.stl
- You can now delete the base and continue with the countries itself like is shown in the picture.
- Use the split option to turn every country into a seperate object.
- Now, you have to decide which countries you want to give which colour. For each colour you are going to use, do the following:
- Remove all countries of the other colour(s), untill you're left with just the countries of one colour.
- Right click on a country, select 'scale to size', select 'along z axis', enter a height of 1mm.
- Repeat the step above on all countries.
- Click on the 'export STL...' option and save these countries and name them something like 1.5_"nameofthecolour".stl
You should now have a base file and seperate files for every colour you want to use.
Step 3: Slicing
Printing a multi-coloured part is more difficult than a regular one. It works this way:
- Print the base in black, it is litterally the base of all countries and contains the borders too.
- The countries are printed in groups of countries with the same colour.
- 1mm of each group is printed, starting as far away possible from the starting position of the printhead.
- After all groups have had their first 1mm, you add a second one, and than a third. Keep doing this until all groups have reached a total height of 6mm (5 layers of 1mm on top of the 1mm base).
- Start by importing the base and all country groups into your slicer (I use cura).
- Make sure the base is located in the centre of the bed.
- Place every group precisely on the base on the spot where it should be printed. You might need to increase their height to do this.
- When everything is positioned correctly, delete all files except for the base.
- Slice the base and save its gcode file.
- Use ctrl+z or the undo option to bring everything back into position.
- Remove everything except for one group.
- Set the height of the group back to 1mm.
- Slice the group and save its gcode file.
- Repeat step 6-9 until you've sliced everything.
You should now have a gcode file for the base and one for every colour group.
Step 4: Editing the G-Code Files

All parts are now sliced and ready to be printed, but there is still a small problem: when you print a layer of a group, it will be printed on the bed like you would normally want it to be. However, we need that layer to go on top of the previously printed parts that are already on the bed.
The base has a height of 1mm, so the solution is to make the printer move up 1mm and tell it it has not moved up at all. It will then start printing on the base (1mm above the bed) thinking it prints on the bed. To do this, we will manually need to make a simple modification to the gcode files. The following needs to be added after the homing command (G28):
You need to make a slightly different modification to a gcode file printing the first layer of each group than to one printing the second layer of it!! You can either make a total of 5 copies of each gcode or edit them inbetween prints.
The gcode-file of the base requires no editing.
For the first layer of countries:
G1 Z1 - Moves the printhead to a height of 1mm
G92 Z0 - Tells the printer the printhead is at a height of 0mm
For the second layer of countries:
G1 Z2 - Moves the printhead to a height of 2mm
G92 Z0 - Tells the printer the printhead is at a height of 0mm
For the third layer of countries:
G1 Z3 - Moves the printhead to a height of 3mm
G92 Z0 - Tells the printer the printhead is at a height of 0mm
For the fourth layer of countries:
G1 Z4 - Moves the printhead to a height of 4mm
G92 Z0 - Tells the printer the printhead is at a height of 0mm
For the fifth layer of countries:
G1 Z5 - Moves the printhead to a height of 5mm
G92 Z0 - Tells the printer the printhead is at a height of 0mm
Step 5: Printing
- Print the base first.
- Print the first-layer file of each group, starting with the group the furthest removed from the starting point of the nozzle.
- Print the second, third, fourth and fifth layer by layer. Not group by group!
Good luck printing the worldmap!!


