Introduction: 3d Printer → Drawing Machine!
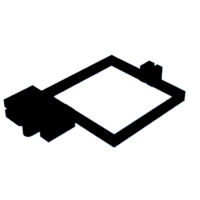
This is an attachment that can be fitted to the extruder of your 3d printer. After tweaking some slicer settings (I'll walk you through the settings a little bit later), a pen can be used to make your 3d printer into a drawing machine! Above is a picture of a tiger I made with this accessory.
Supplies
1x 3d Printer w/ filament (Ender 3v2 is what I have, but any printer with an extruder that looks similar should work too)
1x A pen with a diameter of around 0.32 inches (this is the standard size for a regular BIC pen)
2x Nut with diameter of 0.24 inches
2x Screw (that goes with previous nut) measuring 0.6 inches (or longer)
Step 1: Download and Print the Accessory!
Download the STL below, and print it in your favorite color! I used rainbow filament to print mine, so it has a nice gradient.
Attachments
Step 2: Weed the Print CAREFULLY
Make sure to be gentle when weeding the print, so you don't break it. After weeding, make sure your pen fits the gap, and the attachment can slide onto your printer's extruder.
Step 3: Slicer Settings
I use Cura, so that is what I will be giving a setting tutorial on. However, if you use some other slicer, just try to find the same settings in yours and change them, because most generic slicers are the same.
- set the temperature to: 0
- set the layer height to: 0.2mm
- set the shell thickness: 0.2mm
- make sure enable retraction is on
- turn off all supports
- nozzle size to 1mm (or whatever size tip your pen has)
- set minimum travel: 0.01mm
- enable combing: all
- z hop when retracting: set to at least 3mm
- Change line count: 0
If you have a heated print bed, set it to 0° C.
*****MAKE SURE TO PULL OUT ALL FILAMENT FROM YOUR EXTRUDER!!!*****
Attach all the parts to your printer's extruder, and measure the distance from the nozzle of the extruder (where the filament comes out) to the tip of the pen. Whatever this distance is, change your z offset setting to it (if you're in the US, you might have to convert inches to millimeters before putting the offset distance into the slicer).
When you actually start the drawing, if the pen is jammed too tightly into the paper, increase the z offset value, if the pen is too far away, decrease the z offset value.
Step 4: To Import an Image
After you've found an image online and downloaded it (make sure it's a PNG or go to https://www.remove.bg/upload to remove the background), bring it into your slicer the same way you do an STL.
Once it's in the slicer, use the move tool to bring the photo down so that no layers are on the build plate (picture on the left). Then move the photo up so that only the first layer is on the build plate (picture on the right).
Then slice the image, and upload it to your printer.
You can attach a piece of paper to the print bed with some tape or sticky tack.
Step 5: Done!
Now it's just trial and error, adjusting the slicer settings until you get a drawing you're happy with! If you have any questions, don't hesitate to ask in the comments!

This is an entry in the
Build-A-Tool Contest


