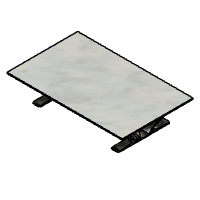
Introduction: AI Designed Dining Table
I wanted to try out Fusion 360's Automated Modelling feature. I've never used anything like this before as my designs are always quite simple any simply don't need this style of modelling. Given that I am in the process of moving, and am currently in the process of design some furniture for my new place, and have seen some really cool AI generated designs for some tables, I though I use this new feature to explore some designs for my own table.
I also wanted to try and improve my Blender skills, specifically learning how to make more realistic renders, so I though I take this opportunity.
Supplies
- Fusion 360
- Blender (optional)
Step 1: Experimenting
To start off with I just thought I would seeing how the feature worked, and what it could do. The basic principle is that you give it some faces to connect, and bodies to avoid, then it will generate a handful of options on how to do this, with a small amount of customisation for each option.
I made two rectangular bodies about 50mm apart with a cylinder, 25mm in length, floating in the center in the center. I selected the top and bottom faces of the rectangle, as the faces to connect, and then the cylinder and the body to avoid and hit generate. This can take a few minutes, but one of it being cloud based is that even it goes pretty quickly, even on my MacBook Air.
In this case it gave me four options to choose from, some others shapes I tried gave me more options, and others less. It also give you the option to make each alternative thinner or thicker, depending on what you prefer.
Step 2: The Table
To start this off, I had two strips for the feet, and then a handful of sections underneath the table top, these would be the faces for connection. I then added a large cylinder running along the x-axis, this would be the body to avoid.
I selected the option I thought looked the most interesting, and made the components as thin as I could. I then flatten the top and the feet, and added some materials. I did a quick render within Fusion 360, but it wasn't quite looking right, so I exported it as an OBJand moved over to Blender.
Attachments
Step 3: Rendering in Blender
I always wanted to learn how to render, so I can visualise my designs better. I found an interior scene on BlenderKit, and loaded it in using their addon. The great thing about doing it this was all the textures and lighting were already applied. I then imported the table (you may have to enable the OBJ import option in User Preferences) and found a concrete texture for the base, and a marble texture for the top.
I then posited the camera and altered the lighting slightly, and hit F12 to render.

This is an entry in the
Made with AI - Autodesk Design & Make - Student Contest


