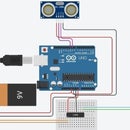
Introduction: ARDUINO GESTURE CONTROL ROBOT
HI! I'M GLAD YOU CHOSE MY PROJECT. MOVE ON TO DO THIS ROCKING PROJECT. WHEN YOU MOVE YOUR HAND FRONT THE ROBOT MOVES FRONT , WHEN THE GLOVE IS MOVED BACK YOUR ROBOT WILL MOVE BACK, AND THE SAME APPLIES FOR RIGHT AND LEFT. THIS IS DONE USING A SENSOR CALLED ACCELEROMETER. CHECK OUT THE VIDEO FOR THE WORKING SAMPLE..
https://youtu.be/JGp9JjD-D24
Supplies
a) Arduino Uno
b) Transmitter and Reciever (Same frequency)
c) MPU-6050 Accelerometer
d) BO Motars with wheels
e) Motar driver(any)
f) Jumper cables
g) Robot car chassis
h) Arduino A to B cable(for coding)
Step 1: Materials Needed
a) Arduino Uno
b) Transmitter and Reciever (Same frequency)
c) MPU-6050 Accelerometer
d) BO Motars with wheels
e) Motar driver(any)
f) Jumper cables
g) Robot car chassis
h) Arduino A to B cable(for coding)
ALL PRODUCTS AVAILABLE IN AMAZON, FLIPKART AND AVAILABLE IN E COMMERCE SHOPS
Step 2: Connecting Rx (Reciever)
Plan your robotic car and connect your recieving system. Take help of the connection diagram for easy reference.
Step 3: Connecting Tx System (Gloves)
Plan how are you going to design your gloves for operating the robotic car. Make use of the connection diagram and connect your materials with the help of jumper wires. At last stick the done tx system in your gloves from which your going to operate.
Step 4: Coding Your Project
Code your project by connecting your arduino UNO to laptop or pc using A to B cable. Code using Arduino IDE app. Link of the app :( https://www.arduino.cc/en/main/software ). Download the app first and connect it.
CHECK THE NEXT STEP FOR THE CODE.
Step 5: Code to Be Uploaded
This is the code you have to type (copy and paste) :
#include<MPU6050_tockn.h>
#include<wire.h>
MPU6050 mpu6050(Wire);
long timer = 0;
void setup() {
pinMode(4, OUTPUT);
pinMode(5, OUTPUT);
pinMode(6, OUTPUT);
pinMode(7, OUTPUT);
Serial.begin(9600);
Wire.begin();
mpu6050.begin();
}
void loop() {
mpu6050.update();
Serial.print("accX : ");Serial.print(mpu6050.getAccX());
Serial.print("\taccY : ");Serial.print(mpu6050.getAccY());
Serial.print("\taccZ : ");Serial.println(mpu6050.getAccZ());
if (mpu6050.getAccX() >= 0.70)
{ //FORWARD
digitalWrite(4, HIGH);
digitalWrite(5, LOW);
digitalWrite(6, LOW);
digitalWrite(7, HIGH);
}
else if(mpu6050.getAccX() <= -0.60)
{ //BACKWARD
digitalWrite(4, LOW);
digitalWrite(5, HIGH);
digitalWrite(6, HIGH);
digitalWrite(7, LOW);
}
else if(mpu6050.getAccY() >= 0.60)
{ //LEFT
digitalWrite(4, LOW);
digitalWrite(5, HIGH);
digitalWrite(6, LOW);
digitalWrite(7, HIGH);
}
else if(mpu6050.getAccY() <= -0.60)
{ //RIGHT
digitalWrite(4, HIGH);
digitalWrite(5, LOW);
digitalWrite(6, HIGH);
digitalWrite(7, LOW);
}
else{
digitalWrite(4, LOW);
digitalWrite(5, LOW);
digitalWrite(6, LOW);
digitalWrite(7, LOW);
}
}
Step 6: Finally Test Your Project
Test this wonderful project.
Done by : VEDANTH.K Thank You

Participated in the
Arduino Contest 2020


