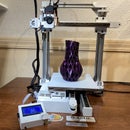
Introduction: Adding Parts Cooling Fan to Your 3D Printer
For those of you new to 3D printing, most 3D printer do not come with a cooling fan. Yes there's a fan right on the extruder (and it may very well be the loudest part to your printer) but that fan only cools the Hot-end Heat sink. It prevents heat from traveling up to the extruder, which can cause all sorts of issues.
The Cooling fan we're talking about here is to cool the filament that is deposited on your print. Cooling your print can make the difference between a beautiful print and a failed print.
The parts cooling fan is controlled independently from the Hot-end fan (which generally, is always on). Most slicers will automatically insert all the right g-code to run the parts cooling fan in the right places and at the right time.
Btw, some materials should not not be cooled AT ALL so don't fall for the "cooling extruder and filament simulaniously". That can't be good.
Step 1: Connecting the Cooling Fan
This is assuming you are using a RAMP 1.4 and Marlin 1.1.x, although similar principals apply to other boards. On the RAMPS Shield there are 3 power outlets that can be configured for different functions. These are D8, D9 and D10 (blue connectors).
Generally D8 is reserved for heating the bed and D10 is reserved for Extruder 0 (the first extuder). D9 can be assigned to either a second Extruder or to a cooling fan.
In this case we'll be attaching the cooling fan to D9 (polarity matters so make sure the plus aligns with the fan's red wire).
Step 2: Setting Up Marlin 1.1.x With Cooling Fan
This is just a matter of selecting the proper board configuration. In your marlin code base you'll find a file called boards.h. In it you'll find all the boards currently supported by marlin and for each board there are different options.
#define BOARD_RAMPS_OLD         3     // MEGA/RAMPS up to 1.2

#define BOARD_RAMPS_13_EFB      33    // RAMPS 1.3 (Power outputs: Hotend, Fan, Bed)
#define BOARD_RAMPS_13_EEB      34    // RAMPS 1.3 (Power outputs: Hotend0, Hotend1, Bed)
#define BOARD_RAMPS_13_EFF      35    // RAMPS 1.3 (Power outputs: Hotend, Fan0, Fan1)
#define BOARD_RAMPS_13_EEF      36    // RAMPS 1.3 (Power outputs: Hotend0, Hotend1, Fan)
#define BOARD_RAMPS_13_SF       38    // RAMPS 1.3 (Power outputs: Spindle, Controller Fan)

#define BOARD_RAMPS_14_EFB      43    // RAMPS 1.4 (Power outputs: Hotend, Fan, Bed)
#define BOARD_RAMPS_14_EEB      44    // RAMPS 1.4 (Power outputs: Hotend0, Hotend1, Bed)
#define BOARD_RAMPS_14_EFF      45    // RAMPS 1.4 (Power outputs: Hotend, Fan0, Fan1)
#define BOARD_RAMPS_14_EEF      46    // RAMPS 1.4 (Power outputs: Hotend0, Hotend1, Fan)
#define BOARD_RAMPS_14_SF       48    // RAMPS 1.4 (Power outputs: Spindle, Controller Fan)

#define BOARD_RAMPS_PLUS_EFB   143    // RAMPS Plus 3DYMY (Power outputs: Hotend, Fan, Bed)
#define BOARD_RAMPS_PLUS_EEB   144    // RAMPS Plus 3DYMY (Power outputs: Hotend0, Hotend1, Bed)
#define BOARD_RAMPS_PLUS_EFF   145    // RAMPS Plus 3DYMY (Power outputs: Hotend, Fan0, Fan1)
#define BOARD_RAMPS_PLUS_EEF   146    // RAMPS Plus 3DYMY (Power outputs: Hotend0, Hotend1, Fan)
#define BOARD_RAMPS_PLUS_SF    148    // RAMPS Plus 3DYMY (Power outputs: Spindle, Controller Fan)
In case of the RAMPS 1.4 (BOARD_RAMPS_14_XXX) you can select the different configuration of the power outputs.
In the case of my printer I happen to have 1 extruder, 1 heated bed and one cooling fan so BOARD_RAMPS_14_EFB (43) it is.
This means that in the configuration.h you set the board to this one:
// The following define selects which electronics board you have.
// Please choose the name from boards.h that matches your setup
#ifndef MOTHERBOARD
  #define MOTHERBOARD BOARD_RAMPS_14_EFB
#endif
This is all you need to do with regards to the cooling fan installation in the software. The rest of the cooling fan settings is controlled by the g-code
Step 3: Testing Your Fan and Setting Up Your Slicer
You can test your cooling fan by directly sending it g-code to control the fan. In software like Pronterface or through an interface like Octo Print's you can send the command M106 S[0.255] (M107 turns it off).
The slicer software is what will generate the g-code and it will have a section for setting up your cooling fan configurations. More slicer software applies some intelligence to how and when to apply cooling.
In Slic3r the cooling setting are associated with the Filament setting (as they differ per type of filament).
In cura 1.7.0 you'll find a cooling section under the Print Setup.
I think that covers how to get started with adding a cooling fan on your 3D printer. Good luck figuring out the best setting for each material you choose to print with (remember some like ABS can't handle cooling at all).
If you liked this check out my other instructables or visit my website at https://core3d.tech


