Introduction: Adding Windows to Your Spaceship


The following information is a single lesson in a larger Tinkercad project. Check out this and more projects on Tinkercad.
Return to Previous Lesson: Creating Wings for the Spaceship
Lesson Overview:
Now we're going to add some windows!
Step 1: Introduction
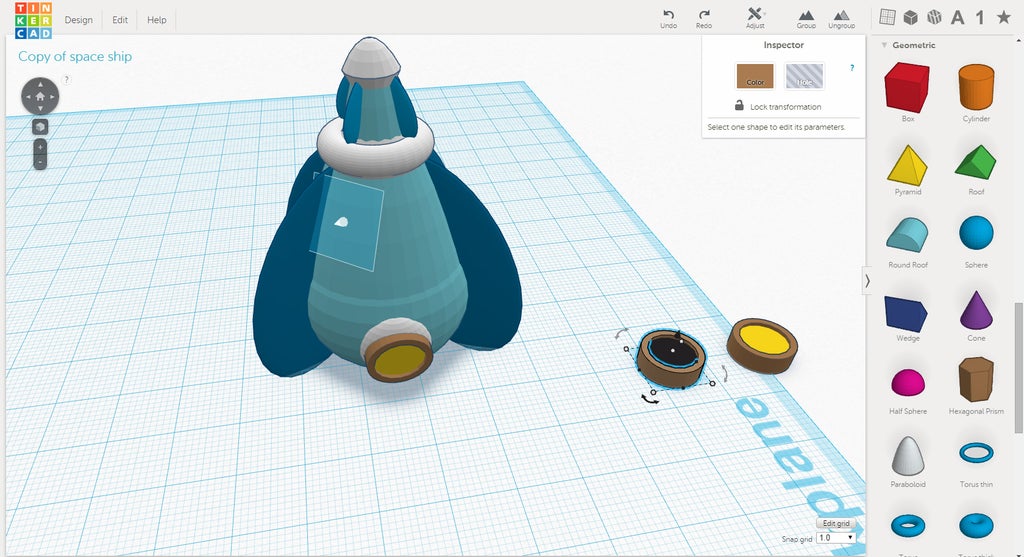
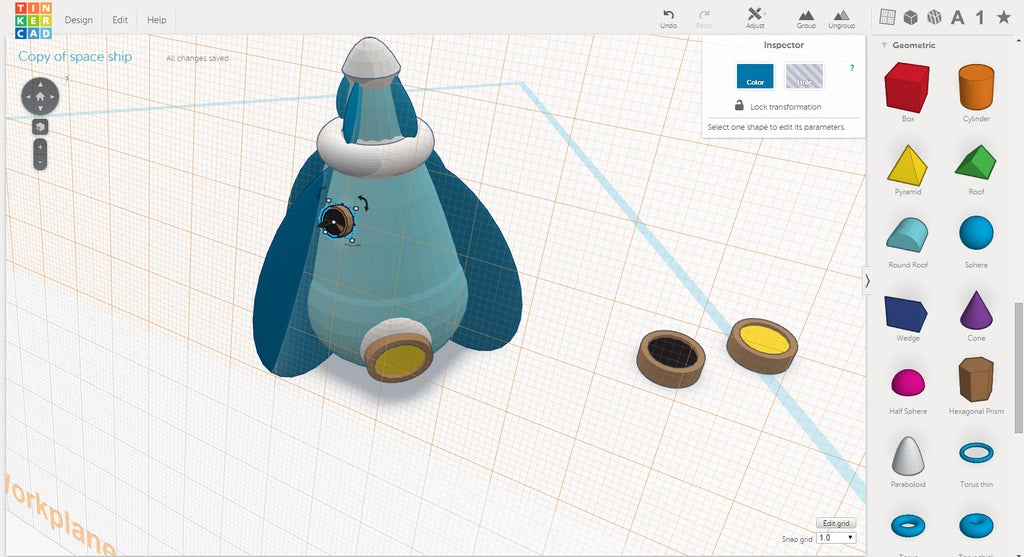
In this lesson we will make windows for the crew to see out of. Once the windows are made, we will use the Workplane Tool to place copies all over the spaceship. When the lesson is finished, the spaceship will look something like the image below.
Instructions
- Go to the next Step.
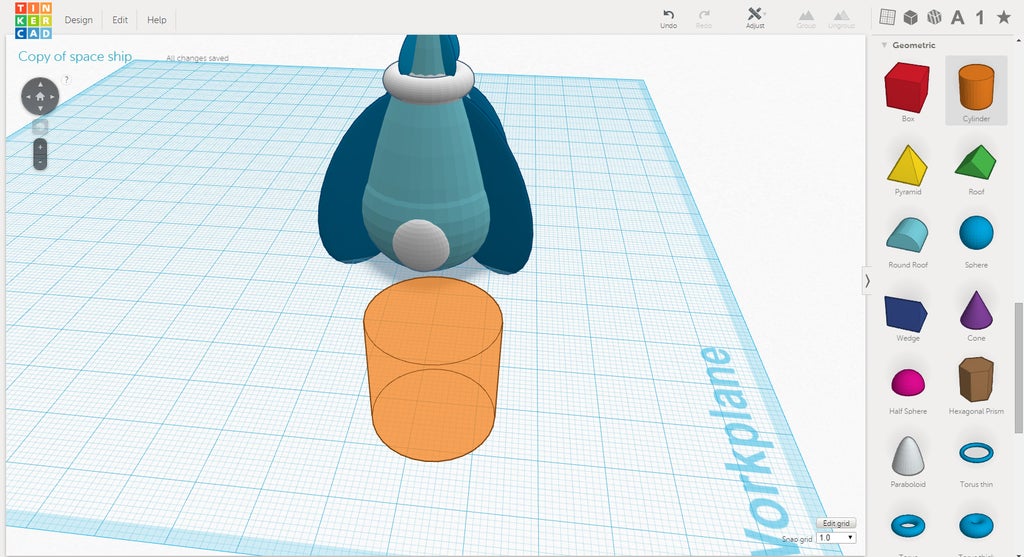
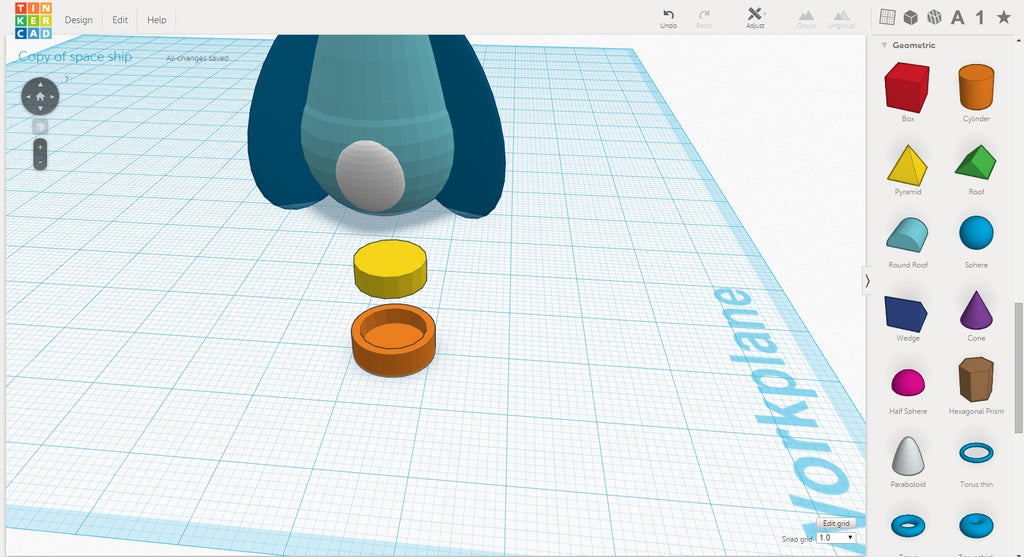
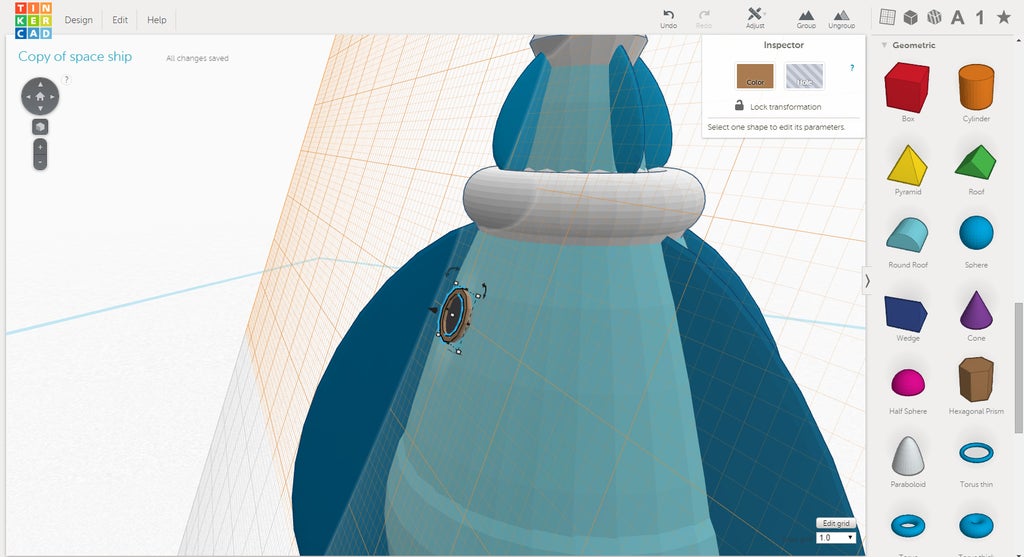
Step 2: Creating the Window.


When finished with this step, you should have something similar to the image below.
Instructions
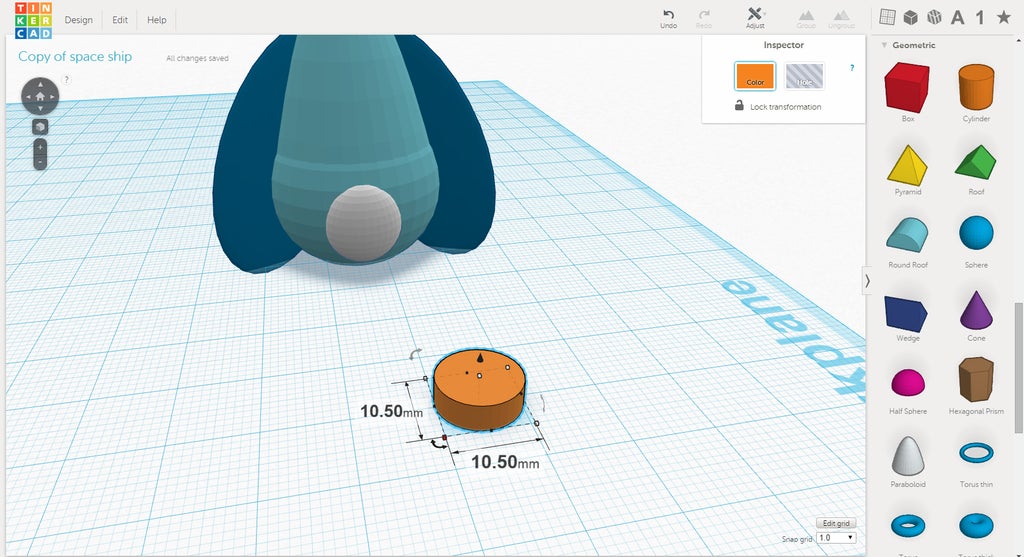
- Place a Cylinder on the workplane.
- Scale the cylinder down to about 10mm along the X and Y axis, and 4mm tall along the Z axis.
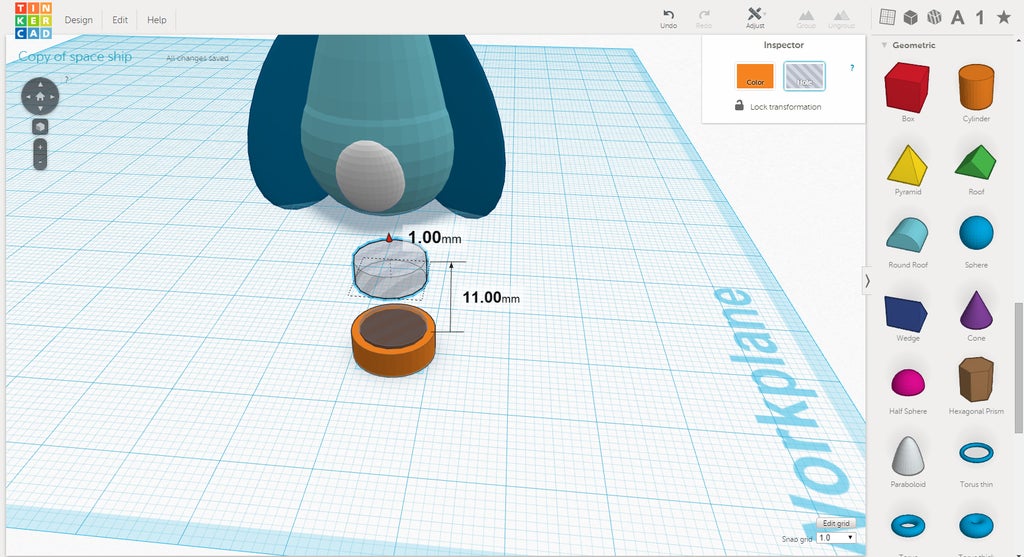
- Duplicate the cylinder and turn it into a hole. Make sure that the two cylinders share the same center.
- Scale the hole cylinder down to 9mm.
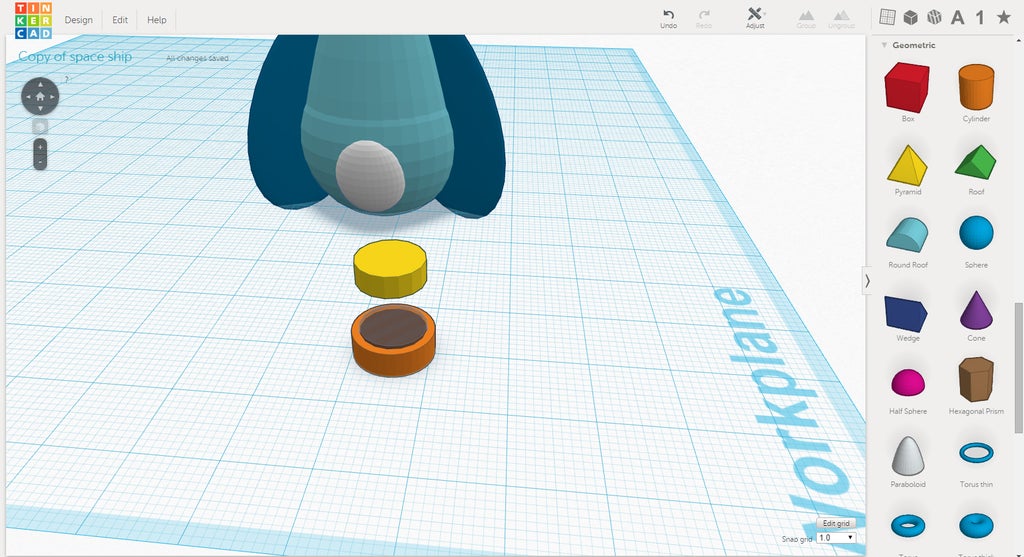
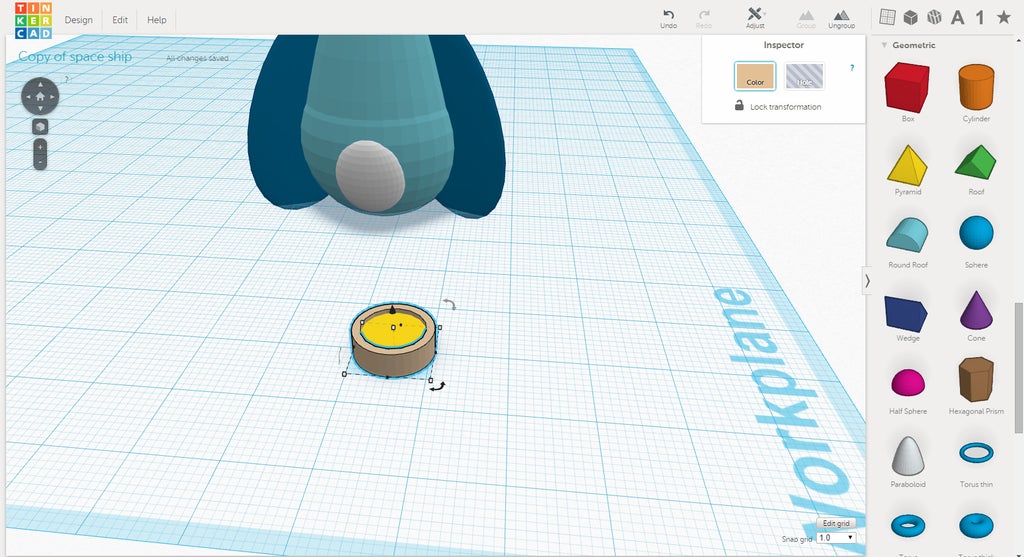
- Move the hold cylinder down so that it rests inside the solid cylinder. Make a duplicate of the hole cylinder and change it's color to yellow.
- Group the orange cylinder and hole cylinder together.
- Move the yellow cylinder down into the orange cylinder. The yellow cylinder should be below the surface of the orange cylinder
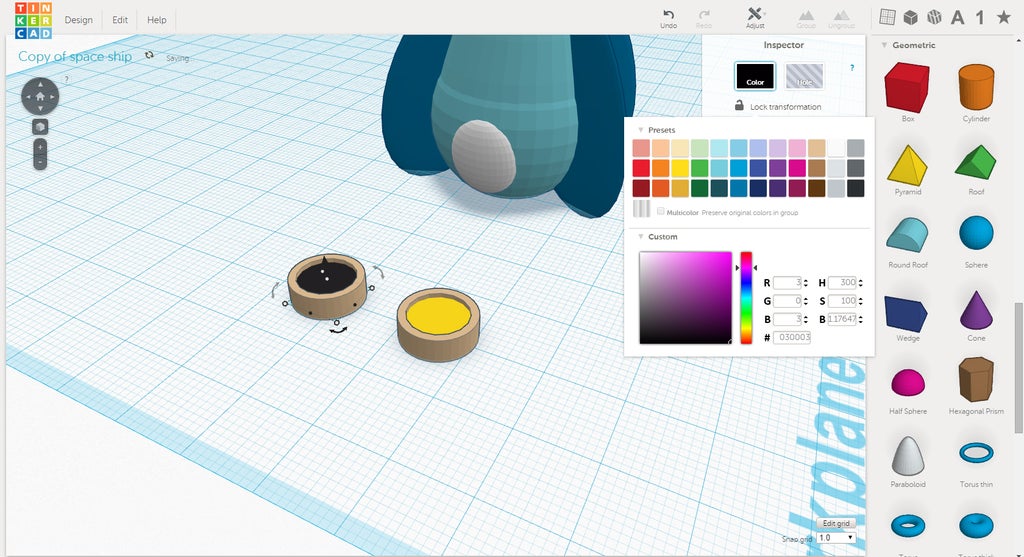
- Make a duplicate of the window and move it off to the side. Change the color of the second window from yellow to black. Now you have a window with the lights on and off.

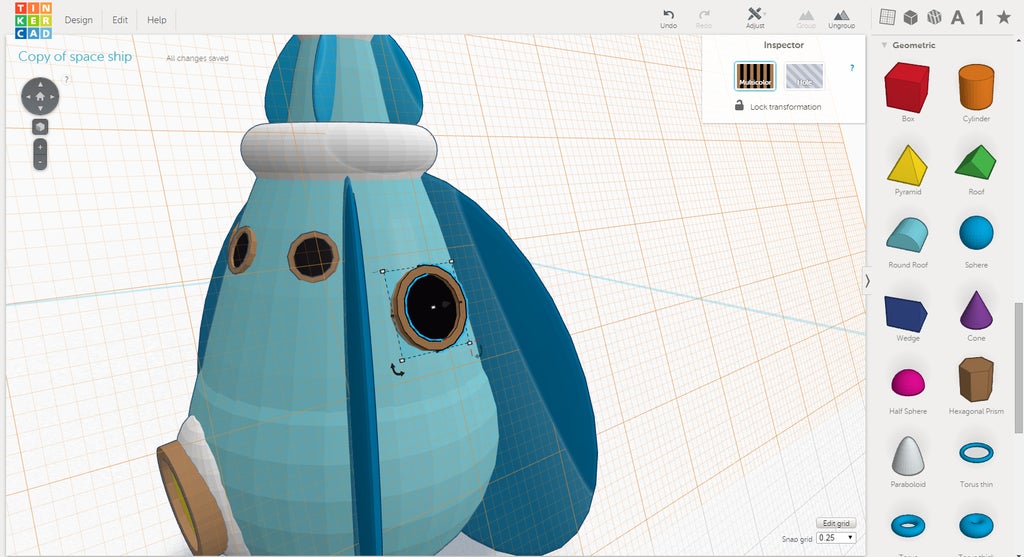
Step 3: Placing the Windows.


In previous lessons we used The Workplane Tool to place new objects, from the menu, where they should be. The windows are already built on the workplane. The Workplane Tool can also be used to position copies.
Instructions
- Choose which type of window you wish to use, on or off. Select and group those objects together. Choose Inspector>Color>Multicolor to keep the original colors.
- With the grouped window selected, use CTRL+C to copy the window. Press W to switch to the Workplane Tool and pick the first location you want a window to be.
- After the grid turns orange, use CTRL+V to paste a copy of the window.
- Make changes to the size or position of the window as you see fit.
- Repeat the previous steps until your spaceship has enough windows. Place windows around the Living Quarters and the Escape Pod.

In the next lesson you will learn to make some legs!
Next Lesson:Making the Legs