

Introduction: Arduino Uno R3 Installation Guide


Introduction
Arduino is an Integrated Development Environment based upon Processing. It has made very easy several things namely these are embedded systems, physical computing, robotics , automation and other electronics -based things.
Step 1: Requirement:
Before getting started to run and develop firmware applications on your Arduino UNO R3, there are some hardware and software requirements.
1 Hardware Required:
- A USB TTL Serial cable or a Micro-USB cable.
2 Software Required:
- Windows
- Arduino IDE 1.8.3
Step 2: How to Install the Arduino UNO R3:

1) Download the Arduino UNO R3 as this link and then Unzip all these files.
2) Copy and paste the Folders in :-
Example :-
My Computer in C:/Program Files (x86)/Arduino
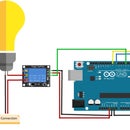
3) The Arduino folder contains both the Arduino program itself and also the drivers that allow the Arduino to be connected to your computer by a USB cable . Before we launch the Arduino software, you are going to install the USB drivers.You should see an LED is ‘ON’ light up.
4) If you’re running Windows 8, you’ll need to disable driver signing. If you’re running Windows 7, Vista, or XP, you’ll need to install some drivers.
Step 3: How to Install Drivers in Arduino UNO R3:

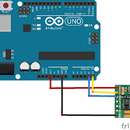
1) Plug in your board and wait for Windows to begin its driver installation process
2) Click on the Start Menu, and open up the Control Panel.
3) While in the Control Panel, navigate to System and Security. Next, click on System.
4) Once the System window is up, open the Device Manager.
5) Look under Ports (COM & LPT). You should see an open port named “Arduino UNO (COMxx)”. If there is no COM & LPT section, look under ‘Other Devices’ for ‘Unknown Device’.
6) Right click on the “Arduino UNO (COMxx)” or “Unknown Device” port and choose the “Update Driver Software” option’
7 )Next, choose the “Browse my computer for Driver software” option’
8) Finally, navigate to and select the Uno’s driver file, named “ArduinoUNO.inf”, located in the “Drivers” folder of the Arduino Software download (not the “FTDI USB Drivers” sub-directory). If you cannot see the .inf file, it is probably just hidden. You can select the ‘drivers’ folder with the ‘search sub-folders’ option selected instead.
9) In windows will finish the driver installation.
Step 4: To Test the First Program in Ardunio Board:

Open the Arduino application than Go to the File > Examples > 1. Basics > Blink
Step 5: Select the Type of Arduino Board You’re Using: Tools > Board > Your Board Type:

Step 6: Select the Serial/COM Port That Your Arduino Is Attached To: Tools > Port > COMxx:

Step 7: Next Step:

If you’re not sure which serial device is your Arduino, take a look at the available ports, then unplug your Arduino and look again. The one that disappeared is your Arduino.
With your Arduino board connected, and the Blink sketch open, press the ‘Upload’ button.
Step 8: Last Step:
After a second, you should see some LEDs flashing on your Arduino, followed by the message ‘Done Uploading’ in the status bar of the Blink sketch.


