Arduino Webserver Control Lights, Relays, Servos, Etc...

261,374

930

80

Introduction: Arduino Webserver Control Lights, Relays, Servos, Etc...

About: Author, Blogger, Electronics Enthusiast and Entrepreneur. For complete Electronics Projects and Tutorials go to: https://RandomNerdTutorials.com
In this project using only an Arduino with an Ethernet shield.
I’ll be controlling one LED and a servo, but you can apply this method to control a DC motors, buzzers, relays, stepper motors, etc..

Overview:

When you upload the the code provided in this tutorials. it creates a webserver in your LAN and you simply use the IP to access that webserver through your browser. After that it shows a webpage similar to that one below. When you press the button “Turn On LED” your url will change to: “http://192.168.1.178/?button1on” the arduino will read that information and It turns the LED On.

By default the IP is “192.168.1.178″. That also can be found on the Arduino code provided.
The Webpage will look like the image on the attachments.

Check this Video tutorial below ! (Includes demonstration)


Step 1: Parts Required

  • 1x Arduino Uno
  • 1x Ethernet Shield (with Wiznet W5100 chip)
  • 1x 220 Ohm Resistor
  • 1x LED
  • 1x Micro Servo Motor
  • 1x Breadboard
  • Jumper Cables

Step 2: Schematics

Simply follow the schematics.

Step 3: Upload This Arduino Code Below:

Step 4: Final Step

It's done! If you didn't watch the youtube video yet, make sure you watch now. Not only to see the video demonstration, but you can also find more information that might help you finish this Instructable.


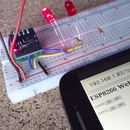
Now you can create your own webserver! 
And control any electronic device you desire.

Did you enjoyed this project?
Please support my work by sharing this project with a friend!

Make sure you follow me on instructables so you don't miss my next project!

Have a problem?
Leave a comment below and I'll help you :)

P.S. Click here to see my blog where I post weekly Projects and Electronics Tips!

2 People Made This Project!

Recommendations

  • Make It Bridge

    Make It Bridge
  • For the Home Contest

    For the Home Contest
  • Game Design: Student Design Challenge

    Game Design: Student Design Challenge

80 Comments

0
corneke
corneke

15 days ago


Yeah, I made it.

Many thanks!

0
MarjanT4
MarjanT4

Question 3 years ago

Hello
I have an important question, thank you if anyone can help me.
What to do for converter stations by Ethernet (How does for example station number 1 find out that station number one is over and continue working now?)
Thankful

0
ΓιώργοςΚ9
ΓιώργοςΚ9

Question 3 years ago

Hello,
Nice project! helped me a lot to understand how web server work.
i want to ask if there is any possible way to add password to protect the webserver
thank you a lot

0
hadisamani
hadisamani

5 years ago

hello sir
i connected to nudemcu and control it with routor network
but i want control it with 4g...
how i can do it?
thank you for nice code and nice guide:)

0
didierh3
didierh3

Reply 4 years ago

Hi,
Just create a DynDNS name, set it in your router, and create a NAT to your web server.
from your 4G device simply type the dyndns name.

0
AliS319
AliS319

Question 5 years ago

What if that IP is already in use on some network? Is there any method to assign a dynamic IP and then detect that IP on through android/java/js(through any other language, on another machine)?

0
KhaledA134
KhaledA134

5 years ago

Dear Sir
many thanks for your valuable site
is there any simple project for one led web control using meag2560+enc28c60 Ethernet module knowing that i ha succeed to run two leds using arduino uno with the same Ethernet module but regarding mega2560 i was unable to find any simple project on the web unless using an ethernet module equipped with an SD card which i don't have for now.

thanks

0
EgaN4
EgaN4

6 years ago

Great job, I just wondering once Arduino programed, is USB connection still needed or it can be controlled just by network cable over web?, thanks

0
Maruf93
Maruf93

6 years ago

Why It's not working???

0
ryankim08
ryankim08

6 years ago

i didn't work. I m using an ethernet module is it the same as ethernet shield?

0
PatrickL139
PatrickL139

6 years ago

Yeah, I made it.

Is it possible to add the LED light status on the website?

Many thanks!

0
MuzammilT
MuzammilT

Reply 6 years ago

can u send me this project code to my mail

mtmlttgi@gmail.com

0
HridoyK3
HridoyK3

6 years ago

What the program does not need this project? The program will please anyone.

0
AlvianP
AlvianP

6 years ago

hey, very nice project !

can i do this with ENC28J60?

its basically has the same eternet function but i dont know which line code i should change to make this works, thanks in advance

0
Balu_Sk
Balu_Sk

6 years ago

Hi.. I have to add more buttons and readings on the page. I know there will no enough space in the arduino. How can I modify this code and host the page in SD card.

0
mohamadhassan
mohamadhassan

6 years ago

Hi, if we want to access the arduino over the internet, what we we have to do ?
thanks in advance

0
TomH164
TomH164

6 years ago

Do you need to be on the same Internet connection to use this?

0
fefrie
fefrie

Reply 6 years ago

No you can use your home ip and foward ports to port 80 on the arduino

0
WesleyS34
WesleyS34

Reply 6 years ago

Super helpful, thank you!! I've always wondered how to control the MKR1000 from the web, this seems like a great way! Is it possible to put a login on Port 80 for security? Is that somewhere in my router settings?