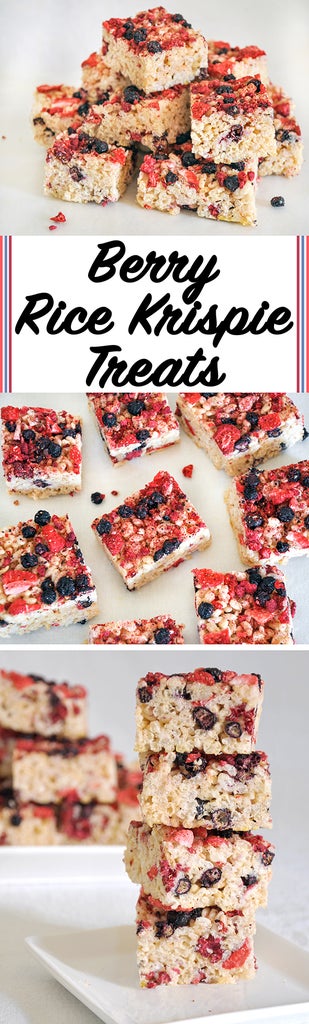
Introduction: Berry Rice Krispie Treats


Recently, I made some chocolate bark with freeze-dried fruit. I had lots of fruit leftover, so I decided to make something else. I've been craving Rice Krispie Treats so I thought I'd try adding the fruit to them. The fruitiness goes great with the Krispie treat and makes for a tasty snack (that almost feels healthy).
Step 1: Supplies

To make these, you need to make your favorite Rice Krispie treat mix. There are lots of ratios, but so you can get an idea of how much fruit you need to go with your mix, the following is how much I used. I took my recipe from Step 5 of The Best Rice Krispie Treats Instructable. Also, my treats came out a bit gooey, so I stored them in the fridge.
Ingredients:
- Rice Krispie Treat Mix
- 4 tbsp (56g) butter
- 5 cups (225g) mini-marshmallows
- 5 3/4 cups (152g) Rice Krispies
- 3 1.2oz bags of freeze-dried fruit*
Utensils:
- Pot
- Baking Dish
- Wooden Spoon
- Mixing Bowls
*I actually used what I had left in my fruit bags after making my Fruity Chocolate Bark. So, I actually used a bit less than this, but I think this is a good amount if you have full bags. I ended up having about 3 cups worth of fruit.
Step 2: Prep Fruit


You don't have to prep the fruit if you don't want to, but it doesn't take long for the marshmallows to melt, so if you are going to, do it now.
I separated out the smaller bits of fruit and ended up putting aside about 1/2 - 1 cup worth of the fruit for the top of my treats (I would say to even save the fruity dust, I thought it looked nice on top of the treats and it provided more color). Also, I left the raspberries and blueberries the way they were, but broke the strawberries up a bit so they wouldn't be just in big clumps. I just snapped the strawberries in half, so you don't need to get out a cutting board and knife or anything.
Also, putting some fruit aside for on top of the treats helps make sure that all of your treats will have fruit once they are cut up.
Mix together your fruit and the (measured out) Rice Krispies you are going to use to make your treats.
Step 3: Melt Mallows and Mix


When you are ready, make your treats. Grease your baking pan now so you're all ready.
Melt the butter and then add in the marshmallows. When the mallows are all melted, remove it from the stove and add in your Rice Krispie fruit mix.
Step 4: Make Treats


Once everything is mixed, pour it into your greased baking pan.
Using a spoon with nonstick spray, or a piece of wax paper, push your mix into your pan so it's even.
Sprinkle the fruit and fruit dust you set aside on top of your treats. Use wax paper to push the fruit into the treats so it sticks.
You're done! I stored mine in the fridge, but I don't think you need to.
Step 5: Enjoy


As usual, I took a ridiculous number of pictures of my treats and I want to share more of them. So, here they are :)


