Introduction: Broken Earphones to Your Most Treasured Pair for 99p and Some Easy Soldering
There are a few guides to repairing plugs and leads on broken earphones but these miss the much easier approach of just replacing the lead with one from a cheap set from ebay. Earphone lead and plug repairs are both difficult and unlikely to be as strong as the original. In my case I had broken the lead of my favourite Sennheiser earphones when they got caught in something I was passing. I replaced the original black lead with a nice red fabric covered, braided lead from a 99p set of earphones bought on ebay. Now not only do they work again but are as strong as new and they look great. You can also use this approach to add a microphone – just use leads from a set with a mic!
Note there is an assumption here that the fault is in the lead/plug. However this will in most cases be the case. The wires in headphone leads are quite fragile.
Tools you will need:
- Soldering iron
- Modelling knife
- Tweezers
- Meter for measuring conductivity - or small battery and bulb

Parts needed:
- A cheap set of ‘phones from ebay with really nice leads
- Broken set for repair
Steps:
- Open up the ear pieces
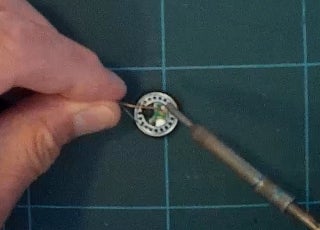
- Unsolder the leads from the speakers and check speakers are OK
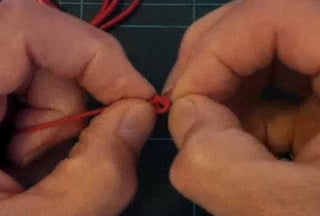
- Swap the new lead over (undoing and redoing the small knot)
- Solder the new leads in place
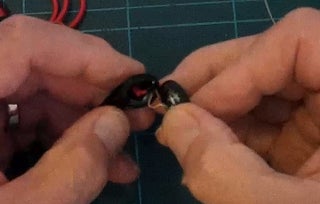
- Reassemble the earpieces.
Step 1: Disassembly
My broken earphone:

99p set from ebay with braided leads and gold plated plug:

Open up the earpieces:
This tends to be easier than it might first appear. There is usually a joint between the main body of the earphones and the cover over the speakers. Pressing a moderately sharp blade on this joint will often open it. Try applying a small force sequentially around the joint, gradually increasing the force until it gives way. Keep flesh the right side of the blade!

My Sennheiser phones were just clicked together. No glue, and clicked back just as easily.

Unsolder the leads from the speakers and check speakers are OK:
Before unsoldering note the lead colours and if there is a polarity marked on the speakers. This is usually a red spot. If possible check which is ground using a meter to the barrel of the plug. Note also that the plug tip is left and the middle-ring right.

Also check the resistance of the speakers. They should be around 16 - 64 ohms. Most earphones are 16, 32 or 64 ohms. If they are outside this then check their specification. If one speaker is different to the other and different to the specification then there is probably a fault and best not to use it. If it is lower than 16 ohms there is probably also a problem and I would check it this should be the case and whether the player is rated to drive the lower resistance.
Step 2: Reassembly
Swap the new lead over (undoing and redoing the small knot):
There is usually a simple knot to restrain the lead. Undo these and swap the leads over. Use a meter to check the right and left are the correct way around (or just move them over one at a time). Then redo the knots. The leads tend to retain their shape and so it is easy to get these made in the original places.

Solder the new leads in place:
Check which wire is which and solder them in place.

Reassemble the earpieces:
There is no harm to do a test before final assembly. Hopefully these will just click back in place. Otherwise apply a drop of cyano adhesive.

Step 3: Video Demonstration
This is a pretty easy repair. I hope the video above will give you the confidence to tackle this.
I am delighted with the outcome. I don’t have to buy a new set of phones and my repaired ones look better anyway.
Enjoy this simple fix.
Mike

Participated in the
Trash to Treasure


