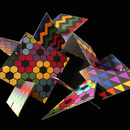
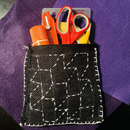
Introduction: Build a Makey Makey Drum Machine
"Got some pretty good beats on this 808 CD” —Frank Ocean, “Swim Good”
Be cool at all of the parties in 2020, with the style of the 1990's with this drum machine inspired by Roland's TR-808. Using custom graphics and Electric Paint.
The main console for the drum machine is made from cardboard or wood. You'll also need a computer/laptop or Chromebook with internal or plug-in speakers. This project requires Scratch (online software) and a Makey Makey board. See a live demo of this project:
Supplies
To make a stencil for the drum machine 'interface':
- Cardstock (heavy paper) or mylar stencil film
- X-ACTO knife
- Cutting mat
- Tape
- Permanent marker
- Stencil brush or paintbrush
To make the drum machine 'interface' using a laser cutter:
- Inkscape (vector editing software)
- Wood or cardboard
Other required supplies:
Electric paint or the DIY alternative
Small paintbrush
Step 1: Introduction: What Is a Drum Machine?
What is a drum machine? A drum machine is an electronic musical instrument that creates percussion sounds, drum beats, and patterns. Drum machines can imitate drum kits or other percussion instruments, or produce unique sounds, such as synthesized electronic tones.
The Roland TR-808 is a drum machine created by Ikutaro Kakehashi in 1980. Its unique bass drum sound is what rap artists mean when they say “turn up the 808.”
Legendary hip-hop music producer J Dilla used a machine called the AKAI MPC 3000 that is an integrated rhythm machine, drum sampler, and MIDI sequencer.
Hip-hop pioneer Hank Shocklee uses many different kinds of drum machines to create music.
Step 2: Choose Your Method
For this project, you can choose one of three options to build your Makey Makey drum machine:
Stenciling (Step 3)
Vector Graphics & Laser Engraving (Steps 4-8)
Painting (Step 9) - you can skip stenciling and laser engraving to paint directly on your base board
Once the base board is painted (with Electric Paint) and the paint has dried you can connect the board to your Makey Makey using alligator clips (Step 10)
Step 3: Design Your Interface: Stenciling
You can use a stencil to create the graphics for your drum machine interface. Stencils are cut from a thin material that can hold its form—cardboard and plastic sheets such as mylar are the best option for making stencils by hand. Mylar is easy to find online or in craft stores, and it can be cut with scissors or an X-ACTO knife.
Create a design using six (6) shapes such as from clipart. Draw the design on a sheet of paper at the scale in which you want the stencil. Then, place your stencil pattern on top of your cutting mat and put the mylar sheet on top of that. Secure both sheets with tape.
Use a marker to trace the stencil design on the mylar (you can use a q-tip with rubbing alcohol to remove). When finished tracing, remove the sheet of paper below the mylar. With an X-ACTO knife, cut out your stencil design from the mylar.
You can find a stenciling tutorial HERE or on YouTube:
Note: You can skip this option and use Electric Paint to paint a design directly on cardboard or wood (Step 8).
Step 4: Design Your Interface: Inkscape
Vector graphics can be scaled up (made bigger) without losing quality. To create laser cutter friendly files you will need to use a vector graphics editor such as Inkscape that is free and open-source.
To create your vector-based drum machine buttons:
- Launch Inkscape
- To use the tracer, import the image (make sure image is selected)
- Select: Path > Trace Bitmap
Note: Skip steps 4-7 if you created a stencil or plan to paint directly on your cardboard base.
Step 5: Choose a Filter Option
You will see three filter options. Make sure "Brightness cutoff" and "Remove background" checkboxes are selected; click "Update" or "Okay" and close the window.
Step 6: Create Leads for Your Buttons
Create leads (legs) for each of your buttons or keys:
- Delete the original imported graphic
- Choose the Rectangle tool from left side toolbar
- Drag a rectangle from the graphic to the bottom of the document
Step 7: Fill in the Rectangles
Once a rectangle or any shape is drawn you can choose colors in the Fill and Stroke box (on the right). Choose the "Fill" tab and click "Flat Color"; repeat this step for each rectangle/lead you draw.
Save your finished graphic as a PDF (or SVG for laser cutting).
Step 8: Use a Laser Cutter
Laser cutters are machines that cut materials using a beam of light as opposed to a blade. If you have access to a laser cutter you can use it to engrave your design. Laser engraving cuts through the material’s surface leaving a cavity that reveals an image that is noticeable at eye level and to the touch. In the image above, a laser cutter was used to remove material around the "buttons" and leads.
Here's a laser cutting tutorial:
Step 9: Paint Your Interface With Electric Paint
You can make your drum machine design work using Electric Paint, a non-toxic electrically conductive material that is simple to use and dries in under 15 minutes to become conductive. Artists such as Thomas "Detour" Evans uses Electric Paint to transform his paintings into MIDI instruments (see example above).
Using a small paint brush, paint your drum machine design and make sure to include the leads. Depending on which method you chose to make your drum machine design here are your options:
- Use a stencil or paintbrush to apply the Electric Paint.
- Apply the Electric Paint to the laser etched design that should appear raised and easy to see.
- Neatly apply the Electric Paint directly to the cardboard base using a paintbrush.
Once the Electric Paint dries you can use alligator clips to connect each painted lead to the Makey Makey.
You can seal or protect the paint using this tutorial: https://www.instructables.com/id/How-to-Seal-Electric-Paint
Step 10: Set Up Scratch and Makey Makey
The Makey Makey can replace the computer keyboard and act as the 'controller' for Scratch and your custom cardboard/Electric Paint drum machine.
You can do this by importing sound files into Scratch, writing code for the computer's keyboard and connecting the Makey Makey to replace the keyboard. To use Scratch follow these steps:
- Go to the Scratch website
- Click the "Start Creating" button
- Click the "Sounds" tab and the add (+) sound button near the bottom left of the project window
- Drag & drop code blocks to create the trigger sounds (see image above)
- Code blocks are color-coded (ex. yellow for "when 'up arrow' key is pressed").
- You can change the keys and create code for each key/sound.
Note: Sample sound files have been provided.
To set up Scratch for the Makey Makey follow the tutorial HERE.
Next, set up your Makey Makey with the computer. Use the alligator clips to connect the Electric Paint-ed drum machine (i.e., painted leads) to the Makey Makey.
Now have fun making music!
This work is made possible by support from STAR, a Biogen Foundation Initiative. The team at Lesley supporting this initiative includes faculty and staff in the Lesley STEAM Learning Lab, Science in Education, the Center for Mathematics Achievement, and other related Lesley University departments and programs.


