

Introduction: Building a Modbus Client With XIAO ESP32C3 to Read Holding Registers of Modbus TCP/IP Devices


Modbus is a widely used communication protocol in industrial automation for interfacing various electronic devices. In this tutorial, we will explore how to create a Modbus client using the XIAO ESP32C3 microcontroller to read holding registers of Modbus TCP/IP devices. The XIAO ESP32C3, equipped with Wi-Fi connectivity, allows us to establish communication with Modbus TCP/IP devices over a network.
Supplies
- XIAO ESP32C3 microcontroller board
- A Modbus TCP/IP device (e.g., PLC, sensor, or any other Modbus-enabled device or Simulator)
- Arduino IDE installed on your computer
- Basic understanding of Modbus protocol
Step 1: Install Modbus Library
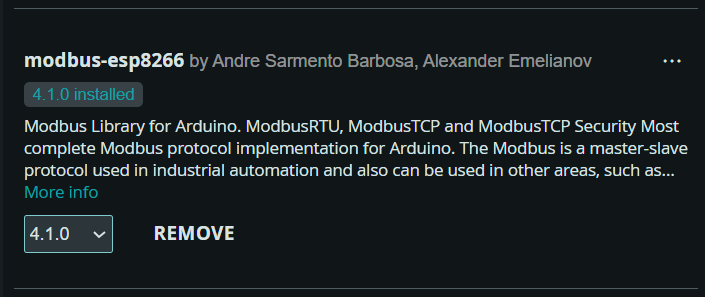
To communicate with Modbus devices, we need to install the Modbus library. Follow these steps to install the library:
- Open the Arduino IDE and navigate to Sketch > Include Library > Manage Libraries.
- Search for "modbus-esp8266" and install the "modbus-esp8266" library.
Step 2: Writing the Code
Now, let's write the code to create a Modbus client using the XIAO ESP32C3. Below is a sample code snippet to read holding registers from a Modbus TCP/IP device:
#include <WiFi.h>
#include <ModbusIP_ESP8266.h>

const char* ssid = "YourWiFiSSID";
const char* password = "YourWiFiPassword";

IPAddress remote(192, 168, 1, 7);  // Address of Modbus Slave device
const int START_REG = 0;           // Starting holding register
const int NUM_REGS = 10;           // Number of holding registers to read
const int INTERVAL = 5000;         // Interval between reads (in milliseconds)

WiFiClient client;
ModbusIP mb;

uint16_t res[NUM_REGS];
uint8_t show = NUM_REGS;  // Counter for displaying values
uint32_t LastModbusRequest = 0;  // Variable to track the last Modbus request time

void setup() {
  Serial.begin(115200);

  // Connect to WiFi
  WiFi.begin(ssid, password);
  while (WiFi.status() != WL_CONNECTED) {
    delay(500);
    Serial.print(".");
  }

  Serial.println("");
  Serial.println("WiFi connected");
  Serial.println("IP address: ");
  Serial.println(WiFi.localIP());

  // Initialize Modbus client
  mb.client();
}

void loop() {
  if (millis() - LastModbusRequest >= INTERVAL) {
    LastModbusRequest = millis();

    if (mb.isConnected(remote)) {
      // Read holding registers from Modbus Slave
      uint8_t transaction = mb.readHreg(remote, START_REG, res, 10, nullptr, 1);

      // Wait for the transaction to complete
      while(mb.isTransaction(transaction)) {
        mb.task();
        delay(10);
      }

      // Print holding register values
      Serial.println("Holding Register Values:");
      for (int i = 0; i < NUM_REGS; i++) {
        Serial.print("Register ");
        Serial.print(i);
        Serial.print(": ");
        Serial.println(res[i]);
      }
    } else {
      // If not connected, try to connect
      mb.connect(remote);
    }
  }
}
Replace "YourWiFiSSID" and "YourWiFiPassword" with your Wi-Fi credentials. Also, set the serverIP variable to the IP address of your Modbus TCP/IP device.
Step 3: Upload the Code
Connect your XIAO ESP32C3 board to your computer using a USB cable. Select the correct board and port from the Tools menu, then click the "Upload" button to upload the code to your XIAO ESP32C3 board.

Step 4: Testing
Once the code is uploaded successfully, open the Serial Monitor in Arduino IDE. You should see the XIAO ESP32C3 connecting to your Wi-Fi network and then attempting to read holding registers from the Modbus TCP/IP device. If everything is set up correctly, you should see the data received from the Modbus device in the Serial Monitor.

Step 5: Conclusion
In this tutorial, we've learned how to create a Modbus client using the XIAO ESP32C3 microcontroller to read holding registers from Modbus TCP/IP devices. With this knowledge, you can now build your own Modbus-enabled IoT applications and integrate them into industrial automation systems. Experiment with different Modbus functions and parameters to explore more functionalities offered by the Modbus protocol.


![Tim's Mechanical Spider Leg [LU9685-20CU]](https://content.instructables.com/FFB/5R4I/LVKZ6G6R/FFB5R4ILVKZ6G6R.png?auto=webp&crop=1.2%3A1&frame=1&width=306)


