Introduction: CSCI-1200 Project 1: Morse Code
In this lab you will be using pushbuttons, a LCD screen and an LED to display Morse Code values for all letters in the alphabet.
Hardware you will need:
1. Arduino Uno
2. LCD screen
3. Pushbuttons
4. Potentiometer
5. LED
6. Breadboard
7.Wires/Connectors
Libraries Needed:
1. LiquidCrystal
Step 1: Connect LCD Screen
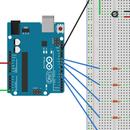
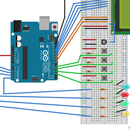
Connect the LCD into the Breadboard. The LCD's pin will be connected to the Arduion in the following order:
- Ground
- Power
- Pin 11
- Pin 10
- Pin 9
- Pin 8
- Empty
- Empty
- Empty
- Empty
- Pin 7
- Ground
- Pin 6
- Potentiometer (Connected to Ground and Power)
- Power
- Ground
Step 2: Add a Pushbutton
Insert the first pushbutton into the breadboard. The pushbutton is connected using two jumper wires and a 10k Ω (ohm) resistor.
- Place one jumper wire on the bottom left side of the button and connect to the power rail.
- The second jumper wire will be connected to port 2 of the Arduino.
- The resistor will be connected on the bottom right side of the button and the ground rail.
Step 3: Add Three More Pushbuttons
Follow the same steps from Step 2 to add three more push buttons to the breadboard. These three buttons will be used to input different letters from the alphabet: button 1 inputs A-J; button 2 inputs I-R; and button 3 inputs S-Z. The fourth button will be used for an Enter button.
Step 4: Connect an LED
An LED of any color will be used to display the Morse Code value of the letters.
- Place the LED anywhere on the breadboard
- Connect a jumper wire from the ground rail to the bottom lead (-) of the LED
- Using a 220 Ω (ohm) resistor, connect the one end to the top lead (+) of the LED and the other end will be connected to Pin 12 of the Arduino.
Step 5: Morse Code
Morse Code is a form of transmitting information as a form of tones, lights, or clicks. An LED is used to accomplish this in this lab. Each letter of the alphabet is represented using either a short blink, called a dot, or a longer blink called a dash. The code for this lab sets a dot to be 300 milliseconds and a dash to be 900 milliseconds.
Image Source: https://www.schoolofsurvival.com/wp-content/uploads/2015/09/morse.jpg
Step 6: Code for Morse Code Display
Attached is the 1200_Project1_MorseCode.ino which contains all code needed to convert a letter selected by a push button to Morse Code shown on a LED; as well as, displaying the chosen letter on the LCD screen.


