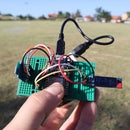
Introduction: Controlling a Light Bulb With Google Sheets
Hi Everyone,
When it comes to IoT devices, there are many ways that you can control them. There are fancy ways of controlling them like using Alexa or Google Home but a very unusual and extremely simple way is controlling them through Google Sheets.
Stick around to see how it is done and how you can create a similar system of your own.
Supplies
Tools and materials used in the video:
- NodeMCU - https://s.click.aliexpress.com/e/_dXcZIcB
- 5V 1 Channel relay module - https://s.click.aliexpress.com/e/_d7lyZwf
- Dupont jumper wires - https://s.click.aliexpress.com/e/_dYyS7jt
- Mini breadboards - https://s.click.aliexpress.com/e/_dX3jA75
- Light bulb - https://s.click.aliexpress.com/e/_d8rE5Fh
- Quick wire terminals - https://s.click.aliexpress.com/e/_dSrV9Pp
Step 1: Wire Up the Electronics
For the purposes of this demonstration, I’ll use a NodeMCU board but the same can be done with any other Internet-enabled microcontroller.
Here, a single channel relay is connected to the board through pin D0 while the 5V relay VCC pin is connected to the Vin pin, getting the full 5V from the USB cable. On the relay, we use the negative trigger pin so the relay will turn on once the D0 pin goes low.
On the same pin, the NodeMCU board has one of its onboard LEDs connected that is also turned on, once the pin is pulled low. This will serve as an indicator that the output is triggered.
Step 2: Prepare the Google Sheet
As I said, to control this device I’ll be using Google Sheets and for that, I’ve created a new spreadsheet with the name of my device and a cell below it where the input control will be written. In my case, the cell address is A5 and we will later need this information to tell the Arduino code where to look for it.
In one of my previous videos, I showed you how you can add custom functions to any Google Sheet and we will use the same method here but now instead of creating a function that can be called from inside the sheet, we will use a special one that can be called externally as an API.
The method that we will add to the spreadsheet is called doGet and it will be called when we make a GET request later through the spreadsheet API URL.
The method accepts one parameter and inside it has all of the information regarding the request that we will make. What we are interested in, are the parameters that are sent with the request, specifically, the read parameter.
We first check that this parameter was properly sent and if it was, we use it as an address to the cell that we want to read from. The value of it is then taken and sent back to the caller as a textual response so it can be parsed and acted upon.
Additional to the function, we also have two more lines of code where we specify the spreadsheet and the inside sheet from where we want to read the values. This is really important and necessary as the Arduino will access this without having the spreadsheet opened so it needs to know which one it is.
The spreadsheet ID can be extracted from the editing URL of the Google Sheet and it is the part in-between ‘spreadsheet/d’ and ‘/edit’ in the URL. The second parameter is the actual sheet name and this can be taken from the bottom tabs where all of the sheets are shown.
The code is now ready to be published as a web application so we can get a URL that we can call from the device. To do this, we can click on Publish -> Deploy as web app and the appropriate window will come up.
In this window, at the top, we get the URL on which we can access our application and the part that is between ‘macros/s’ on the left and ‘/exec’ on the right is the script ID that we will need to paste inside the Arduino code on the device.
Below the URL, we have the project version number and it is really important to note that whenever you make changes to a published code, you need to publish it as a new version in order for them to be publicly visible and functional. Unless you do that, the URL will still call the last published version and not the latest code.
Finally, we need to specify the authorization for the script and also set the access level for it. In our case, we need to select our logged in user and also make the script public, by selecting that “Anyone, even anonymous” can access the application.
Once the script is published, we can use the URL inside the browser, but we will append “?read=A5” at the end to send in the parameter that we are set to read. If everything is setup right, you should see the content of the A5 cell in the browser.
At the end of the Instructable, there will be a link to my spreadsheet from where you will be able to copy it in your Drive along with the code and give it a try if you want. Keep in mind that in such a case, the generated ID will be different, and also the published script id will also be different than mine so you will need to replace them.
Step 3: Prepare the Arduino Code for the NodeMCU
Now with the control part done, we can turn our attention to the Arduino code and how we need to set it up. To start, there will be a link at the end of this Instructable to the GitHub repository of the project so you can download it and replace just the necessary parts.
At the beginning of the sketch, we include two files. The first one is for the WiFi connection and the second one, HTTPSRedirect, is the one that actually is the star of the entire project. This is a custom class written by the electronicsguy that allows the microcontroller to follow any redirects that a URL might return until it reaches a page that actually returns content.
The way that Google Sheets works, the initial script URL that we got, will make multiple redirects until the result of the script is shown. With the regular http client library, we can only execute a single request and if that request returns a redirect, then we are left with no content returned.
So, next in the Arduino sketch, we have the specifications for the WiFi that we will connect to, and then we have the script id and the cell address from where we want to control our device. Make sure to replace these with yours appropriately as you created the Google Sheets document earlier.
At the beginning of the setup function, we specify the relay pin, Arduino pin 16 in my case, and we then connect to the specified WiFi network.
Once we are connected, we print out the IP we got from the router and we then continue to instantiate the HTTP client that we will then repeatedly use to access the script URL.
If the connection was successful, we initiate the get request to get the data from the cell and if it does successfully, we get the returned value and compare it with several predefined values that indicate that the output of the relay should be on.
In my case, I’ve used few that logically represent an on-state like 1, different variations of the word on and true as a boolean value. Keep in mind that what you are comparing here is a string and it is case-sensitive.
Whenever there is a match, we pull the output pin low, and that turns on the relay that is connected to it. In any other case, the output will be pulled high and the light attached will be turned off.
At the end of the sketch, it is important that we add some delay so we don’t overwhelm the server with requests but keep in mind that this delay will affect the response time of the connected light. Keeping this in the realm of a few seconds is a nice balance.
Step 4: Going Further
Now that we have the entire system setup, it is really easy to add additional devices that will be programmed to just use a different cell address and maybe even use the value in the cell to set the desired temperature, humidity levels, or anything else that can even be combined with logging of certain data to the same excel where the trigger values can be formulas that calculate the input based on the logged data.
If you have any ideas for such a system where this can be used, let me know down in the comments and if there is enough interest I can work on creating a project like that in a future video. Be sure to like this one, hit the subscribe button, and bell notification icon and I will see you all in the next one.
Cheers and thanks for watching!
To start a system like this you can copy my spreadsheet from the link below:
https://docs.google.com/spreadsheets/d/1-8Tn9usMtX...
The full source code for the Arduino device and the Google Sheet can be found at: https://github.com/bkolicoski/arduino-google-shee...


