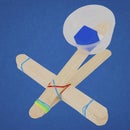
Introduction: Cork Launcher
Quick to build, the trigger launcher offers ample opportunity to customize your design.
Build a triple-shooter, or a super long one to maximize the energy harnessed from the rubber band!
You can find the lesson plan, 1-page project sheet, and more project ideas at STEM-Inventions.com
Project Goal: Students build and modify a simple trigger-release cork launcher that fires at least 10 feet
Design Variables: Number of rubber bands, length of the launcher, number of combined launchers
Key Concepts
- Trajectory is the path that an object follows through the air or other fluid
- Trigger is a device that sets off a mechanism
Prep: Carefully cut corks into quarters (2 per student)
Safety: Always aim cork launchers away from people, even when unloaded.
Step 1: Materials
The Engineering Creation Kit has everything you need for this project and many more from STEM Inventions.
For the basic model, you'll need:
When you make a purchase through these links, I may earn an affiliate commission at zero cost to you.
Step 2: Frame and Trigger
In the first picture, the sticks appear to be long shallow steps, descending from right to left. This is necessary because the rubber band will be released from right to left. If the edge of the craft stick is exposed, it may catch the rubber band and cause the shooter to not work properly.
Two cubes are placed close together on one end to support the trigger. This will make more sense in the next step.
Finally, the trigger (clothespin) is glued on.
Step 3: Attach the Rubber Band
The rubber band that is used to fire the cork is simply taped to the front of the shooter.
Bonus! If you choose not to tape the rubber band to the front, then you'll have a rubber band launcher!
Step 4: Load and Fire!
Use a utility knife or other tool to cut a piece of cork into a disk shape. This will help tremendously with the aerodynamics of cork.
To load: use two fingers to pull the rubber band back into the open trigger. Close the trigger, then let go of the rubber band. Insert the cork disk between the strands of taut rubber band.
Launching is easy: just aim and push the clothespin!
Try to limit the number of cork disks the students can take home
Step 5: Advanced Ideas: Hinged Double Launcher, Cork Launcher Car
The skewer can be slid out of the frame, which allows for different cork launcher designs to be interchanged. The example pictured has a basic cork launcher and an arrow launcher.
An arrow launcher fires projectiles that are identical to these. The basic example has one modification: a pair of small guide sticks glued at the front of the launcher. This increases reliability and accuracy.
The Cork Launcher Car is more than just a cork launcher on wheels. A craft stick glued to the end of the clothespin acts as a trigger. When the car is pushed into a wall, the craft stick leverages the force of the impact to open the clothespin, which automatically launcher the cork. Be Careful! Always place yourself to the side of the car's path. Never position yourself directly in the path of the launcher. This is esay to forget because it is very intuitive to push the car directly away from oneself. Always stay to one side.
Step 6: Tips and Troubleshooting.
- The design in this Instructable shows the cork launcher in its simplest form. Encourage the students to make modifications.
- Don't allow the students to launcher craft cubes. It is much denser and performs better than cork disks, but it is also more dangerous.
- This activity is very easy - older students may complete it in as little as 10 minutes. For added longevity, set up targets or other challenges.
- As students are building, make sure that they do not accidentally make a mistake on the first step. An edge of a craft stick or other imperfection that impedes the release of the rubber band is not uncommon and takes time to fix.
- You may want to tape the rubber band on for some students. It's a quick thing to do, and younger students tend to struggle with it.
- If a student is having trouble loading the cork launcher, show him/her how to load it in 3 steps or less, i.e. 1. Hold the launcher in one hand and use that hand to open the clothespin 2. Use two fingers to pull the rubber band back into the clothespin 3. Release the clothespin, then the rubber band.

Participated in the
Pocket Sized Contest


