

Introduction: Creating a Keyboard With Only Two Buttons (Ctrl+C, Ctrl+V) Through DeviceScript Has Been Said to Improve the Efficiency of Programmers😂


Creating a Keyboard with Only Two Buttons (Ctrl+C, Ctrl+V) through DeviceScript has been said to improve the efficiency of programmers😂. Another aim is to familiarize oneself with the programming techniques for multiple identical modules under the Jacdac protocol.
Supplies
KB Brain RP2040 x 1
KB KeycapButton x 2
Jacdac Cable x 2
LEGO bricks x 1
3M adhesive

Step 1: Launch Visual Studio Code
Choose DeviceScript.
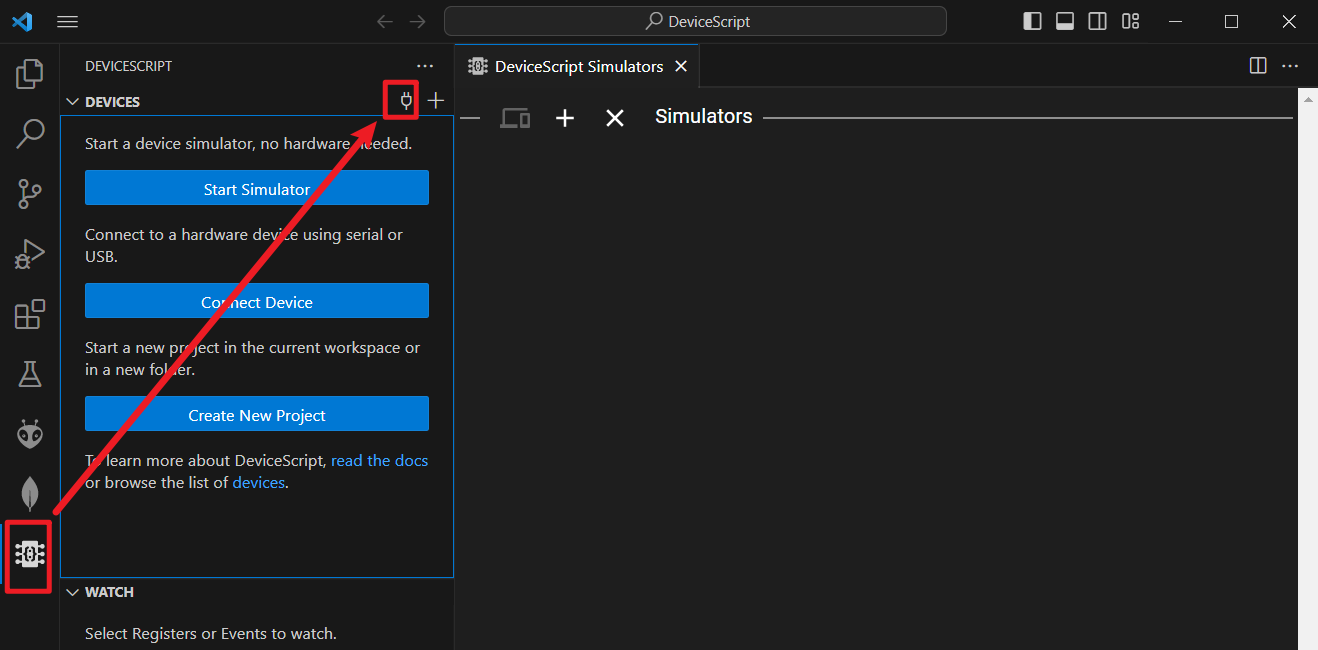

The software automatically detects three devices: KB Brain RP2040 and two KeycapButton. If you are still unable to connect at this point, please refer to the DeviceScript configuration tutorial mentioned in the previous article.

Step 2: Programing
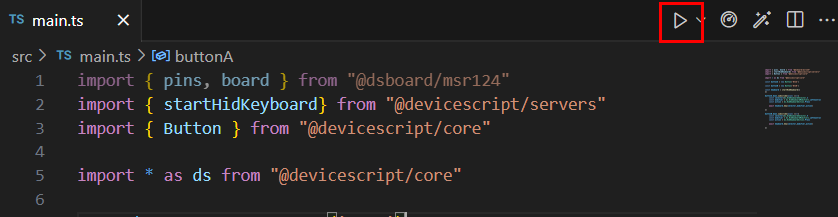
Open the "main.ts" file in the DeviceScript environment.

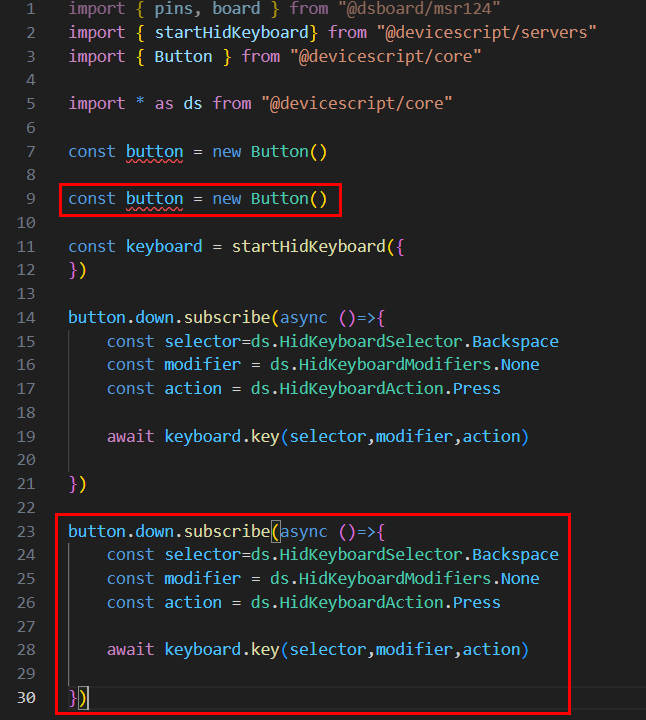
Do you remember the single button program from last time?

Simply follow the format and add another button accordingly.
It is evident that the following program is incorrect; what we need to do is distinguish between the two buttons.
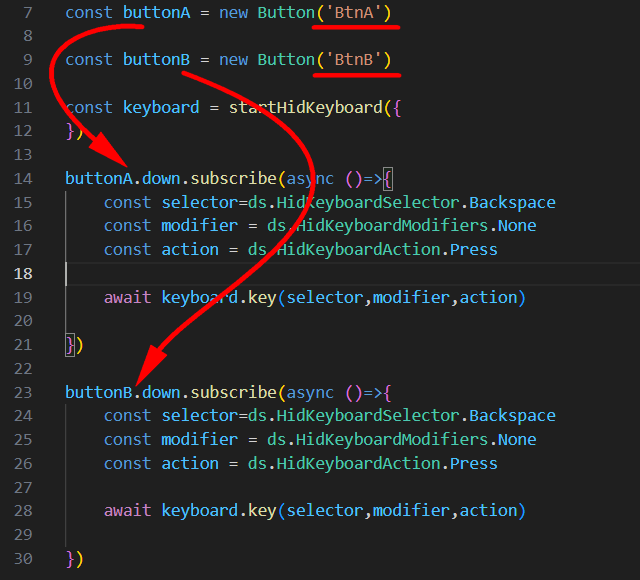
Revise the program once again to differentiate between buttonA and buttonB.
Make further amendments to specify the attributes of the buttons, and thus the task will be complete.
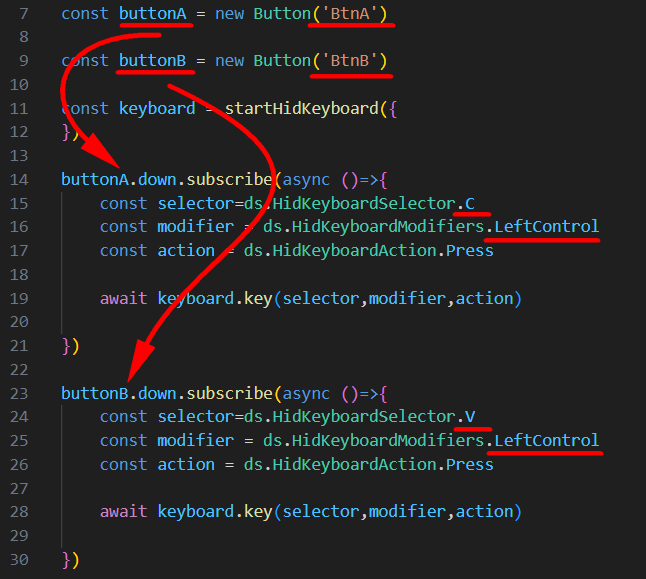
Please provide the complete code for reference.
import { pins, board } from "@dsboard/msr124"


import { startHidKeyboard} from "@devicescript/servers"


import { Button } from "@devicescript/core"


import * as ds from "@devicescript/core"


const buttonA = new Button('BtnA')


const buttonB = new Button('BtnB')


const keyboard = startHidKeyboard({


})


buttonA.down.subscribe(async ()=>{


const selector=ds.HidKeyboardSelector.C


const modifier = ds.HidKeyboardModifiers.LeftControl


const action = ds.HidKeyboardAction.Press


await keyboard.key(selector,modifier,action)


})


buttonB.down.subscribe(async ()=>{


const selector=ds.HidKeyboardSelector.V


const modifier = ds.HidKeyboardModifiers.LeftControl


const action = ds.HidKeyboardAction.Press


await keyboard.key(selector,modifier,action)


})
Click the "Run" button to successfully upload the program to the motherboard.
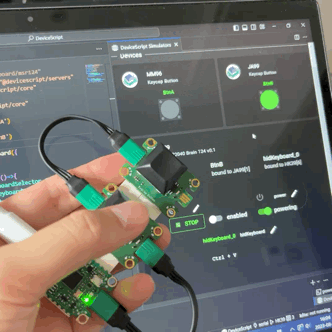
The buttons have been bound to specific names as shown in the diagram. BtnA is bound to the key MM96, and BtnB is bound to JA99. If this does not meet your expectations, you can modify the code accordingly.

Step 3: Experimental Findings
Simulation Results: When clicking on the string associated with BtnA or BtnB in the emulator, a "Select a role" window will pop up. Selecting a role temporarily does not have any noticeable effect, and the purpose is yet to be determined.

Let us proceed with an attempt to observe the outcome.

Step 4: Additional Tutorials Are Available for Further Guidance
This tutorial aims to swiftly familiarize you with DeviceScript.
For further study materials, you can refer to the following sources:
DeviceScript | DeviceScript (microsoft.github.io)
The TypeScript syntax documentation for Jacdac can be found at:


