

Introduction: How Can I Run Teachable Machine on a Microcontroller?


This compact device operates independently from a computer, allowing users to conveniently experience the fascination of machine learning.
Supplies
Materials
Microbit (or Arduino, or other boards with serial ports)
Sugar-Camera (a circuit board based on ESP32-S3)
Robotbit expansion board (for IO port conversion and power supply)
A few Lego structural components (for building the framework)
MicroUSB data cable and PH2.0 4PIN connector cable
software
Teachable Machine(Teachable Machine)
MakeCode(https://makecode.microbit.org/)
KittenBot_Teachable Machine(A compact tool designed by Xiaomiao Technology that seamlessly connects microcontrollers with the Teachable Machine platform.)
Step 1: What Is Teachable Machine?
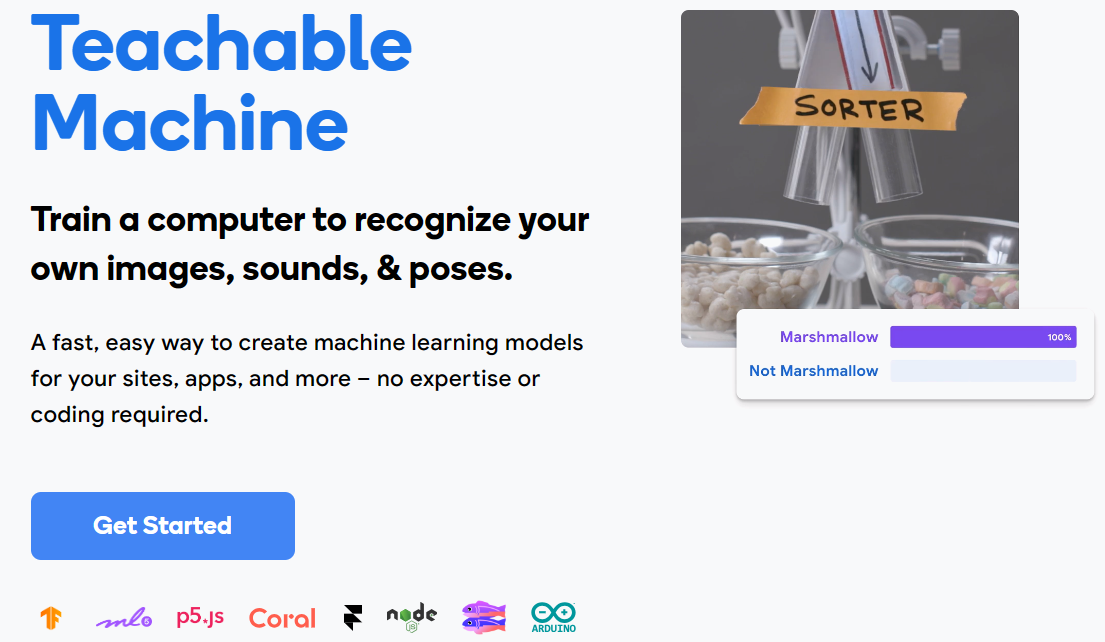
Teachable Machine is an online tool developed by Google that aims to empower users to train their own machine learning models through simple interactions. It eliminates the need for coding, instead allowing users to gather data through features like cameras, microphones, and image uploads. With this data, users can train their models by providing different labels and examples. Teachable Machine automatically analyzes and learns from these examples, enabling it to recognize and categorize similar data in the future.
This tool can be used for various applications, including image classification, pose recognition, sound recognition, and more. It is especially well-suited for beginners and educational purposes.
Step 2: Pain Points
Most of the time, online tutorials focus on teaching how to utilize a camera for model training and then recognize the results on a computer. However, for some small projects, we desire to operate independently from a computer. We aim to import the trained model into a microcontroller and control sensors such as displays and servo motors based on the outcome.
Step 3: The Objective and Significance of This Project
To achieve a machine learning object classification system independent of a computer, our goal is to import the trained models from Teachable Machine into a microcontroller with an integrated camera, specifically the ESP32-S3. By establishing a serial connection with the Microbit, we can accomplish the desired outcome.
This compact device operates independently from a computer, allowing users to effortlessly and conveniently experience the fascination of machine learning. It serves as a tangible manifestation of the accomplishments achieved solely through software-based learning in Teachable Machine, enhancing the enjoyment of the learning process.
Step 4: Connecting Sugar-Camera to a Computer
Please ensure that Sugar-Camera has been flashed with the dedicated firmware for Teachable Machine.

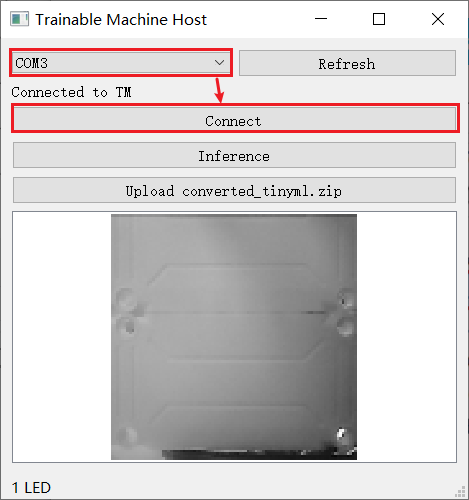
Step 5: Connecting the KittenBot Teachable Machine Widget
Open this tool
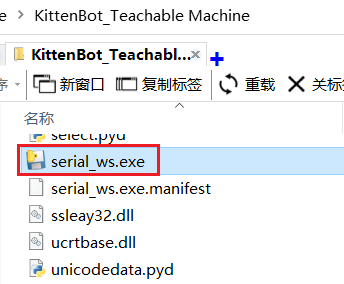
Establish a connection with the serial port of Sugar-Camera. Upon successful connection, the interface will display the image feed.
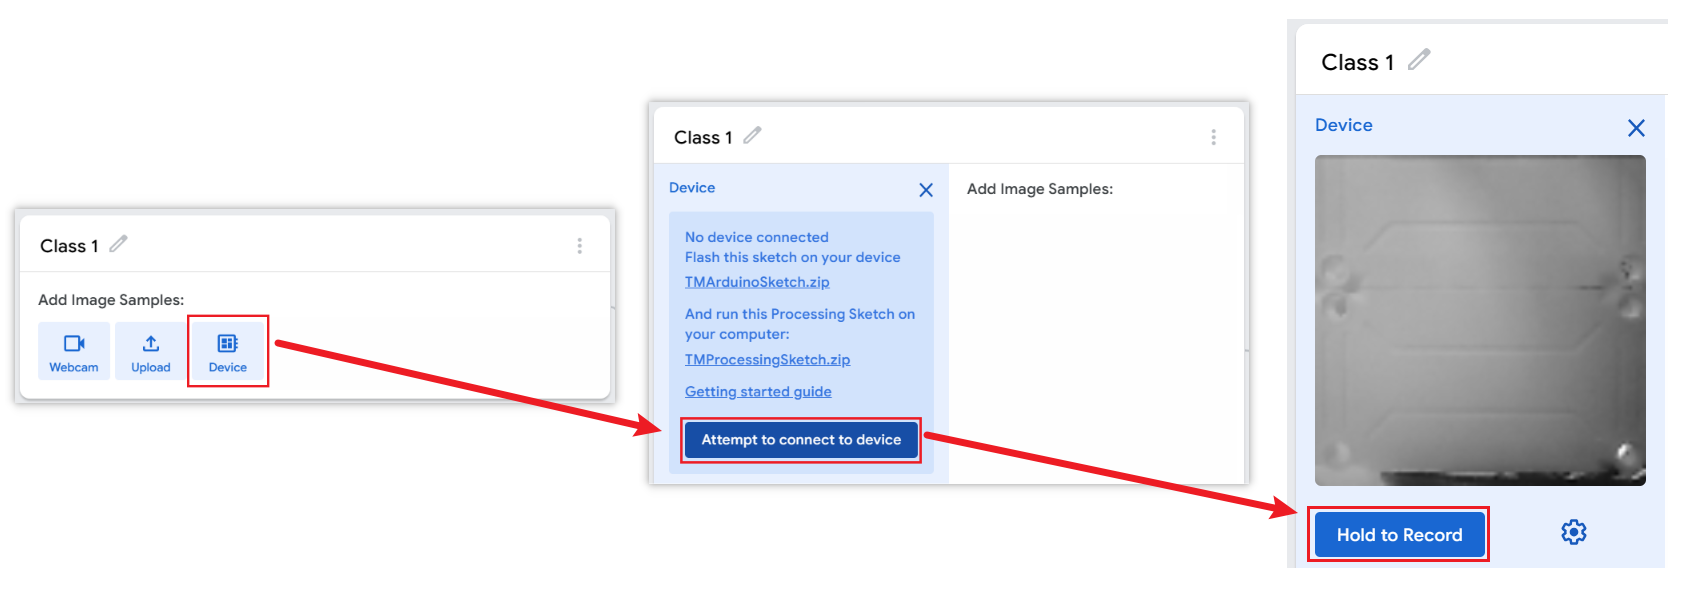
Step 6: Create a New Project on the Teachable Machine Platform
Follow the instructions shown in the diagram below to create a machine learning project for the microcontroller.

Step 7: Input
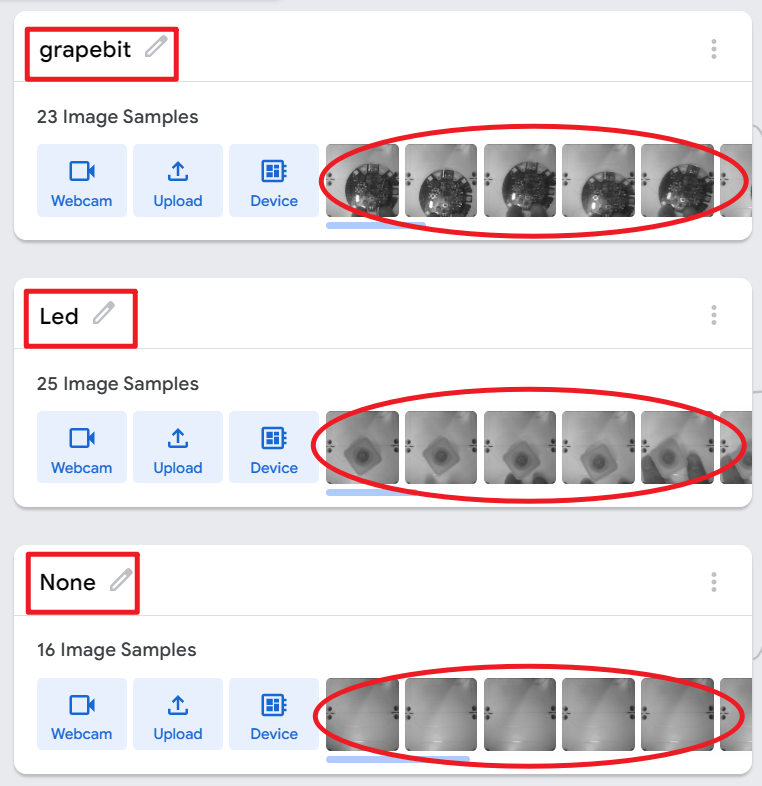
Collect different samples according to the instructions in the diagram below.
Three categories have been recorded here, namely grapebit, LED, and None
The names of the categories can be modified. The recorded images can be individually deleted or further added. Generally, a recognition effectiveness of over 20 images is sufficient.
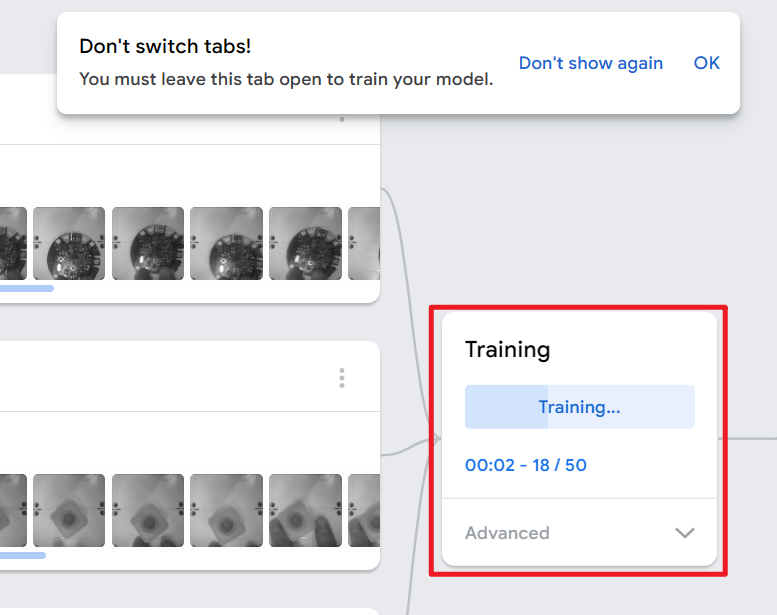
Step 8: Training
Click on "train" and await completion of the training process.
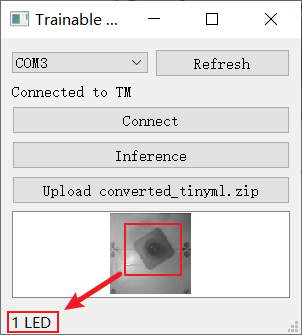
Step 9: Testing
Establish a connection with the device
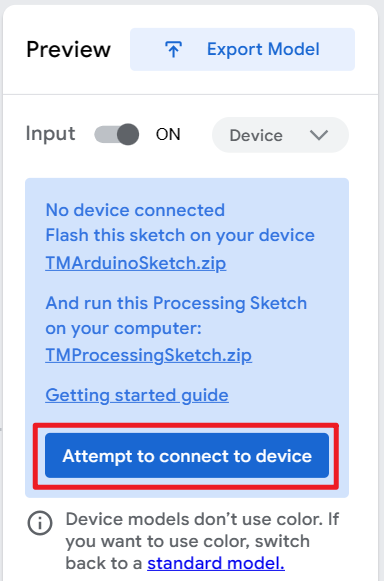
Examine and assess the identification of three objects. In the event of inaccurate recognition, proceed with the collection and input of additional data into the model, followed by training and subsequent testing. Repeat this cycle to ensure continuous improvement.

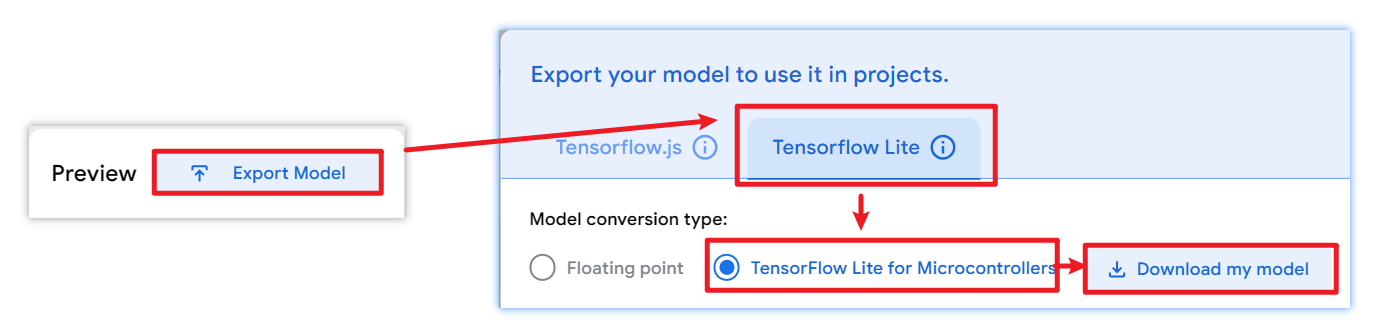
Step 10: Export the Model
Upon confirming that the recognition performance of the model meets the requirements, proceed with exporting the model for integration into a microcontroller.
Step 11: Transfer the Model to the Microcontroller
Utilizing our proprietary tool, transmit the compressed ZIP package containing the model to the Sugar-Camera device.
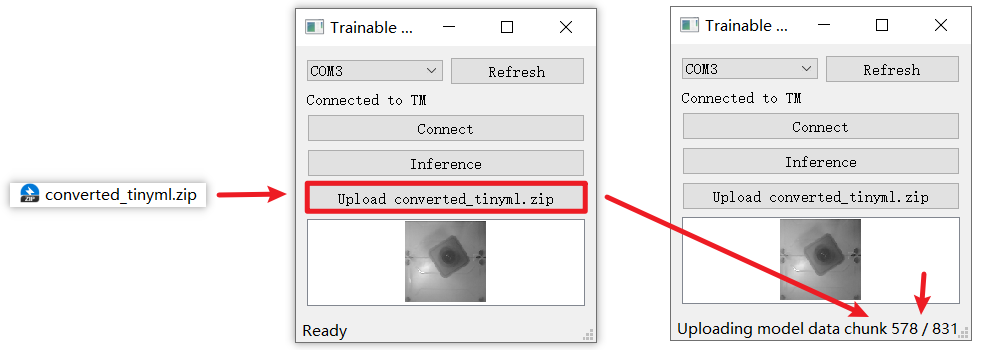
Reconnect once again to obtain the recognition results.
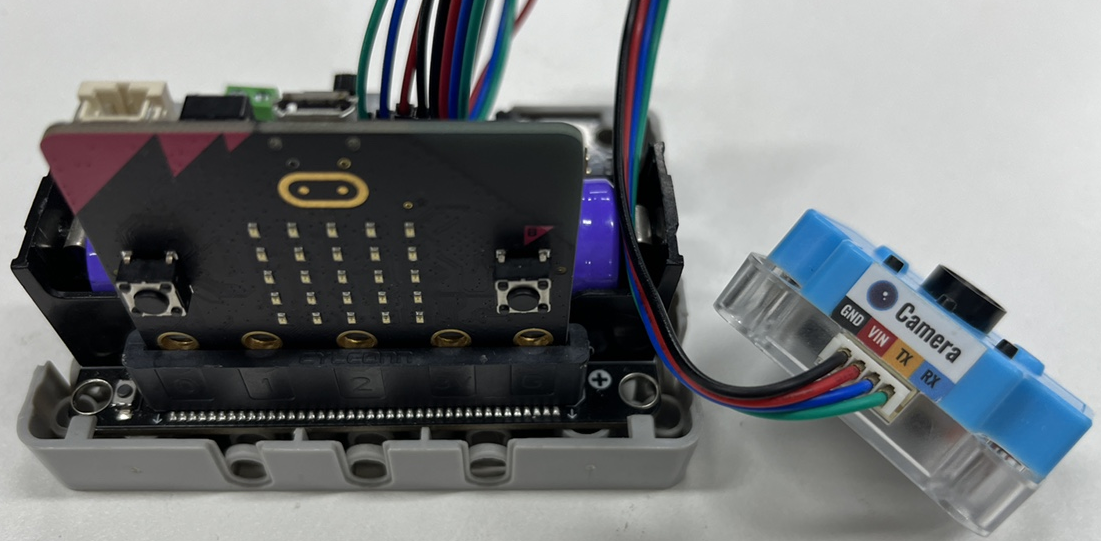
Step 12: Establish a Serial Connection for Communication
Establish a serial connection between the Microbit and the Sugar-Camera.
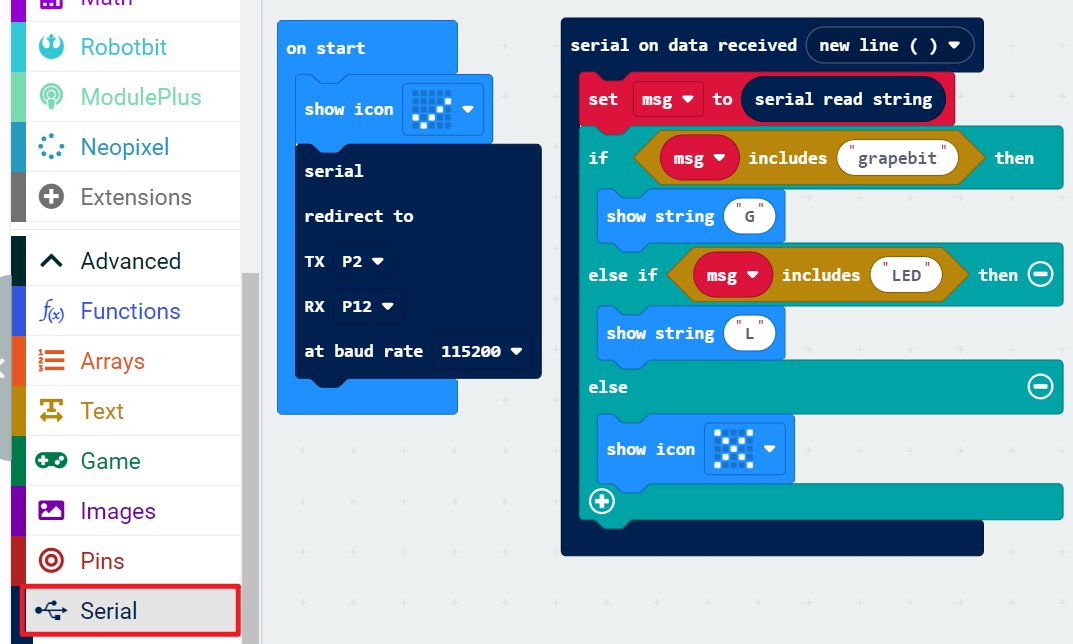
Step 13: Compose a Program for the Microbit
Source code of the program:
https://makecode.microbit.org/_PuvHgaWR27PT
The program, as shown in the image, requires you to modify the pins and the identification type name for the Serial. Once you have made these changes, proceed to download the program.
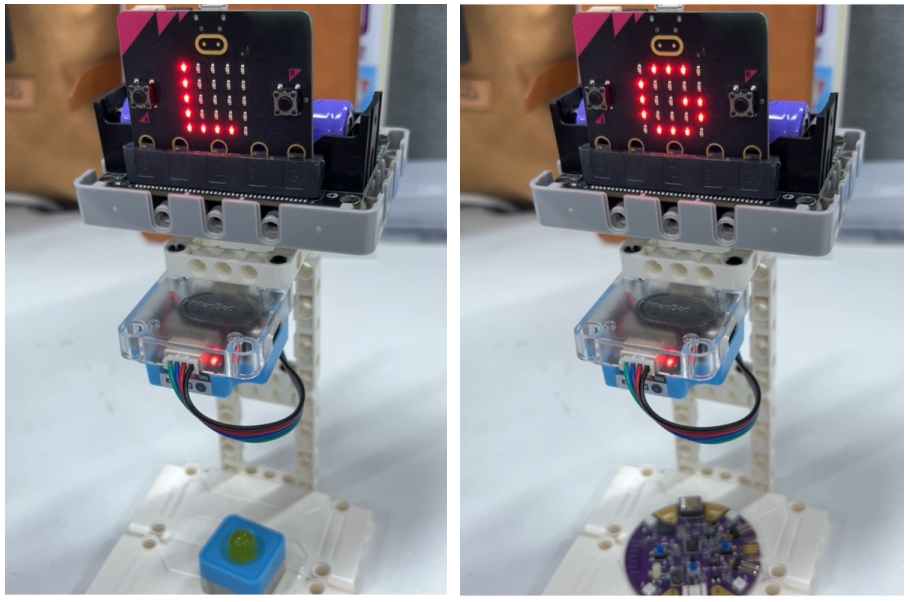
Step 14: Recognition Test
Recognition Test
Step 15: Epilogue
The exported model images from Teachable Machine's microcontroller project are 96x96 in size and in grayscale, which limits the recognition performance to some extent.
To enhance the recognition rate, it's advisable to select objects with significantly distinct shapes and appearances.
It is hoped that Teachable Machine can gradually expand its capabilities, allowing for larger sample image sizes and the inclusion of various colors. This expansion would greatly improve the recognition effectiveness.


