

Introduction: Customize Your MagicBand With Duct Tape


Last December, my parents coordinated with extended family to take a trip to Disney World. Shortly before our trip, several boxes of Magicbands were delivered.
What’s a magicband? It’s a bracelet with an RFID tag inside that connects with various “stations” throughout the park. You can use the magic band to pay for your meal or merchandise, use a fastpass, enter the park, enter your resort room, as well as other abilities.
Guests staying on-property receive them in advance of their trip while anyone else can pay about $13 for one online or at the park (there’s also a free card alternative). The bands come in 7 basic colors.
With so many bracelets, we had multiples of each color. So, it became my job to customize them and make them easier to tell apart.
Come the eve of our trip, I realized that I hadn’t done anything to my band. Looking for a simple fix, I used duct tape to customize it.
Supplies:
Duct Tape (or any decorative tape that’s at least 2 inches wide)
Nail polish (optional)
Nail polish remover (optional)
Scissors/hobby knife/electronic cutter


Step 1: Step 1 (optional): Nail Polish on the Indented Section


In the middle of each magicband, there’s a faint mickey. To make it pop out, paint it with nail polish. I recommend black or white for the indented section and any color of your choosing for the raised section.
First, choose your indented color. Paint the section, and don’t worry about any polish getting on the raised portions.
Once the indented section is completely full, let it dry. Now take your nail polish remover and rub gently on the surface. This will remove any stray polish on the raised portions without damaging the indented section.
In the picture, the indented section is white while the raised portion is black.
Step 2: Step 2 (optional): Nail Polish on the Head

Now pick a second color for the head. Try a more vibrant color or a pastel for a greater effect. Lightly brush on the polish onto the raised section. If you find this hard to do, wrap the band around a water bottle to make it easier.
In the above picture, the raised portion is red to contrast the yellow band.
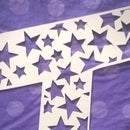
Step 3: Step 3: Cut Your Duct Tape


Measure your magic band. The cut file here is for the smaller sized magic band. This means it won’t cover the removable grey border. The band is about 8 inches long and an inch wide at its widest point. At the bottom, it’s about a quarter of an inch.
I’ve designed a template with a mickey head cut out. It doesn't match up exactly with the mickey head on the band but comes close. You could substitute this for a different shape based on your duct tape choice. For example, you could cut out an apple-shaped hole for a Snow White tape or a snowflake for Frozen.
Cut out the design on copy paper first until you find the sizing close enough to the band.
Once the template was done, I placed the duct tape on a cutting mat and cut to size. If you find removing the duct tape from the cutting surface difficult, use a butter knife or scraper to lift it up gently.
Step 4: Apply the Duct Tape and Seal


Starting from one end, gently apply the duct tape, smoothing as you go.
Use a credit card or another flat device to remove any air bubbles.
Gently poke at the holes with a toothpick, pen, or other small object. Then fasten the band on each setting.
You can use clear nail polish to seal the duct tape on. I didn't use this on mine and, as shown in the pictures, it did start to fray a bit (this was taken several weeks later however, it stayed in tact during the trip).
If you want to change the duct tape between trips (passholder not staying on property), just forgo the nail polish and the band will stay pristine underneath the removable tape.
Note on Customization: You can choose in advance what color bracelet you want on the mydisneyexperience website. If you know what duct tape you'll be using, pick a band color close to it. In my case, the red band blended into any spots the red duct tape didn't cover, making it less noticeable.
Note on Kid's Sizes: If removing the grey border to make the band smaller, rub the edges of the band with sandpaper. The border does not always come off smoothly.
Step 5: Further Ideas and Thoughts
Further Ideas:
Disney also releases “limited edition” magicbands like these
frozen ones that retail for $30. http://disneyparks.disney.go.com/blog/2014/08/enj...
Consider buying this duct tape for $6 for a cheap DIY version. http://www.walmart.com/ip/Duck-Brand-Disney-Froze...
Also, this technique works with bangles, bent popsicle sticks, and other bracelet forms.
Thoughts on Magicbands and Customization:
The magicband technology (while somewhat intrusive) is very helpful. In addition to the features listed in the intro, it even stores ride pictures without you having to do anything. I recommend the band to anyone going to Disney World.
Further, I also highly recommend customizing them. Even if each person has a different color magicband, customizing them has additional benefits. One of the main benefits is cast member interaction. Very few people at the park currently have customized bands. Our group got a lot of attention from cast members because of the bracelets which led to the children in our party getting picked for more activities as well as just having more magical moments.
One constant at Disney World is that there is always more interaction with people who want to be there. This can be shown many ways (being happy obviously, disney merchandise, and customized disney apparel). If you're hoping for a little extra Disney magic, customizing your Magicbands is one way to add to your chances.
In addition to magic at Disney World, some of the kids continued to wear their bands after the trip, leading to it being a useful souvenir.
Step 6: Temporary Tattoos


The other main way to decorate is using temporary tattoos. Unlike stickers, the tattoos blend into the band and appear like they belong.
The tattoos show up really well on the yellow and pink bands. They're decent on orange bands. Blue, red, and grey are lackluster.
Tattoos should be applied according to their directions onto the band. To make them stand out more on the darker bands, apply white nail polish to the area before applying the tattoo.
To prevent cracking, apply the tattoo onto the band while it is in it's bent state (try the band on, mark which holes you're using, undo, and then fasten on the same holes).
Let the tattoo dry completely and then go over it with several coats of clear base coat nail polish.
Step 7: Sharpie


Sharpies also work on the bands. As noted in the temp tattoo section, the different band colors do dictate effectiveness.
While black sharpie will work on all bands, lighter colors do not show up well. In this case, I used sharpies on white tape when needed.

Participated in the
Bracelet Challenge


