Introduction: DART ARCADE
Nerf (trademarked in capitals as NERF) is a toy brand created by Parker Brothers and currently owned by Hasbro. Most of the toys are a variety of foam-based weaponry, with other Nerf products including balls for sports like American football, basketball and baseball. The most notable of the toys are the dart guns (referred to by Hasbro as "blasters") that shoot ammunition made from Nerf foam. Since many such items were released during the 1970s, Nerf products often feature bright neon colors and soft textures similar to the flagship Nerf ball.
Nerf and other manufacturers now have a variety of interesting weaponry, and they are a favorite for kids to shoot their darts all over the place … and at each other … particularly in the house.
Ever try to contain the area in which a kid can shoot the darts ? … GOOD LUCK !
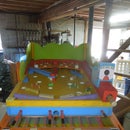
Well I seem to have accomplished the confinement trick by building a confined dart game requiring a degree of skill with many items to shoot and many items to shoot at … the kids still shoot darts all over the place, but not as many as before, because now they shoot most of the darts in the Dart Arcade.
A finished picture of the Dart Arcade is shown above.
Supplies
THE MATERIALS :
(1) 2 lb. box 3” Wood Screws
(1) 1 lb. box 1+ ⅝” Wood Screws
(1) Tube Wood Glue
(40) 2x4x8’ boards
(1) ¾” x 4 x 8 Pine sanded plywood
(3) ½” x 4 x 8 sanded plywood … (for sides & doors & back panel & roof)
(7) Pints of different color paints (semi-gloss)
(2) Lights … (battery powered)
TOOLS NEEDED :
Hammer ... Drill ... Drill Bits : miscellaneous sizes
Ruler : tape measure ... Ruler : Straight Edge ... Ruler : Square
Pipe Clamps ... Paint Brush : 2” ... Paint Brush : small ... Paint Brush : very small
Jig Saw ... Router
Sander --- (with 80, then 120 grit sandpaper) ... Table Saw or Circular Saw ... Miter Saw
Step 1: THE PLAYING FIELD :
4’W x 8’L x ¾“Thick table top.
The Playing Field is nothing more than a 4x8 sheet of smoothe surface plywood surrounded by a box 4’ square at the far end. Various items to shoot at are placed in the confined box area, and battery operated lights add a little flare for night shooting.
Step 2:
A closer look at the Playing Field … note that the top of the ‘box’ can be used for storage of household items, so the large size of the Dart Arcade can be put to other uses.
A real close look at the items to shoot … they can be virtually anything you want to shoot at … some items were found at the local sports store, others online (like ping pong balls and tennis balls), some items from the kitchen pantry, and other items were just made.
Step 3: THE WEAPON AREA :
An extension on the front of the Dart Arcade is reserved for the weapons, darts, balls, and anything else you can safely shoot.
It even has a maneuverable rubber band activated Catapult !
Step 4:
The Weapon Area table drops 7+ ½” from the Playing Field table, and measuring 13+ ½” to the bottom of its 2x4 supports. The Weapon Area table is 13+ ½” Deep, but only extends out 10” of this from the main Frame.
With the main Playing Field 31” H from the ground, this puts the Weapons Table surface 23+ ½” from the ground. This seems to be a good playing height overall for kids and adults alike.
Step 5: THE TARGET BOX :
Doors 48”H x 22” W, two on each side, were added to allow easy access for target set-up.
A wooden swivel lock was added to prevent door opening while shooting, and also to prevent kids from leaning against the door and falling out if they decide to climb into the target area from the front of the game (which they do).
Step 6: THE FRAME :
The Frame is constructed out of 2x4’s, and the table is 4’ x 8’.
The primary framing is on the outside of the 4x8 area, with doubling of the 2x4’s in some areas resides inside the 4x8 area and is cosmetic in nature. The front 2x4 is 39” long and the center and rear 2x4’s are 70” Long.
The Target Box itself is 4’W x 4’L x 4’H.
The orange Side Panels are ½” Thick and 4’ Long, and rise from 10” H in the front to 21+ ½” H in the back.
Again since the arcade does take up a lot of space, good storage area is provided under the arcade.
Note : two 2x4’s are laid underneath the Arcade at 3 points, thus raising the Arcade 3” … this was not done just to raise the height of the Arcade, but was needed so the doors could clear the couch on the other side. All Frame measurements from ground level presented in this presentation do not take this extra 3” into consideration … their height from the floor exclude this extra 3” elevation.
Step 7:
View of right side and back of Arcade, and then the left side of the Arcade.
Step 8:
Framing underneath the Arcade … there are only three 2x4’s holding up the entire Playing Field panel… all the support is provided by the 2x4 pillars (in blue) in front, middle, and back of Arcade.
The far left 2x4 (in yellow) is the outer frame support you see in the 1st Frame picture …
The Orange 2x4’s at ground level in the 1st Frame picture run the 8’ table length, and give rigid support to the pillars.
Also the Framing for the drop for the Target Box can be seen.


