

Introduction: Desktop Firepit


Using a 3D-printed buck, I created a silicone mold for making a desktop fireplace out of concrete.
Supplies
- 3D printer (with filament)
- 2 part silicone
- Small plastic bucket (large enough for the 3D-printed buck)
- Hot glue gun and glue
- Wood filler
- Sandpaper (various)
- Mold release spray
- ready-mix concrete
- Concrete mixing tools
Step 1: Watch the Tutorial Video
For best results, follow the tutorial video here:
https://youtu.be/vX5_8MiZyec
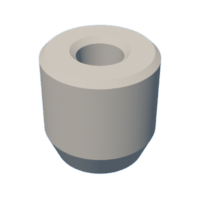
Step 2: 3D Printing the Buck

Create a buck using 3D printing. Be sure your chosen design has minimal backdraft for easy removal of finished parts from your silicone mold.
Attachments
Step 3: Sanding the Buck

Prep the surface of your buck. The layer lines will be visible on your final product, so sanding them down or using wood filler to make the part smooth is recommended!
Step 4: Create Silicone Mold

Secure your buck in the bottom of your (disposable) plastic bucket. Hot glue works well for this step. Find a bucket that leaves about 1" around all sides of your buck and be sure it is deep enough to fill 1" over the top of your buck.
Step 5: Silicone Pour

Mix silicone and pour it into the silicone mold (bucket with buck secured). Allow the silicone to fully cure before proceeding.
Step 6: Finish Silicone Mold

Finish the silicone mold by removing the silicone mold from the bucket and extracting the buck. Remove the flash as necessary.
Step 7: Pour Concrete

Mix and pour the concrete into your new silicone mold. Allow the concrete to fully cure before proceeding!
Step 8: Remove Firepit From Silicone Mold

Remove your desktop firepit from the silicone mold.
Step 9: Fill and Burn

Carefully fill with isopropyl alcohol and burn safely!


