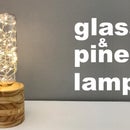
Introduction: Easy Concrete Lamp
Let's build a concrete lamp!
I'm the kind of person who likes to get down to business, so why should I buy a lamp if I can build one?
Watch the video and follow the steps below to make your concrete lamp!
Step 1: Materials and Tools
You will not need many materials and the ones you need are very cheap and easy to find:
Materials:
- Cement or concrete mix
- Glass bottle with lid
- Plastic container (I used disposable dessert bowls)
- Light Bulb & Socket (I used an IKEA E14 lamp)
- Paper tape
- Cardboard
- Primer and Paint (you really do not need that, you can leave it unpainted)
Feet to protect furniture
Tools:
- Utility knife
- Sandpaper
- Hot glue gun
- Brushes (if you decide to paint)
Step 2: Get to Work Part 1...
Let's get started!
Start by isolating the bottle cap with a piece of cardboard and paper tape.
This step did not go well. The aim would be to remove the lid after the concrete is cured but the lid is large and the concrete connection to the bottle has been compromised...
I solved the problem with hot glue, it was not the best solution but the alternative would be to start over and I had no other type of bottle. With a smaller lid bottle it will work perfectly!
Glue the bottle to the plastic container and start preparing the concrete.
A very important step is to apply some type of release agent. You can use several products for this purpose but I prefer to use vaseline, it does not stain and is easy to apply.
Pour the concrete and when it is full, tap it gently to release the air bubbles. Let it dry / cure for at least 3 days.
Step 3: Get to Work Part 2...
Find a way to make height for the top of the lamp. The top of the glass bottle can not touch the plastic container. As you can see in the image I used some jars and wood to make the height that I found ideal.
Prepare more concrete and pour in the plastic container then put the other half of the lamp. Tap gently to remove air bubbles and allow to dry / cure for 3 days.
It's time to reveal the almost finished lamp.
Carefully remove plastic containers using a utility knife if necessary.
After removing the molds and insulation, allow to dry / cure for at least another day.
Step 4: Get to Work Part 3...
Sand the concrete until smooth, I used 120 grit sandpaper.
If you are not going to paint you can skip this part of this step.
Clean the dust and cover the glass with the paper tape.
Apply one coat of primer and let it dry. After choosing the color for your lamp is time to paint. Remember, less is more. A small amount of paint and many coats give a better finish than a coat with a generous amount of paint.
I chose copper, an excellent color but I had to paint five coats to look good!
After the paint dries, remove the paper tape to reveal the glass.
Important note:
- It is necessary to make a notch to be able to pass the power cord of the lamp.
- As I wrote in the Get to Work Part 1 step: "The aim would be to remove the lid after the concrete is cured but the lid is large and the concrete connection to the bottle has been compromised... I solved the problem with hot glue, it was not the best solution but the alternative would be to start over and I had no other type of bottle. With a smaller lid bottle it will work perfectly!" You can see in the image the glue I had to put to solve the problem.
Step 5: Get to Work Part 4...
Make a hole in the cover to be able to pass the power cord and connect the socket.
Glue the socket with hot glue on the lid... Screw the lamp and test!
It works? Good! Let's finish our lamp!
Glue the lid on the underside of the lamp and apply feet to protect the furniture and you're done!
Step 6: Final Thoughts...
What could be improved?
- Use another type of bottle with a thinner lid to avoid having to glue it.
- Paint with spray paint ... The painting will be more uniform and not take so long.
If you have any doubts feel free to ask.
Thank you very much for your presence, I hope you enjoyed it and try to make the lamp!


