

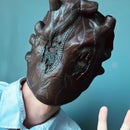
Introduction: (Easy) Magnetic Halloween Shoulder Pets


Hello there and happy Halloween, (If it's Halloween) as I've been at home for a while I've been looking into things to make when I had this thought what if I had a bigger version of a figure from a game like DnD. I liked the thought of something like that but I didn't think it had much practical use. That was until I saw some magnets lying around and had this idea. "What if a figure like that could sit on my shoulder, like a little pet" so I got to using programs like blender and so today I'm going to be showing you my simplified method for making these magnetic shoulder pets!
Supplies
Supplies Needed
1.) 3D printer (Or you can outsource to a company that does prints on demand)
2.) Neodymium magnets (2-4 to make sure they don't fall off your shoulder)
3.) Hot glue gun / Super glue
4.) Various paints and paintbrushes
5.) Matte clear coat
Optional
1.) Lighter (It's a minor effect but still a cool one)
Step 1: Sourcing Your Model


When looking for a model I wanted to use characters that walked on all fours or at least looked like they were sitting, this would make hiding the magnet easier. When looking for these models I came across an account on thingiverse by the name of schlossbauer who makes high quality DnD mini's for free I've used a couple of their models in the past and some of they work great for this process but any model works it just has to be big enough to add in magnets in a later step.
(Side Note: I wouldn't recommend choosing a model with a lot of thin or complicated parts, if this will be on your shoulder for long periods of time someone could bump into you and damage it)
schlossbauer thingiverse link: https://www.thingiverse.com/schlossbauer/designs
Once you've found your model we are going to want to remove the base it's attached to. If your model doesn't have a base you can ignore this part and move on to the next step but if it does you are going to want to pay attention. Firstly you are going to want to import your model into a program like 3D builder. To do so you are going to open 3D builder and when prompted to open, select your model from your downloads folder and it will start to load. Once your model is imported we can left click on it and go over to edit and click split. A green square should appear this is where your model will be split, you can adjust the square up and down to slice more parts off your model. We just want to remove the base so adjust the bar so that the base no longer appears, and then hit split in the top left corner. We have now split our model but to save it we are going to go to the 3 lines in the left corner and hit save as. However do not save the file as a 3MF save it as an stl, this will help in the blender part of the process.
Step 2: The Blender Part of the Process


Now most PC's won't have blender preinstalled so head over to https://www.blender.org/download/releases/2-92/ to download it. (Don't worry it's free) When blender is installed we can get to adding the magnets holes, import your model by going into file and then import stl. Once your model is added hit crtl + a to add a new mesh, the mesh we will be adding is a cylinder. Using the move tool move the cylinder inside the bottom of your model, the space the cylinder occupies in the monster model will get deleted soon. So ensure you have scaled the cylinder appropriately.
Once you have moved the cylinder in place click the monster model, then go over to the right and click on the wrench icon. Once the icon is clicked you will see a button that says add modifier you want to add the 'Boolean' modifier this will make the cylinder take up the space in the monster model. In the area where add modifier used to be you will see some new information, all you need to do is ensure that the object selected is the cylinder and then hit apply. And now that's the hard part over. Now just delete your cylinder and there should be a hole where you can put your magnets in the printed model. To save the model go to file -> export -> export as stl and then you can name your 3D model appropriately because we no longer need to add any changes to the model. Now time to print
Step 3: Time to Print


Now setting up to print is easy but I can't speak for how it might be when ordering from a print on demand site. The steps may vary but they are along the same lines.
Now when prepping to print you can import into your slicing program of choice I used Cura, my settings are pretty simple but you don't need to follow them exactly, for instance my model was a bit small so you can scale yours up, or use more infill to make sure it's more durable, or even add a smaller layer gap so you don't need to do as much work to hide layer lines. A lot can be changed but here are my settings I changed for this print.
Scale: 408.34%
Infill: 8%
Layer Height: 0.08mm
Supports: Yes (Subjective depending on model)
Step 4: 9 Hours Later.....


Tada! You've got your model in real life now just to rip off those annoying supports. Take your time if your model breaks in any way you can always repair it with enough super glue. Make extra sure you pull out the magnet hole's support it will look like a big chunk of plastic and will be hard to take out but eventually it should come out. Also check every crevasse sometimes auto-generated supports can leave annoying supports in small places.
Step 5: So..... You Bought Giant Magnets

Before buying magnets I'd recommend you print your model first to prevent this mistake but in case your magnets are too big here's how to fix that. Get a lighter and heat up around the base on the model near where the magnet hole is. It will soften up to make sure your magnets fit in this hold. In the image the magnets are sticking out a bit because the model has legs and we want it to connect to the other magnets later on. But everything will be fine if it doesn't stick out like mine.
Step 6: Smoothing Time!!!


We don't want our beautiful creature to be covered in a bunch of lines so we gotta hide them. You could spend hours sanding down the plastic but I found if you cover your monster in a thin layer of gap filler you can sand that down when it drys and it makes the layer lines a lot more subtle. Repeat until you are content with how smooth your monster is.
Step 7: Adding Magnets for Real This Time


To add your magnets I just pored a bunch of hot glue into the magnet hole and added a magnet on top I then surrounded it in super glue and let everything dry. BE PATIENT!!! If the glue doesn't hold your model could fall off your shoulder when walking and plastic isn't the most durable so its best to be patient now. Once your glue is dried you can see in the image I added a second magnet. I've tested it and I found that 2 magnets for some reason creates a stronger bond than 1, especially through fabric. So I glued the 2 together and let that dry. Once everything has dried have a test, you monster should be able to walk on walls now (Provided they are metal walls).
Step 8: Painting (Subjective)


Here we start the painting process, you don't have to follow exactly what I do I'm just an example but you can try any mix of different colors for your monster. But I'm just inspiration let your monster be any color you want!
Before Starting Remember: It's okay if your paint job looks a little messy we will just call that weathering
When I started to paint I started with an off white coat around the main body portion avoiding raised portions and the eyes because I was going to paint them differently later. Once that was done I let it dry and went over the same area again with the same color, this is important because when doing the weathering part the paint can chip off really easily and leave giant parts which you will have to paint-over again.
The next part I started to paint on were the raised detail bits, I went over those with a gray color, so areas like the stripes that are under the eyes, and the areas above the toes, and especially the rim of the cauldron. Details like these really make a monster pop and can draw lots of attention to you and your unearthly friend!
After painting the raised details I went over the areas like the feet with a solid black, being very careful because black is a hard color to paint over.
Next I painted the eyes a light blue because I really wanted them to be noticed especially at night.
For the cauldron liquid I went with a purple because I wanted to look like toxic goop, so I started with a dark purple base coat and let it dry. Then I got a sharpie and drew a swirl pattern. On top of the swirl pattern I went over it with light purple to make it look more interesting.
Finally to add the finishing detail I added some gold detailing to the cauldron handles and tried to be light with it mixing in a bit of brown to make sure it wasn't too sparkly but I don't think the intended effect came off too well it still looks very shiny. However that's nothing some weathering can't fix!
Step 9: Prepare for Weathering

Weathering can make or break a project like this, it can hide all your mistakes or create all new ones, the key to avoiding any damage is to protect your new friends from all the grime he's going to be covered in. I sprayed my creature in a matte clear coat to protect the paint. I probably should have been more patient when taking the photo because it looks glossy but the coat is still there and it's protecting the bottom layer of paint.
Step 10: Grime Time


To make weathering liquid it's very easy you just get some brown paint add a lot of water until it's very watered down and then you apply it all over the monster. The clear coat from before will prevent any paint from wiping off but just to be extra sure dab a paper towel to get all the watered down brown paint off. Keep dabbing off until it looks like there's no watery paint left on the surface, the brown paint should have seeped into all the cracks and it should give off this rusty effect like our monster has been out and about for decades exploring the world. This step also covers up any areas that your paint job may not have been the best it basically covers up around the edges where you are most likely to mess up it always helps to make your monster look more worn a perfect compromise if you ask me.
Step 11: Cauldron Bubbles (Optional and a Little Dangerous)


This step is optional and only really applies if you are doing a cauldron spider like me. If you are doing this effect ensure you are very careful) but if you want the subtle cauldron bubble effect you can get a lighter and bring it really close to the paint until it starts to make bubbles in the surface when it does this the bubbles stay in the paint giving off this really cool effect! Just be careful not to melt the plastic.
Step 12: How to Wear Your Friend


To wear your new monster friend you are going to want to stick 2 magnets inside of the shoulder area of your shirt and then place your friend on top. The magnets will stick together through your shirt making them stick to your shoulder. Now you and your best buddy are ready to explore to your hearts content. Or maybe just show off at a Halloween party, it's up to you! The magnets are super strong so there shouldn't be any worry about they falling off!
Step 13: Epilogue

If you are struggling with making your model I have some of the models I've modified below all credit goes to schlossbauer for the models I just modified them (Note: They aren't scaled you will have to do that on your own however). Additionally if you don't have a 3D printer I've linked some companies that do print on demand help. (I do recommend doing your own research with printing on demand to find the best rates however I just linked some of the most popular, I have my own printer and have never personally used them so be advised)
3D printing companies:
Pre-Edited 3D files:
https://drive.google.com/file/d/1HFreINpQDe49BK6B_2gRtO_6CV89AXk4/view
Anyways I've had a lot of fun making these and I'd love to see some people make some for Halloween too! So good luck and have fun!

Participated in the
Halloween Contest


