Introduction: Easy Motorcycle Windshield
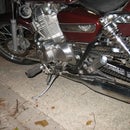
I am the proud owner of a magnificent motorbike, an honda rebel :) and a spare polycarbonte sheet, so I decided to make a windshield. I think polycarbonate is the only safe material for a windshield.
Soy el orgulloso propietario de una magnifica moto, una honda rebel :) y una lamina de policarbonato de sobra, asi que decidí hacerme un parabrisas. Creo que el policarbonato es el unico material seguro para un parabrisas.
Step 1: Testing With Carboard Windshield
Before start cutting I made the tests using cardboard.
Antes de empezar a cortar hice las pruebas con cartón.
Antes de empezar a cortar hice las pruebas con cartón.
Step 2: Polycarbonate Sheet.
The main component.
El componente principal.
Step 3: The Windshield Cut.
This is the definitive cut and some washers and nuts used to install it.
El corte definitvo y algunas arandelas y tuercas que usé para instalarlo.
El corte definitvo y algunas arandelas y tuercas que usé para instalarlo.
Step 4: Handlebars Attachment.
To attach the windshield to the handlebars I used four plumbing clamps and four threaded bars. These lower bars should be perpendicular to the forks, anyway test and trial is the way to adjust it.
Para sujetar el parabrisas al manillar usé cuatro abrazaderas de fontanería y cuatro varillas roscadas. Las varillas roscadas de abajo deberían ser perpendiculares a las horquillas, de cualquier modo solo el ensayo y las pruebas te dan el modo de ajustarlo.
Step 5: Fastening the Windshield.
I made the holes in the cardboard and after that I marked them in the real one.The holes in the windscreen slightly larger, 7mm, than the threaded rods diameter 6mm.
The windscreen is fastened by the pressure exerted by the nuts on the washers on both sides.
Hice los agujeros en el cartón y después los marqué en el de verdad.Los agujeros en el parabrisas son ligeramente mas largos 7mm, que los de la varilla roscada 6mm.
El parabrisas esta amarrado por la presión ejercida por las tuercas en las arandelas sobre ambos lados.
Step 6: Finished
Well not at all because the film which cover the windshield is almost is very difficult to peel.
A final touch, the windscreen is tied between the lower ends with a spring behind the headlight, this adds stability, less vibrations and gives the windscreen a rounder shape, more aerodynamic I hope.
Bueno no del todo porque el film que lo cubre es casi imposible de pelar.
Un toque final, el parabrisas esta amarrado de los extremos inferiores con un muelle entre ellos,por detrás del foco, es añade estabilidad, menos vibraciones y le da una forma mas redondeada, mas aerodinámica, espero.


