Introduction: Elton John Glasses With T-Glase
I've been exploring making 3D objects from 2D shapes. Glasses are fun and useful and I found a simple connection works to hold the novelty glasses together. Star shapes are a terrific application of Zotebook, the iPad app I am using, and can be made with any number of points quickly.
I stuck with the traditional John Elton 5 point star here because it's a classic. And I wanted to try out T-Glase filament with the 3D printer. It also works with a laser cutter and craft cutter.
I'm including all 3 files here, but the real fun is making it in Zotebook.
Here are 3 types of files, PDF (for laser cutter), STL (3D printer), and SVG (craft cutter)
Also, 2 files of the stars and frame separately. When I used the Lulzbot mini I needed separate files (and printed at 95% size)
Step 1: What You Need
A picture of Elton John Glasses
An iPad with Zotebook installed
A 3D printer, laser cutter, or craft cutter
Step 2: Make a Star
Stars are easy to make in Zotebook. The Same Angle and Same Length gestures turn a handmade shape into a perfect shape.
Once I have a perfect star I can adjust the shape by selecting a single point to shape it for Rock Star Glory.
For more on making stars in Zotebook check out Making a Seven Pointed Star. https://www.instructables.com/id/Make-a-Seven-Poin...
If you have never used Zotebook, check out https://zotebook.io
And some of our other intro Instructables like https://www.instructables.com/id/Learn-Zotebook-Wi...
Step 3: Make an Outline
Now with the Shape Widget tool I make a copy, shrink it, then move it back to make an outline.
By scribbling anywhere I create the cutout.
Step 4: Make a Copy
Again with the Shape Widget, I copy the star.
Step 5: Nose Piece
The nose piece uses one of the best features of Zotebook, the Recurve tool.
I put my finger near any line, wait for dots to appear, and curve the line as needed.
Step 6: Frame
I will be constructing these with a 3D printer or laser cutter so I need to make 3 pieces and and a way to connect them.
I start with a long straight bar for the frame arms and make a notch for the stars.
I'll scale the notch later to the thickness of the material I choose to use.
Step 7: Ear Hook
Now I can shape the arms with Recurve tool.
Step 8: Copy the Arm
I'll need 2 arms for the frame, so I use the Shape Widget again.
I am not really sure about the length at this point, but I will test it with a paper prototype before 3D printing and then adjust it.
Step 9: Get SVG File to Test Print With a Craft Cutter
This is optional, but a great step for me.
At Zotebook.io I can get SVG, PDF or STL files.
I use a craft cutter to test the design prototype before trying to 3D print it.
Step 10: Check for Size and Fit With the Prototype
The stars look good, but the arms of the frame are a little bit long.
Step 11: I Go Back to Zotebook and Shorten the Arms by About a Cm
I tap the line I want to size and enter the length.
I also size the notch to .5 cm, so I will print the stars piece to a 5 mm depth. If I were laser cutting this I'd set the width of the notch to the depth of the material I want to use.
Step 12: Ready to 3D Print
I get the STL file from Zotebook.io and choose a print depth of 5 mm to match the notch. I can also get a PDF file for laser cutting but I want to try out T-Glase filament.
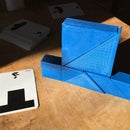
The Stars come out great, but the notch in the frame is a little too shallow.
I should have tried it out with cardboard on the laser cutter first.
But easy to fix.
Step 13: A Small Adjustment
I go back to Zotebook and just change the dimension of one line.
Step 14: And I Redo Do Both Arms
Step 15: Try Again, Success!
The notch works.
They stay together well.
Might fit a tiny bit better if they were a little smaller but kinda like them this way.

Participated in the
3D Printing Contest 2016


