Introduction: Embedded LEDs for Indicators
One of the things I have found as a maker of custom designed Nixie Clocks is that using LEDs in their normal roles gives a harsh type of illumination when you really want something a bit more subdued and in keeping with the warm glow of a Nixie tube.
I decided to make the LEDs give a softer illumination and came up with this method that works extremely well.
Step 1: Materials and Tools You Will Need.
Round Brass bar - I use 13 mm as it gives me the size I need in most cases.
3 mm LEDs of the colour you require
Thin wiring - I use cores stripped from ribbon cable as they are ideal
Heatshrink that is a close fit before shrinking
Quick setting Epoxy - I use the type that is available in two tubes as it lasts longer than the syringe types
Clear nail varnish such as Sally Hansen's Hard As Nails or similar
Lathe
3.10 mm drilll
Countersink bit - wood counter sinks are not ideal as they chatter when making the recess
Parting tool - mine is made from an old 12" hacksaw blade and a small block of aluminium, the blade held by allen screws and washers
Facing tool
Small file - see text for details
Soldering Iron with a fine tip
Wire Strippers
Heat Gun
A 'Third Hand' - one of those little stands with crocodile clips to hold small parts
Step 2: Preparing the Brass Part
Having mounted the Brass bar in the lathe drill a hole of 3.10 mm diameter through it. If you drill longer than the part you are making it is easier to make a second or more parts each time.
Countersink the hole to leave an edge of approximately 1 mm, if you are making several remember the sizes and keep a note of them for repeatability.
Part off to the overall length required. I make the visible part 8 - 10 mm depending on the size of the clock and have a mounting stub 6 - 8 mm behind it.
Turn the part in the lathe and machine the stub to the length and diameter required. I have a 10 mm Forstner bit I use for the mounting holes and make the stub diameter just under 10 mm to allow space for the mounting epoxy.
Turn the Brass mounting in the jaws of the lathe and make a small radius on the edge to soften the facing.
Step 3: Modifying the LED for Mounting
You can check an LED with a button cell, the longer lead is the Anode (positive)
I use a pin vice to hold the LED in my milling machine as it is a quick way to remove the little skirt on the rear edge but you can do this by hand with a flat needle file, it is a bit more fiddly but works.
Check the fit of the LED in the Brass housing, it should slide in easily
Using the 'Third Hand' hold the LED in it and cut the leads short. Tin these with solder.
Split the ribbon cable and strip about 2 mm of the insulation and tin the ends of the wires.
A steady hand is then needed to solder the two wires to the LED.
I cut a small piece of heatshrink and place it between the two connections before sliding the heat shrink up the wires to cover the joints.
Shrink this with a heat gun or hairdyer - avoid doing this with a lighter as you can melt the LED casing.
Test the LED with the button cell again and mark the positive wire with a Sharpie.
Step 4: Setting the LED in the Brass Housing
Using the 'Third Hand' again to hold the LED you can place the housing over the LED and adjust the amount it protrudes into the 'reflector' area. I find that about 2 mm is ideal for this.
Mix the two part epoxy and then carefully fill the 'reflector' until it forms a slight dome. One advantage of this is that you can generate a lot of micro bubbles in the epoxy while stirring and this gives a more diffused light from the LED.
Allow the epoxy to set for at least 48 hours even if it it says it is a 5 minute setting type, it takes a while for it to fully cure in the reflector area.
If the epoxy shrinks and there is a concave surface you can restore the dome shape with clear nail varnish such as Sally Hansen's Hard As Nails or similar. Just load the brush up with the nail varnish and touch it against the epoxy and let it flow off. If you try to brush it on it can go over the edge of the brass. Allow it to dry and apply more if required using the same method until you are happy with the height of the dome. This will give a very high gloss to the surface and still have the diffusion effect below it.
If you want to have an absolutely clear 'lens' you can steadily fill the reflector with several drops of the nail varnish instead of using the Epoxy. Do not try to fill the area in one shot but make several adds until it is to your liking.
Step 5: The End Result
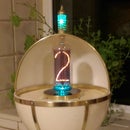
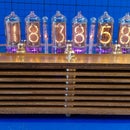
Here is one of my clocks that feature these embedded LED units.
This is the Hands of Time Clock that I also made an Instructable for.
NOTE - if the LED is too bright just add a current restricting resistor in series with the Anode. The value of this is dependent on how bright or dim you want the illumination to be.


