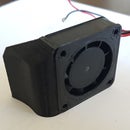
Introduction: Extruder LightBlue
I propose an easy-to-make bowden extruder with an optimized filament path and with a very simple and robust runout filament sensor.
The PTFE tube is cut into V and guides the filament even from the toothed wheel output, making it easier to use flexible filament.
We use a microswitch for the filament runout sensor so that transparent filament detection is perfect. To avoid jamming of the filament, we use an intermediate ball between the filament and the microswitch.
Step 1: Making the Extruder
We printed the parts from PETG with 35% infill and 4 perimeters.
Pay attention: the filament path will need to be calibrated using a 2mm drill after you print the body. Also clean the ball channel with a 6mm drill. The channel is tilted so that the ball slides easily.
With a 1.5 mm drill bit, calibrate the holes for fixing the microswitch with M2 bolts.
In the extruder's body is mounted a runout filament sensor, which consists of a 6 mm ball and a microswitch. The PETF tube will be V-cut and will be mounted at the extruder outlet to provide a friction-free trajectory for the filament, see image.
We used an armature to stiffen the bearing pressure adjustment system.
We used silicone grease to make the arm work smoother.
The extruder has a detachable casing to clean the gear.
BOM:
- the printed parts;
- MK7 toothed gear;
- 5x5x14 605 zz bearing;
- M5x16 bolt for bearing;
- PC4-M10 male straight pneumatic PTFE Tube Push In Quick Fitting Connector;
- 2x M3x10 mm bolts to nema 17;
- M3x24 mm bolt clips to nema 17;
- microswitch D2F;
- 2x M2x10 mm bolts for microswitch;
- 6mm diameter ball;
- M3x35 mm bolt for spring;
- 8mm spring;
- M3 special nuts for spring;
- M3x20 bolt for case;
- M3 nuts for case.
This extruder is used in the LightBlue 3D printer and works perfectly, without any jams. Also detecting the lack of filament and changing the filament goes smoothly.
Happy extrusion!


