Introduction: Faux Stained Glass With Resin and Gallery Glass Paint
Faux stained glass with resin and stained glass paint. Our front door has clear glass panels and I would like to still allow light but possibly obscure the inside view. I thought I would try to make art nouveau, art deco or other similar motifs for our home built in 1912.
Woodrow Wilson was elected US President that year, defeating William Howard Taft and Theodore Roosevelt. WWI was coming in 1914. Women didn't get the right to vote until Aug 18, 1920. Films didn't have sound until 1927. Cars, telephones and radios were few. Art nouveau, craftsman or "arts and crafts" and art deco were popular motifs around this time.
For inspiration, you might take at look at stained glass items on pinterest. If you have a museum close visit that to look at paintings and sculptures for inspiration, composition, lines and colors. Visit churches with good stained glass. Tiffany made great stained glass pieces, but also made beautiful functional pieces in clay. Alphonse Mucha was a wonderful artist who mainly drew amazing art nouveau themes.
Delphi Glass is an existing site for many items related to glass and clay. You can see different types of stained glass for reference.
Supplies
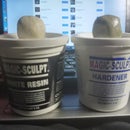
Resin of your choice - either 2 part epoxy like or UV types. Recommend making a little test project before larger project.
Gallery Glass paints - consider other items as well. I have soft pastels from art work, those are basically just pigment and binder, but not really translucent. There are other types of paints that can be used for stained glass effects but this is type I used.
Resin colorants - optional. There are colorants and powders for resin use like alcohol inks that are transparent.
Silicone baking sheet or other silicone surface for the paint.
Dremel or similar tool for trimming resin
Optional - Silicone molds for items, non-hardening clay for making molds
Existing images of ideas, nature, paint swatches, panetone colors.
You might consider tissue paper or fabric pieces. Just be aware, the colors in some items may not last like real paint pigments particularly when exposed to sunlight or UV light waves.
Step 1: Paint Initial Image
You may want to do a few sketches for whatever you might think you want.
Select paint colors paint desired image on smooth or textured silicone. The baking silicone sheet I use had a smooth side and another side with ridges. Allow the paint to dry.
Real stained glass never has sharp corners into the glass. Glass is actually a supercooled liquid and the glass in old windows will be thicker at the bottom and thin at the tops like stained glass window in old cathedrals.
Step 2: Remove Paint From Silicone
Carefully remove dried image from silicone. Don't worry about any thin spots because you can add more paint, or allow some colored resin to fill the void.
In my sample, I had used some paint that had glitter.
Step 3: Adding Additional Colors or Textures
For individual pieces if you're not sure about colors to add for the thinner areas, you might have color swatches to place under the piece to get ideas about color. Check out some stained glass on pinterest, Delphi Glass or another source. Tiffany created exceptional pieces by layering glass, and he may have mainly used Uroboros glass and that's available from Delphi. Youghiheny, Wissmach, Uroboros all are current stained glass manufacturers that offer exceptional mottled and striped patterns in glass. You can use those examples for great ideas.
In the photo, i thought to just find some stained glass examples online and use those. You can easily see even in the thicker areas of the Gallery Glass paint it is very translucent. You can also see some bubbles that were trapped in the paint. Don't worry about any imperfections because those are in real stained glass and just part of the charm of the medium.
Step 4: Adding Complexity
For layering colors, I made another piece with some of the green and an orange to possibly make a more natural green. There was only "Orange Poppy" in my set of Gallery Glass and the green is "Lime Green". I tested the paint just on a plastic lid and for such a thin layer, it peeled off reasonably well. I may try to mix some reds and yellows together to make other orange colors. Learned the trick of mixing greens with orange in soft pastel work. I did notice the wet paint appears much lighter than the dry. That really helped to make the first layer of green more natural.
Step 5: Color Tests
The lighter image on the red silicone sheet is how the paint looks when wet. I mixed three colors together as a test for a layer - red, yellow and green. This is an attempt to get another variation of a more natural appearing green when the main leaf and this are used together. The color is too red and I was trying to get a more orange color. The red looks a bit like ketchup after fries have been dragged in it so I probably will save this piece for something else.
Step 6: Color Change From Wet to Dry
Here's an example of a test to show how the color will change from wet to dry. I thought I'd make another ginko leaf, but this time use a more natural green.
Step 7: Experimenting With Gallery Glass
Made a new version of ginko leaf as a test. The Gallery Glass paint said not to stir - ha and balderdash. This version looks far more like actual stained glass.
Step 8: Resin Panel
I used UV resin for the first time and it cured on a high UV day so fast. It made a pretty bad looking piece of resin, but this made a great piece of faux art glass! The back was a bit tacky so I painted it with the clear gallery glass paint. I used an entire bottle of the UV resin, but it wasn't enough to make an entire 8x10.5 inch panel.
Step 9: Trimming the Resin Panel If Needed
Since the edges on my initial panel were uneven, I used a dremel to trim the entire panel to size. Made a template to get the correct size easily.
Step 10: Completing Panel
With entire resin panel, adhere the faux glass pieces to the top of the panel with the clear Gallery Glass. Paint faux foiling or use the Gallery Glass leading if preferred.
Step 11: Add Resin Border
Made forms from non-hardening modeling clay over wax paper and used epoxy resin to create the border edge. Used a heat gun to help the resin cure.
Step 12: Prepared the New Border
I have so many flat glass marbles, I felt compelled to use those for their lovely colors. I prepared them so they would be ready for when the resin cured. I like the flat cat's eye orange marbles to blend with the green like in the main panel. The other colors are iridescent clear, aqua, blue and green. After this photo, I made the pattern aqua, blue and green rather than blue, green and aqua. I think that works better because the green and aqua are pretty similar.
Step 13: After Second Resin Set, Border Add
Here's how the border appears.
Step 14: Adding Main Center Panel Items
Adding main image and leading lines. The wee lady bug is "fused glass" on the left side of the ginko leaf. The second photo shows how the panel looks with light shining through it and how it obscures the view.
Step 15: Final Thoughts
I have a few minor touches to make on the panel so I will go ahead and submit this.
Should have probably made the resin panels first. I still need to add the branch for the ginko leaf and finalize the leading. This has been an interesting project and I will make more of these for our front door but probably in different patterns. When I get this panel completely done, I will add a photo to this area.
I do hope others try to do this because it is much less than real stained glass and experimenting with different colors has been very interesting.

Participated in the
For the Home Contest


