Introduction: Frogtopus Racing - Arcade Cabinet Design
I've always had a love for CAD Modeling and, while making my models, I adore listening to podcasts. My favorite podcast "Just Roll With It", has given me so much inspiration that I thought this would be a good way to give back! I created an arcade cabinet based off of my favorite character from their series Riptide - Pretzel the frogtopus! If you are interested in learning how to make this yourself, look no further, as below I show you exactly how I made this model!
Supplies
Programs
- Autodesk Fusion 360
- Blender
- Procreate
Step 1: Forming the Concept
When I heard about a competition to make an arcade cabinet, I wasn't initially sure what to make. That was, until I realized I could create something that inspires me so often, a game based off of my favorite DND podcast "Just Roll With It". I have loved this podcast for years, so making a CAD model inspired by it only felt appropriate. In one of their episodes the DND party is taken to a casino with lots of fairly generic games, but one stuck out- Frogtopus Racing. In the mini-game, one of the party members cheers on his little frogtopus, Pretzel, to swim faster than the others by giving her little boosters like treats and cheers. While they did this with actual creatures, I thought I'd adapt it into an arcade-style game that goes like this:
You spin the helm to make your frogtopus go as fast as it can! Along the way you can pick up items to sabotage the other racers and help your own frogtopus win the race! But the racers can also sabotage you- a frogtopus will sit on top of the arcade cabinet itself and can spray bubbles in your face! If you win the race you get tickets as a prize. While it is simplistic, I feel it's still an adorable concept.
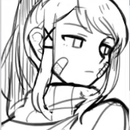
With this in mind, I created a mood board (PDF Below or Images Above) and started making my concept into a CAD Model!
Attachments
Step 2: Creating the Cabinet Base
Screenshot Information
Throughout my entire process I took a screenshot in Fusion 360 so you can follow along! I tried to include all the measurements and where to find each option. If you have any questions, don't be afraid to ask in the comments below!
Steps
- Start by creating your parameters. This way you can change them if need be, and the whole model would adjust accordingly. My final parameters can be found in screenshot #4 above.
- With your parameters done, start to sketch out the basic shape of the cabinet while using your parameters as a guide. You should end up with a rectangle that has a slanted cut through it to make room for the screen and controls.
- Using your cabinet width parameter, extrude out the shape of the cabinet.
- Sketching on the backside of your cabinet, create the basic shape of the fish tank by using the window parameters, then offset it by 1/2" to give it a border.
- Extrude the fish tank/window sketch back by the window width parameter ,then extrude the border out by 3/4".
- To give the cabinet a softer look, use a fillet. Start by selecting all the sharp corners on the cabinet and setting it to 1.25, as well as selecting the fish tank/window border and filleting it by 0.25.
- To make the panels, sketch on the side of your arcade cabinet and use the same cabinet dimensions as earlier to make a rectangle. Then do a 10" fillet on each corner to round it off.
- Next, extrude the panel out 1", being sure to select only the rounded off interior and following the sketch of the cabinet base to make it more fitting.
- To make the second panel, create a mirror of the first panel and select the midplane.
- At this point you should have multiple separate bodies, so convert each one into a component and name them to stay organized.
- While being under the cabinet component, sketch on the front of the cabinet to create a maintenance panel, coin slot, and ticket dispenser. Screenshot #24 has the basic layout, but make sure to make 1/4" holes in the maintenance panel.
- Extrude out the maintenance panel, coin slot, and ticket dispenser by 0.25" to give them some form.
- To screw the maintenance panel into place, use the fastener option and select the screw you want (in this case, socket heads), then select the holes you made earlier to put them into place.
The base of the cabinet is now done!
Step 3: Making the Helm
Steps
- Start off by creating a new component and naming it "helm" to stay organized.
- Then insert a reference image of a helm into the design so you can base the drawing off of it. (Last image above)
- To create the shape of the ship helm, make a sketch on the front plane of the cabinet. Then, follow the shape of the image by making the circles and one of the rods (only half of one).
- Once the sketch is done, revolve the shape of the rod and create a circular pattern of it to make six rods in total.
- Then extrude the rest of the ship's helm by going out 1.25" on both sides.
- To make the shaft, create a sketch on the midplane of the cabinet. In the middle of the panel, make a 10"x0.75" rectangle at a 25º angle.
- Once again, revolve it, then make it a part of the cabinet component rather than the helm component.
- Finally, create a joint to put the helm onto the rod. This is optional, but I made it a revolute joint so the helm could spin.
Step 4: Adding the Barrel
Steps
- To start off, to stay organized, create a new component called "barrel".
- Then make an offset plane from the side of the cabinet that is offset by 15".
- Select that offset plane and make a straight line and a slightly rounded line, then offset the rounded line by 1/4" and connect them together.
- Offset the offset once again by 1/4" and create four straight lines going through the last two curves. These curves will be the metal around the barrel, so they should be fairly skinny and spaced out. Once you are done, trim the excess away.
- Using the straight line you made earlier, revolve your sketch to create the barrel's frame.
- Create a sketch on top of the barrel and make a small circle that is inscribed in the barrel's hole.
- Extrude your sketch by 1" to make the barrel closed off.
- Finally, use your move/copy tool to copy what you just made and place it at the bottom of your barrel to close it off.
This process was greatly helped by this video: https://youtu.be/gcx3GL391fQ?si=MTCJEAyZ0TdM2hA_
Step 5: Forming the Frogtopus
Disclaimer
This section will have a much vaguer step by step. It will be more like tips and tricks, as organic forms like this do not have a streamline process.
Steps
- Create a form (quadball) and place it on top of the arcade cabinet. (I made mine ~10"-12").
- I found have a quadball with a mirror tool on it greatly helped, as did subdividing it twice.
- Having a reference picture near you, use the edit tool to start making the head/body of the frogtopus.
- Going slow and having patience with yourself goes a long way.
- Using the freeform selection tool can give you a lot more accuracy and details when editing.
- Rotate the head/body to be at a slight angle to give it more life!
- Using the sketch tool, create a path of where you want the tentacles to go.
- Using the move tool, you can give it more dimensions to be placed.
- Selecting the path you made, use the pipe tool, make the diameter however large you want (I went with 3.5") and set the display to smooth. You can also choose whether you want your tips to be rounded or spiked here.
- I found that rounded is more consistent since using spikes often gave me error messages. I personally like the look of spikes, but it's up to you!
- Repeat the tentacle process three more times to make all the tentacles. (*Make sure to have one be wrapped around if you want Pretzel to be holding the flag!)
- Once you are done with the base of the body, hit finish form!
- Turn the form you just made into a new component and label it as Pretzel (or frogtopus)!
- *Create a sketch on top of the cabinet and draw a circle that fits the size of Pretzel's grip.
- *Extrude the flag pole to the height you want. (I went with 16")
- *Construct a tangent plane to the flagpole, then an offset plane to create a midplane for it.
- *Create a form (plane) on the midplane. (I made mine 10"x16")
- Subdivide the plane so you will have five lines to move.
- *Use the edit tool to make the flag wavy (select the you made to make them go back and forth) and finish the form.
- Using Pretzel's base as a reference, create a plane through three points (illustrated in screenshot #30).
- Make an offset of this plane so you aren't touching Pretzel
- Create a sketch on the most recent plane and sketch out Pretzel's face. I recommend using a mirror tool and a reference image. (See screenshot #32)
- Make sure the eyes are one piece (no intersecting lines).
- Create another sketch using the plane you made before this. Select the project to surface option and use the sketch you made earlier as the curves. Select the body as the face, make sure you select the project type: along vector and use the offset plane as the project direction. Then, finish your sketch!
- Go to surface and select the patch option using the sketch you just made as the reference.
- Thicken the patches you just made by 0.1" each
- Using the offset plane closer to the face, create a sketch and create the shape of an open mouth. (For reference, see screenshot #40)
- Revolve the sketch you just made to cut out the mouth (make sure to uncheck the mouth detail under objects to cut).
- Using the sphere tool, make three relatively small spheres and use the move tool to make them look like they are coming from Pretzel's mouth. (These will be the bubbles)
*This only applies to you if you want a flag!
Step 6: Making the Decorations
Physical Material
For physical materials, I focused on the texture and material of the object itself. This includes making the barrel out of a wood, the frogtopus out of a plastic, etc. I also demonstrate in the pictures above how to change the color of the material if you choose to.
Appearance
This is where I go into more detail and ensure each face is colored correctly. This also includes adding a custom wooden material that I found only which you can find here: https://polyhaven.com/a/weathered_planks
Decorations
To prepare for the final render, I used Procreate to make some decorations for the cabinet. I did this by measuring out each area I wanted to decorate, then turning it into a reasonable ratio. As an example: My panel is 72" x 30" so I made my canvas size 7200 pixels x 3000 pixels.
If you'd like to use the decorations I made for your project, they will be in Google Drive link below! For the flag, I actually used the official Just Roll With It: Riptide Jolly Roger which was created by CryingWyvern
https://drive.google.com/drive/folders/1Z-cmoktHfJU04hCkfwoRvvKYbdUDtEeI?usp=sharing
Step 7: Animation & Rendering
Blender
In Blender, I ended up using texture maps to apply the decorations I made in Procreate. I ended up using the premade lighting setting listed below and made a small animation to have a good 360º view of the model!
https://polyhaven.com/a/the_sky_is_on_fire
How to apply a texture map on a single face:
- Go to material properties.
- Hit the plus button to add a new material.
- Click "New".
- Click the yellow dot next to "Base Color" and select "Image Texture".
- Click "Open" and select your image texture. (I linked mine above in Decorations)
- Press the "Tab" key and click "Edit Mode".
- With your cursor drag across the screen to select your face.
- Press the "U" key and click "Project from View (Bounds)".
- Click "Assign".
- Your material is now assigned to that face!
Resources
If you also would like to use Blender, here are some of the tutorials I used to understand how to render/animate.
Quick tutorial: Texturing a single face in blender 2.8+
Beginner Blender 4.0 Tutorial - Part 12: Animation
Step 8: Thank You!
Thank you so much for reading! Obviously I'm still learning but I'm really happy with the final product! I hope this tutorial may have helped you make something just as rewarding!

Participated in the
Arcade Student Design Challenge


