

Introduction: Generating Digits of Pi on a Raspberry Pi, Powered by a Pi Decorated Pie in Pi-thon


The theme of this project is "All Things Pi(e)" so I decided to take it to the extreme by cramming in as many Pi(e) as possible. Just the title alone is a mouthful of pie to read.🥧
Supplies
Parts Needed
- Peltier Module SP1848-27145 TEC 40x40mm x2 (Might be able to get away with one although I have not tested it)
- Raspberry Pi Zero 2 W x1
- Boost Converter Module
- Display for the Raspberry Pi
- Any pie (I made my own and decorated it with Pi) (Follow my own recipe for a raspberry pie at step 8)
- Ziplock bag with cold stuff inside (I used a ziplock bag with ice)
- Micro USB to USB A adaptor
Tools/Supplies Needed
- Multimeter
- Soldering Iron
- Keyboard
- Mouse
- Micro-USB to USB type A adapter
- Old Micro-USB cable
- Temperature probe
- Micro SD card (8GB)
- Wire Stripper
- 3D Printer(optional)
Step 1: The Peltier Modules

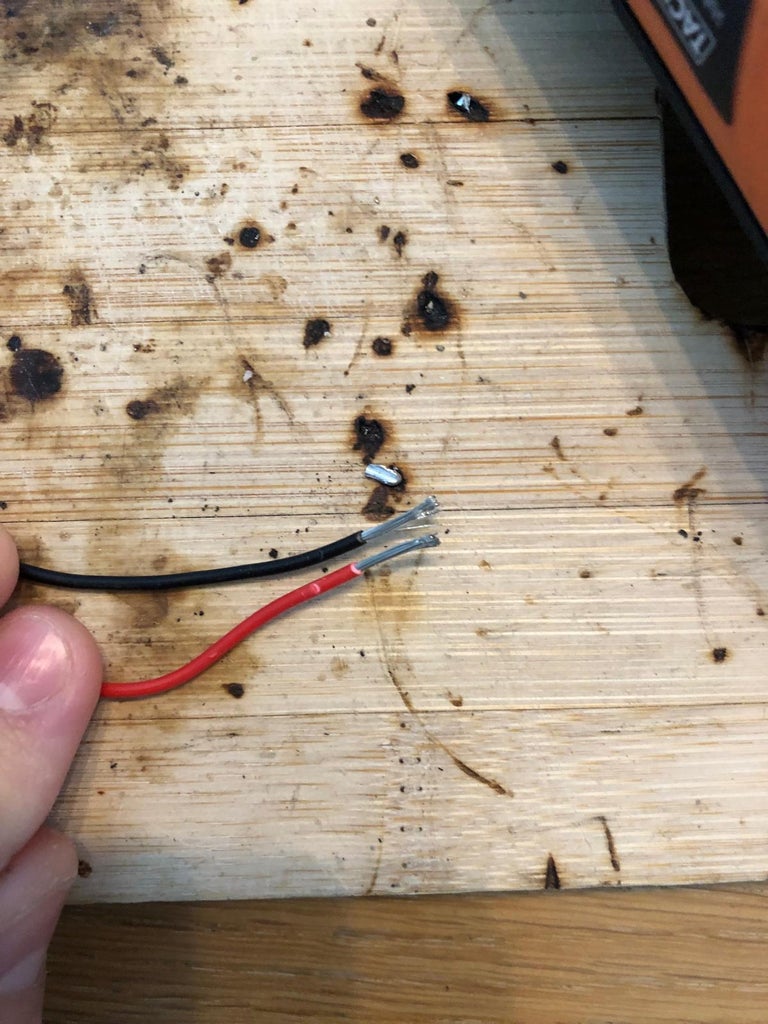
The main attraction of this Pi(e) overdose are the Peltier modules which seemingly turn thermal energy into electrical energy by magic although this phenomenon (The Thermoelectric Effect) can be explained by the movement of electrons across a temperature gradient. The electricity is generated when a temperature difference is applied across a conductive material, causing a voltage difference and subsequent flow of electric current. According to the spec sheet of the Peltier modules used in this project, at a 100° temperature difference, they can generate 4.8V at 669mA which equates to 3.2 wats of power being generated. With two of these in parallel they should easily be able to power a Raspberry Pi Zero 2 W which draws a max of 1-2 wats in this use case.
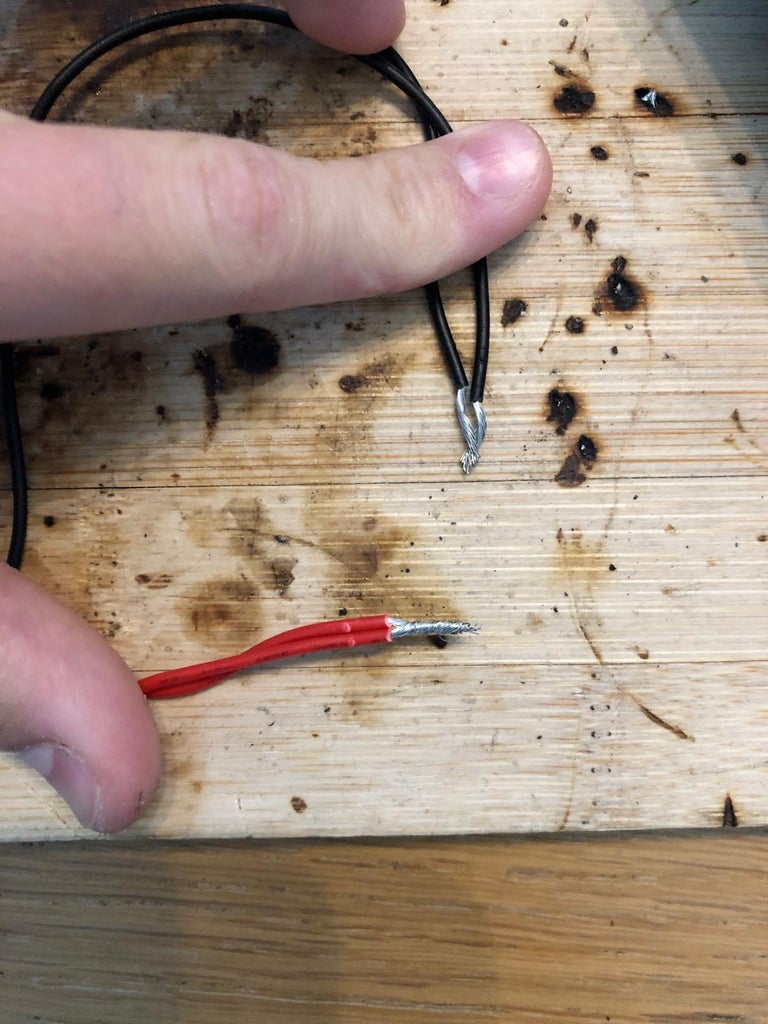
To connect the two module in a parallel configuration, connect the two red wires by stripping the ends and twisting the wires together. Then solder them together. Do the same for the two black wires as well.
Step 2: The Boost Converter Module

This nifty piece of pie converts the fluctuating 3.6V output of the Peltier modules into a stable 5V output for the Raspberry Pi. You will have to use a multimeter to set the output of the boost converter to 5V exactly for the Pi.
Step 3: Wiring Everything


Now to connect everything!
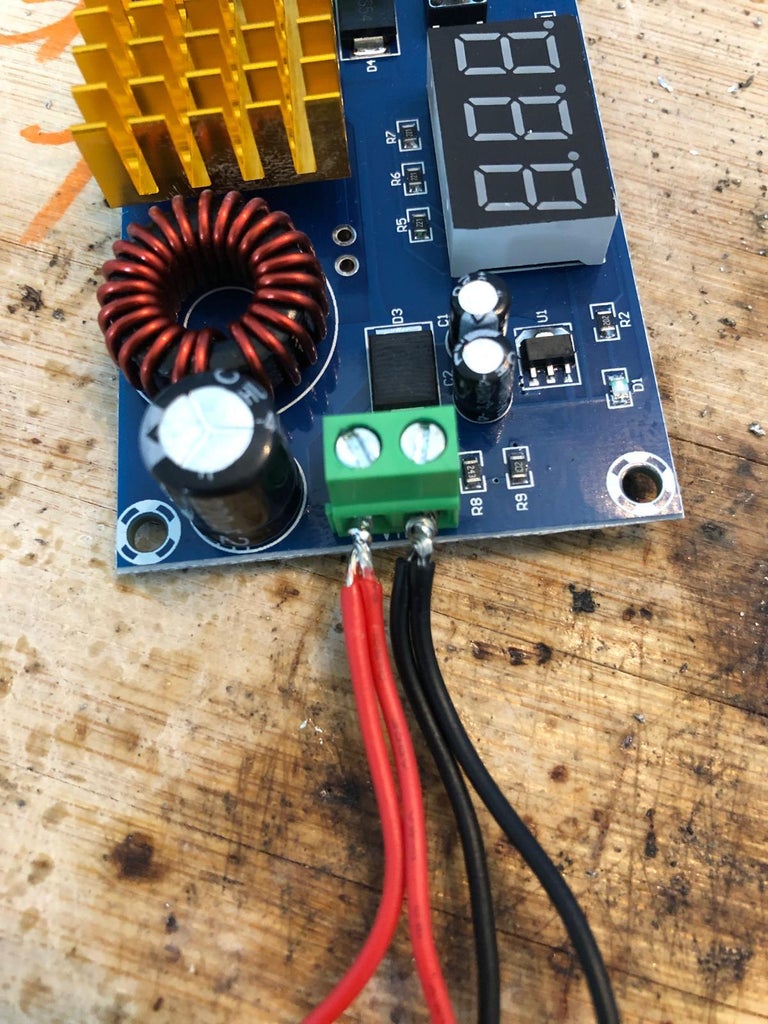
Peltier to Boost Converter
The two combined red (positive) wires from the Peltier module need to be screwed into the the positive (+) terminal in the terminal block labelled "VIN" (voltage in). The two combined black (negative) wires from the Peltier module need to be screwed into the the negative (-) terminal in the terminal block labelled "VIN".
Boost Converter to Raspberry Pi
Cut an old USB A to Micro USB cord in half. If you USB cable follows the standard convention, there should be 4 wires within the cable. We only need to use the Red (positive) wire and the black (Negative) wire. If it doesn't, plug the USB A side into a power supply and use a multimeter to work out which wires are carrying the 5V. Connect the Micro USB end of the cable into the power input of the Raspberry Pi Zero 2 W and then connect the black wire to the negative (-) "VOUT" (voltage out) terminal of the boost converter and the red wire to the positive (+) "VOUT" terminal of the boost converter.
Raspberry PI to Monitor
Connect the Micro HDMI port of the raspberry pi to a monitor using an HDMI cable.
Setting up and testing the boost converter
Plug the other cut half of the USB cord into a power supply to power the boost converter and, using a flat-head screwdriver, set the output voltage to 5V
Step 4: Setting Up the Raspberry Pi
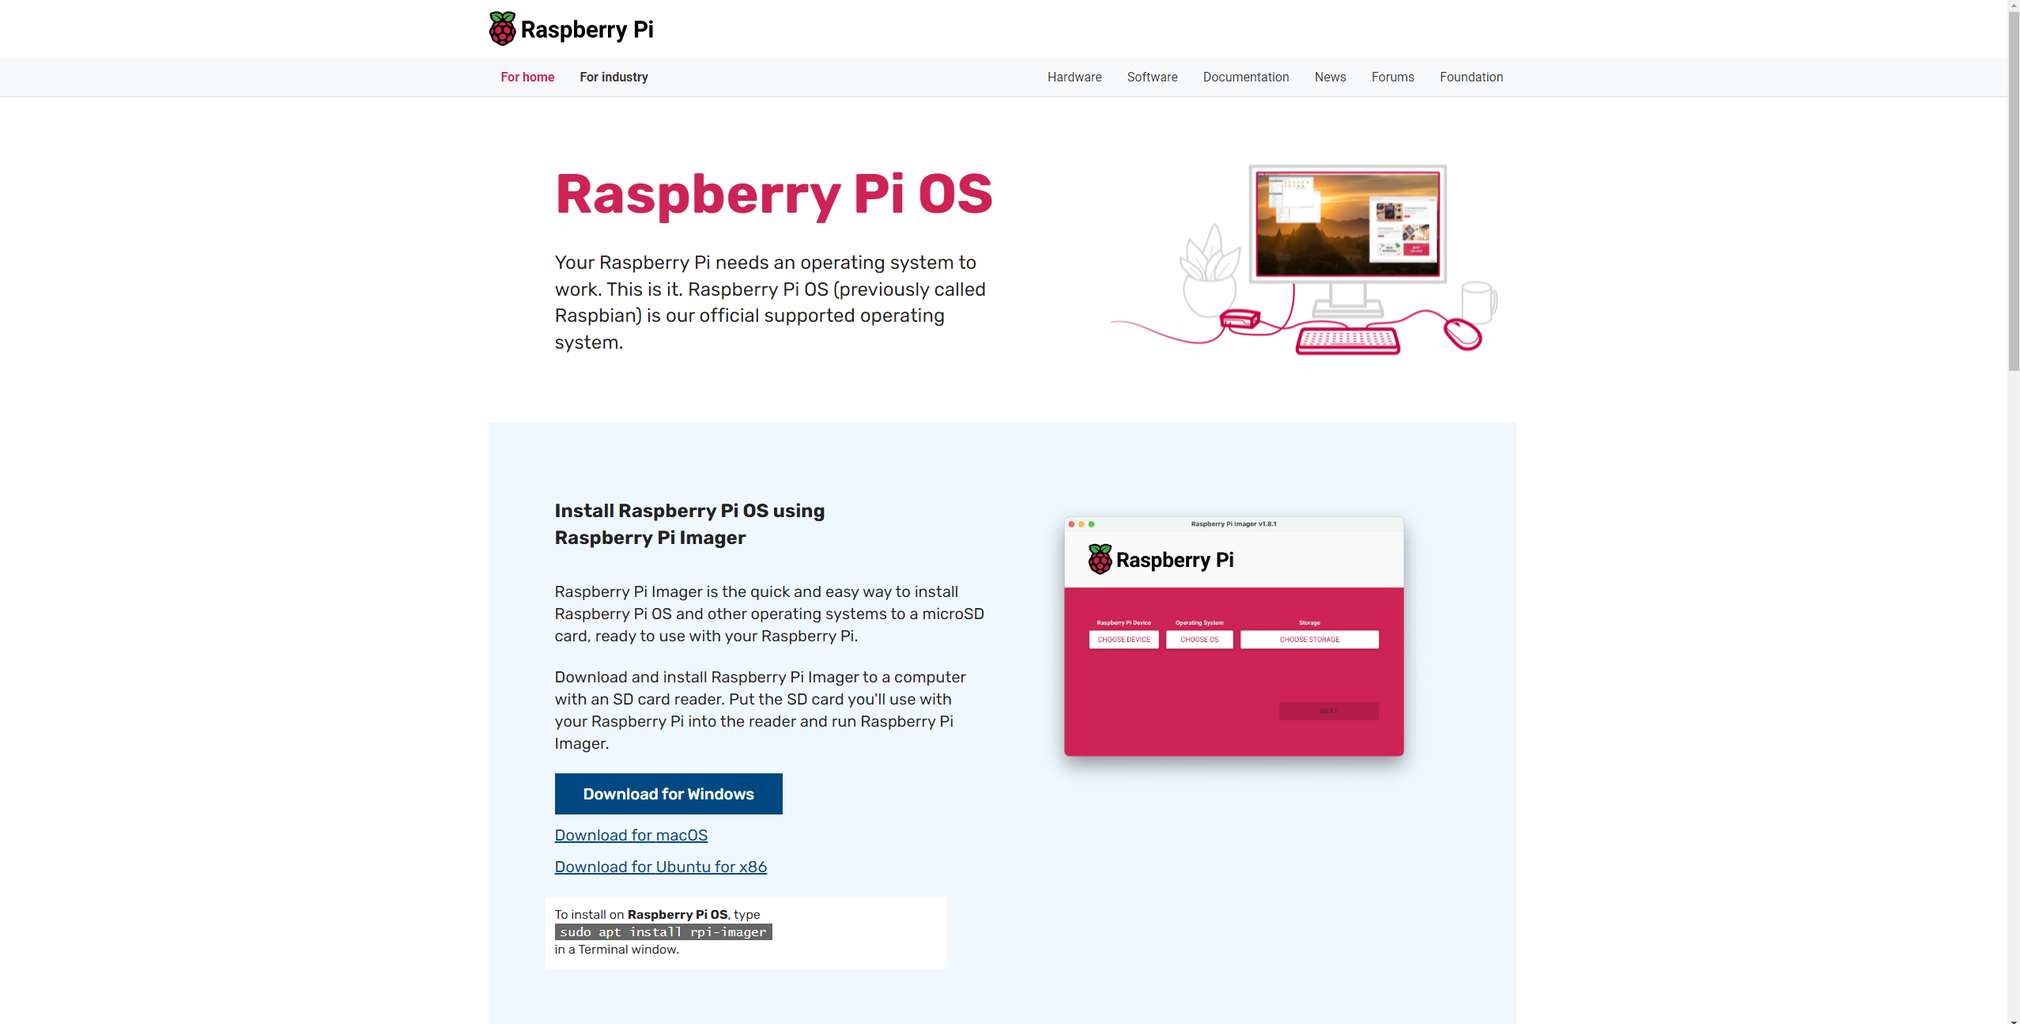


- Go to https://www.raspberrypi.com/software/
- MAKE SURE TO PLUG YOUR MICRO SD CARD IN NOW OTHERWISE THE IMAGE CRTEATION TOOL WILL NOT RECOGNISE IT
- Download the Image Creation tool for your system. I use a Windows PC so I selected "Download for Windows"
- After going through the installation process, a new window should pop up.
- For the "Raspberry Pi Device" field select Raspberry Pi ZERO 2 W
- For the "Operating System" field select "Raspberry PI OS (64 bit)" The images say to use the lite version but ignore this
- Select your storage device for the "Storage" field
- Press "Next"
- Press "NO" for "Would you like to apply OS customisation"
- Press "YES" to "All existing data on 'Mass Storage Device USB Device' will be erased. Are you sure you want to continue?" MAKE SURE YOU HAVE NOTHING YOU WANT TO KEEP ON YOUR MICRO SD CARD
- Wait for the image creator do be finished
- Remove your Micro SD card and plug it into the Raspberry Pi ZERO 2 W.
- Connect your Raspberry Pi to a power source to set it up, we will use the pie power later.
Step 5: Getting the Pi Approximation Script Running
Now we need to install git so you can clone my repository. To do this run these commands in the terminal:
sudo apt update
sudo apt-get install git
Afterward, input 'Y' to continue and allow some git to install.
Once git is installed, paste the following command into the terminal:
git clone https://github.com/SilasMeneux/Pi-on-a-Pi-powered-by-Pie/
Or alternatively you can skip the git install and copy the code manually in.
import tkinter as tk
from decimal import Decimal, getcontext
from math import factorial


def chudnovsky(digits):
    getcontext().prec = digits + 5
    C = Decimal(426880) * (Decimal(10005) ** Decimal(0.5))
    a = Decimal(0)
    for q in range(digits // 15 + 2):
        a += Decimal(factorial(6*q)) / Decimal((factorial(3*q))*Decimal((factorial(q))**Decimal(3))) * (Decimal(545140134)*Decimal(q) + Decimal(13591409)) / (Decimal(-262537412640768000)**Decimal(q))
    return str(C * a**-1)[:-5]


class PiGeneratorApp:
    def __init__(self, root):
        self.root = root
        self.root.title("Pi Generator")
        self.root.attributes('-fullscreen', True)  # Fullscreen mode
        self.root.config(bg='black')  # Background color
        self.label = tk.Label(root, font=("Courier", 200), fg="white", bg="black")
        self.label.pack(expand=True)
        self.digits = 0
        self.pi_str = ""
        self.current_digit_index = 0
        self.input_entry = tk.Entry(root, font=("Arial", 30))
        self.input_entry.pack(pady=50)
        self.input_entry.focus_set()
        self.start_button = tk.Button(root, text="Start Generating", font=("Arial", 30), command=self.start_generation)
        self.start_button.pack()


    def start_generation(self):
        self.digits = int(self.input_entry.get())
        self.pi_str = chudnovsky(self.digits)
        self.update_pi_digit()


    def update_pi_digit(self):
        if self.current_digit_index < len(self.pi_str):
            pi_digit = self.pi_str[self.current_digit_index]
            self.label.config(text=pi_digit)
            self.current_digit_index += 1
            self.root.after(1000, self.update_pi_digit)


root = tk.Tk()
app = PiGeneratorApp(root)
# Create a label widget for the pi decoration
pi_label = tk.Label(root, text="π", font=("Courier", 100), fg="white", bg="black")
pi_label.pack(anchor="center")
root.mainloop()
This code uses a simplified version of the Chudnovsky Algorithm to approximate pi. This is the same formula that has been used for record breaking pi approximations.
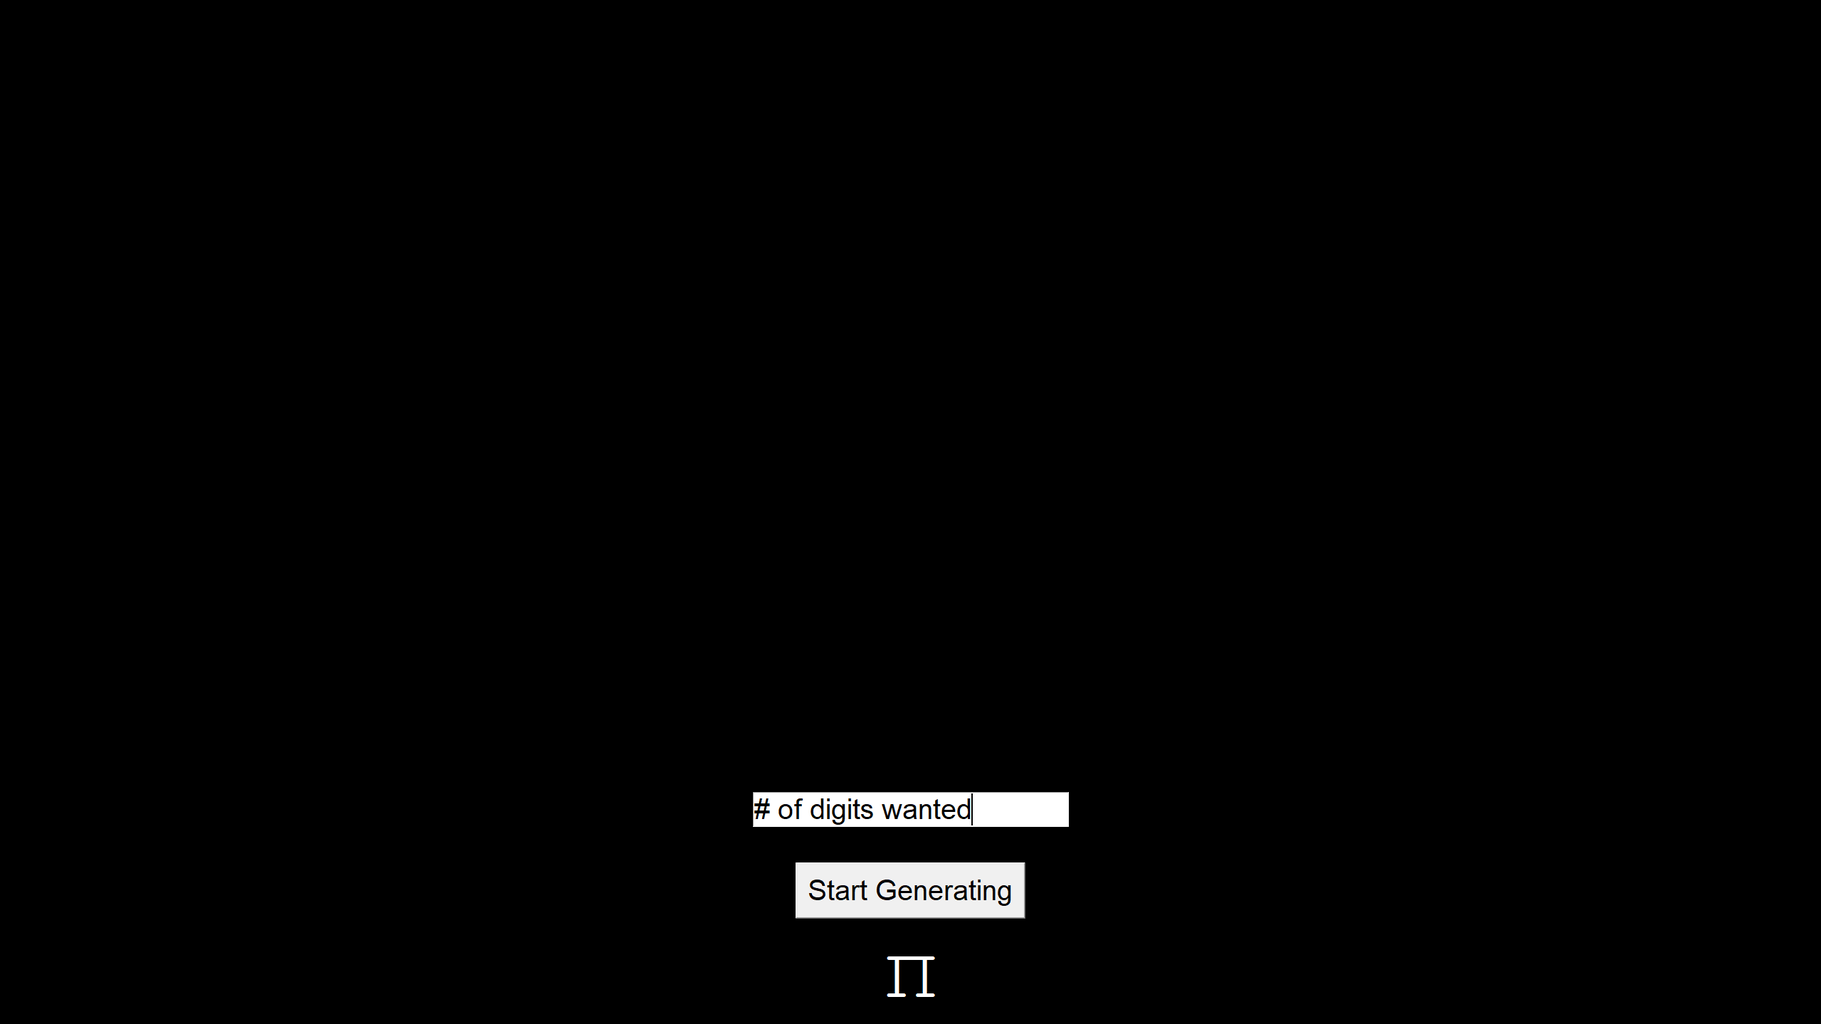
Open the file explorer and find the repository and run the python file. A window should pop up asking how many digits of Pi you want and a button to start generating.

Step 6: Final Preparations

To add some extra yummy pi to my project, I 3d printed a large pi symbol to mount everything on to. I used double sided tape to attach all of the components to the symbol. I will attach the 3D model here:
Attachments

Step 7: Powering the Raspberry Pi Generating Pi Powered by PI


Now that we have baked the ultimate PI generating machine, we can finally approximate the digits of PI. Make sure the surface of the pi is no hotter than 140°C to allow a 10°C margin of error so that the max temp of the Peltier module is not exceeded. The closer the pie is to this value the better as it means that a higher voltage and current will be produced. Place the sides of the Peltier modules which have text on them facing up and place the sides without writing on top of the pie as shown in the picture. Hold a Ziplock bag full of a cold object (I used ice) on top of the Peltier module to cool the other side down. The boost converter should turn on and so should the Raspberry Pi as the modules generate power.
Step 8: OPTIONAL Making a Raspberry Pie

Ingredients:
1 packet ready to roll puff pastry
4 punnets of raspberries
140g granulated sugar
1 lemon
35g corn flour
140g ground almond
Method:
Preheat oven to 200°C (180°C fan)
In a bowl gently mix together the raspberries, sugar, juice of 1 lemon, corn flour, almonds - don’t mix too much as you don’t want to end up with a liquid consistency
Roll out pastry to 2cm think rectangle, cut out 30cm circle, and a 45cm circle.
Place 30cm pastry in the fridge
Place the 45cm circle in a pie baking dish, cover with baking paper and fill with baking beads or lentils
Blind bake the base for 15mins
Take out from the oven, remove beads, place back in the oven for 5mins.
Take out of the oven fill pie with raspberry mixture, cover with 30cm pastry lid with a cut out pi symbol stuck on top using egg wash, coat with egg yolk for glaze.
Place back in the oven for 15mins until mixture is boiling and lid is brown.
Step 9: Conclusion
In conclusion, with just a Raspberry Pi and some Peltier modules, you've got a neat little setup for generating power from waste heat. It's a cool DIY project that showcases the potential of renewable energy tech. The thermoelectric generator technology is still not perfect as it can only generate a small amount of power but hopefully in the near future it will become a lot more effective!
Thank you for reading this Instrcutable and a Very Happy Belated PI Day! This is my first time making one so I hope it was ok!

Participated in the
All Things Pi Contest

![Tim's Mechanical Spider Leg [LU9685-20CU]](https://content.instructables.com/FFB/5R4I/LVKZ6G6R/FFB5R4ILVKZ6G6R.png?auto=webp&crop=1.2%3A1&frame=1&width=306)


