Introduction: Guitar Chord Chart
NOTE: This is a very old project, circa 2016. Some links may no longer be correct and some parts may no longer be available. However, I think that the 3D printed parts and much of the software may still be useful to anyone wanting to make a similar project.
This could be considered a remix of the Digital Chord Chart from Instructables in 2014. However, it is basically a complete redesign with original features, 3D parts and software. Its main purpose is to show the fingering needed to generate specific guitar chords. This version supports the following:
- Finds multiple variations of all standard guitar chords.
- Has a unique reverse chord lookup feature in which the user can specify string/fret fingering and the chord finder will return the name of the corresponding chord.
- Supports user selectable options for chord display.
- Has a demo mode that can be used to diagnose wiring issues (or just show off).
- Has a diagnostic mode that can be used to identify IR codes from any IR remote control.
- Is adaptable to any IR remote control.
- All plastic parts are printable on most reasonably sized 3D printers.
- All 3D parts fit together without the need of glue or other hardware.
This project is fully documented on my Guitar-Chord-Chart git site. Please see it for complete documentation.
Note that links in the PDF file below are not functional. The git site for this project contains a spreadsheet (Manifest.xlsx) with links that were valid at the time of its creation. Some of them may no longer be active.
Attachments
Supplies
Note that links for the items in the parts table can be found in the Manifest.xlsx file on the project's git site.
Required Tools
- Soldering Iron
- Solder
- Side Cutters
- Needle Nose Pliers
- Small Wrench or Pliers
- Knife and/or Wire Strippers
- Small Phillips Screw Driver
- Small Files or Sand Paper
- Multimeter
- Ruler
- Helping Hands with Magnifier (optional but recommended)
- Computer with Arduino V1.7.8 or Later Software Installed
- A-B USB Cable (for Arduino programming)
- Zip Tie Tool (optional)
- 3d Printer (optional)
Step 1: Install Arduino Libraries
This project was created with a pretty old version of the Arduino build system (V1.7.8). Using a more up-to-date version is probably a good idea although there might be some incompatibilities that may need to be handled. The project uses the following Arduino libraries:
- EEPROM https://github.com/arduino/Arduino/tree/master/hardware/arduino/avr/libraries/EEPROM
- IRLib https://github.com/cyborg5/IRLib
- LiquidCrystal https://github.com/adafruit/LiquidCrystal
- TimerOne https://github.com/PaulStoffregen/TimerOne
There are many sites that contain good instructions on installing Arduino libraries.
Step 2: Wiring Diagrams
The first diagram is the wiring for the base, and the second is the wiring for the LEDs in the neck. The following sections will give more detail on wiring the device.
Step 3: Mount the Arduino
Insert the Arduino into the base with the USB connector protruding from the hole in the back of the base. A little force may be needed to get the Arduino to seat properly. Once the Arduino is seated, secure it with 4 nylon M3 x 6mm nylon screws.
Step 4: Install the Power Switch
Pre-wire the Power Switch
See the diagram above. Solder black ground wires, power wires and 1K resistor to the power switch. Leave the other end of the wires free for now. Wiring details follow:
<1> – Solder one end of a 1K resistor to this pin. Keep the leads as short as possible.
<2> – Solder the other end of the 1K resistor to this pin. Also solder a 7” piece of red wire to this pin. This wire will eventually terminate at the Arduino VIN pin, but leave the other end free for now.
<3> – Solder 3 9” black (ground) wires to this pin. They will eventually terminate at the power jack, the LCD, and the IR sensor. For now, leave the other ends free.
<4> – Solder a 9” red (+9V) wire to this pin. This wire will eventually terminate at the power jack, but leave the other end free for now.
Mount the Power Switch
Remove the mounting nut from the power switch if it is not already removed. Fish the power switch wires through the power switch hole in the base. Insert the switch into the power switch hole being careful to observe the keying. The power switch is keyed via 2 flat sides on the hole and on the power switch. Make sure that the switch is oriented so that the flat sides of the power switch match the flat sides of the power switch hole. Once the power switch is seated in the base, fish the wires through the power switch mounting nut, and screw the mounting nut onto the switch. Note that the mounting nut has one side that has bumps. The mounting nut should be oriented so that it the bumps are against the base.
Step 5: Install the Power Jack
Wire the Power Jack
- Solder the red +9V wire from <4> of the power switch pre-wiring section to the large post on the back of the power jack.
- Cut a 5” length of black wire and solder it and one of the black ground wires from <3> of the power switch pre-wiring section to the lower post on the back of the power jack.
- Note that the middle post on the power jack is unused. It has been cut off in the picture below.
Check Connections
Using the multimeter, check that there are no shorts in any of the connections that have been wired so far. Also check that all black wires are connected by verifying that there is continuity between the ends of each of the black wires. Likewise, check that all black wires are connected when the switch is closed by verifying that there is continuity between the ends of each of the red wires. With the switch closed, verify that there is no continuity between any of the red wires and any of the black wires.
Apply Power and Test
Now that the wiring has been verified, it is safe to apply power. Connect the power adapter to the power jack and verify that the switch lights up when it is on, and that the light goes out when the switch is off. In addition, it is a good idea to check that the multimeter shows +9 volts between any red and black wires when power is attached and the switch is on.
Run Power to the Arduino
Now that the incoming 9V power has been verified, it is safe to apply the 9V power to the Arduino’s VIN input. Be sure to disconnect the power supply before performing this step.
Solder the remaining free red wire from the power switch (+9 V) to one end of a 4 pin male header (or use the stripboard method). Solder the remaining free black wire from the power jack (Ground) to the third pin of the 4 pin male header. Now insert the 4-pin header into the Arduino such that the red wire aligns with the Arduino VIN pin, and the black wire aligns with one of the Arduino GND pins.
Assuming that the Blink program is still installed on the Arduino, when power is applied, and the switch turned on, the Arduino’s LED should be seen to blink.
Step 6: Install the LCD
Pre-fit the LCD and Potentiometer in the Base
The base was designed to fit the LCD snugly. Due to variances in 3d printing, the openings for the LCD and potentiometer may need some slight adjustments. Holding the base firmly, attempt to insert the LCD into its opening in the base (connections towards the top of the base). If this is too difficult, inspect the opening to determine where the LCD is binding. Use a file or sandpaper to remove any offending plastic till the LCD fits snugly into its opening.
Similarly, the hole for mounting the potentiometer may be too small to accept it. If this is the case, use a file or sandpaper to enlarge the hole until the potentiometer easily slides into it.
Pre-wire the LCD
All of the pre-wiring of the LCD can be done before the LCD is mounted to the base. See the diagram below for details. Note the following:
- Pin 1 of the LCD module is at the bottom of the diagram, pin 16 is towards the top.
- All wires should be soldered to the back of the board in order to leave room on the front of the board for mounting the LCD module to the base.
- Each signal wire (the wires that will end up at Arduino pins 2 through 7) should be 7” long.
- The black ground jumper wires that connect between pins 1 and 5, and between pins 5 and 16 of the LCD module should be about 2” each.
- The red +5 V jumper wire that connects between pins 2 and 15 of the LCD module should be about 3”.
Follow these steps to pre-wire the LCD module:
- Solder the signal wires to the LCD module. Use the colors shown on the diagram. Leave the other end of the signal wires free for now.
- Solder a 7” length of blue wire to pin 3 of the LCD module. Solder the other end of the blue wire to the center post of the 10K potentiometer.
- Twist the end of one of the ground wires from the power switch (see <3> of the power switch pre-wiring section above) to one of the 2” black jumper wires, and solder them to pin1 of the LCD module.
- Twist the second 2” black jumper to the free end of the other 2” black jumper, and solder them to pin 5 of the LCD module.
- Cut a piece of black wire to a length of 6”. Twist the end of this wire to the free end of the black 2” jumper from the previous step, and solder them to pin 16 of the LCD module.
- Solder the other end of the 6” black wire to either end post of the potentiometer.
- Cut two 7” lengths of red wire. Twist one end of one of these wires to one end of the 3” red jumper wire, and solder them to pin 2 of the LCD module. Twist one end of the other 7” red wire to the other end of the 3” red jumper, and solder it to pin 16 of the LCD module.
- Solder the other end of the 7” red wire from pin 16 of the LCD module (see the previous step) to the empty post of the 10K potentiometer.
- Solder the other end of the 7” red wire from pin 2 of the LCD module to the fourth pin of the Arduino power group header (or stripboard). This red wire should connect to the end of the header that currently has nothing else attached to it.
- Solder the other end of the signal wires (see step 1 above) to a 6 pin header (or stripboard) in the order shown in the diagram (see the table in the picture above, sorry but tables don't format well here ).
Check the LCD Wiring
Use a multimeter to check for shorts and continuity on all connections. If all connections look OK, then insert the header into the Arduino such that pin 1 of the header aligns with D2 on the Arduino, and pin 6 of the header aligns with D7 of the Arduino. Also insert the power header into the Arduino if it is not already there, making sure that the +5V pin is toward the back of the base.
Test the LCD wiring
Attach the A-B USB cable between the computer and the Arduino. Load the IrTest program into the Arduino. Turn the potentiometer until characters can be seen on the LCD display. The LCD should now display “hello world” on first line, and the number of seconds since power-up counting up on the second line.
Mount the LCD
Remove power from the base before continuing.
Now that the LCD is working it is time to mount it into the base. Carefully insert the LCD into the base.
Mount the potentiometer in its mounting bracket. Note that the potentiometer mounting bracket contains a small keying hole on top which can accept a tab that the potentiometer contains. Do not yet secure the potentiometer with its mounting nut, just in case a problem is introduced while mounting the components.
Re-apply power and verify that the LCD is still working correctly. If not, remove the LCD and verify all connections.
Secure the LCD with 3 M3 x 6mm nylon screws. Note that it will not be easy inserting the top left screw, and it will be impossible to insert the top right screw. Due to the snug fit, using 3 screws to secure the LCD should be sufficient.
Secure the potentiometer via tightening its mounting nut.
Re-apply power and verify the LCD is still working.
Step 7: Install the IR Sensor
Mount the IR Sensor
Insert the IR sensor into the base with its leads facing the bottom of the base. It is possible that the IR sensor hole in the base could need some filing in order to make the IR sensor fit. Once the IR sensor is in place, secure it by inserting the Input Device Holding Rod into the through the holes in the two holding rod brackets that are on either side of the IR sensor. This may require the application of some force on the back of the IR sensor to seat it properly into the base.
Once the IR sensor is mounted, use the needle nose pliers to bend the three 3 IR sensor leads toward the back of the base. The bend should be about ½” below the sensor. Using the side cutters, trim the 3 IR sensor leads to about ½” after the bend.
Wire the IR Sensor
Two options exist for wiring the IR sensor.
- Solder directly to the IR sensor’s leads.
- Solder to a 3 pin female header which will mate with the 3 IR sensor leads. I prefer this method.
Regardless of the wiring method used, the following must be done:
- Cut a 9” yellow wire and solder one end to the leftmost pin of the IR sensor (or female header). Solder the other end to the single pin male header. It will be attached to Arduino pin A5.
- Solder the remaining black wire from the power switch to the middle pin of the IR sensor (or female header).
- Cut a 9” red wire and solder one end to the rightmost pin of the IR sensor (or female header). Solder the other end to the Arduino power group 5V pin.
Check the IR Sensor Wiring
Using the multimeter, verify that there are no shorts between the pins of the IR sensor (or female header). Also verify that there is continuity between the IR sensor pins and Arduino pin A5, GND, and Arduino pin 5V respectively. Once verified, connect the female header (if used) to the IR sensor, observing correct orientation. Also connect the 1 pin male header to Arduino pin A5.
Test the IR Sensor
Be sure the Arduino IRLib library has been installed as described earlier.
Load the IrTest sketch into the chord chart’s Arduino and apply power.
When the IrTest sketch starts, the LCD display should "Press a key.".
At this point it is waiting to see a key press from the IR remote control. Press any key on the IR remote. The LCD display will show the count of the number of IR key presses along with the hexadecimal code of the last pressed key. Something like the picture above should be displayed, with a count and value. For example: "Count: 4", "Val = 0xB44D8DFB".
Note that the 8-digit hex code should be unique for each key that is pressed. At this point, the value of the IR code is not important. The important thing is that the IR sensor recognized the receipt of an IR code, and that it is repeatable and unique for each unique IR remote key.
The sketch will continue to accept key presses and return their associated value forever.
Note that in my experience, the only reliable IR codes are Sony codes. And even these don’t always work correctly all the time. The important thing is that IR codes are seen by the IR sensor.
Step 8: Build the Neck Assembly
Pre-test the LEDs
It is difficult to replace an LED once the fingerboard wiring is completed. For this reason, it is advisable that all LEDs be tested before installing them into the fingerboard. I have found that some of the cheap LEDs from the web have a non-zero chance of being dead on arrival.
An easy way to test an LED is to set the multimeter to continuity testing mode and connect the leads to the LED. Some voltmeters supply enough current in continuity mode to light an LED. If yours doesn’t do this, then a battery could be used in its place. If the LED doesn’t light, then reverse the leads and try again. If the LED doesn’t light in either case, then it is probably bad. Discard it.
You’ll need 30 good LEDs for the next step.
Prepare the Fingerboard
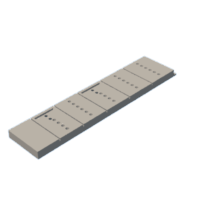
Before installing the LEDs, it is best to install the frets and the inlays into the fingerboard. The frets will keep the fingerboard from lying flat on the working surface, and give the LEDs a bit of room to protrude from the fingerboard when inserted. The inlays should be installed so that the LEDs that are associated with them will penetrate the inlays when inserted. This will eliminate the possibility of having a pre-installed LED get pushed out if the inlay is later added.
The frets fit snugly into the fingerboard fret slots. Some 3d printers may leave a small lip on either side of the fingerboard that can interfere with installing the frets. In this case, it has been found that using a sharp knife or X-acto knife to remove such lips is helpful. Once the fret channel is cleared, simply slide a fret into each of the fret slots as far as possible. Once they are all installed, push them all in flush with the fingerboard by holding the fingerboard on its side against a desk or other flat surface, and apply enough force to move all frets into the correct position.
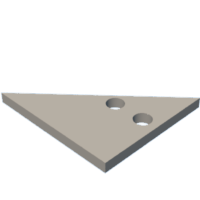
The inlays should be installed next. Note that the fret 3 triangular inlay is slightly larger than the fret 5 inlay. The triangular inlays should be installed with the shiny side up. Install the triangular inlays by seating one edge of the triangle, then forcing the opposite corner into position. A wooden handle may be used to “bump” the inlay into place by tapping it with sufficient force. In the worst case, it may be useful to use a file or some sandpaper to remove a little plastic from one edge of the inlay. If this is done, be careful to not remove too much material.
It is also a good time to insert the circular side inlays. Both of these inlays are the same size, so either one can be installed into either fingerboard side inlay hole. As with the triangular inlays, the circular inlays will be very snug. They may need to be tapped in to get them to seat flush with the fingerboard.
Install the LEDs Into the Fingerboard
It is time to install the LEDs into the fingerboard. The 30 holes in the fingerboard are designed to snugly fit the 30 3mm LEDs. Each LED must be mounted with its longer lead toward the top of the fingerboard, and its shorter lead toward the bottom. It takes a moderate amount of force to install each LED. The best way to insert them is to hold the LED with needle nose pliers by one of leads. Now, with the LED oriented with the longer lead up, press the LED down into its corresponding fingerboard socket with enough force to get it to “snap” or “pop” into place. Be sure that all LEDs are seated to the same depth. This is best done by viewing the front of the fingerboard and verifying that all LEDs protrude the same distance.
Wire the LEDs
Note: The following steps require the LED leads to be bent. Use care when bending the LED leads. Bending them more than once or twice in the same spot may cause them to break off. Also, while bending the LED leads, be careful not to pull the LED out of its mounting hole in the fingerboard.
Bend the LED Leads
Proceed to bend the LED leads as shown in a photo above.
- Starting with the leftmost LED from the top fret, bend the top, longer, LED lead to the right so that it is parallel with the back of the fingerboard and touches the next LED to the right’s longer lead. The bend should be made close to the fingerboard, but not touching it (about 1/8” away). This will allow sufficient space so that soldering the leads, in a future step, will not melt the fingerboard, but will still provide enough room to mount the neck back.
- Repeat step 1 with the rest of the LEDs of the first fret, except the rightmost LED. Do not bend the rightmost LED’s longer lead. It will be handled in a later step.
- Repeat steps 1 and 2 on the rest of the fret LEDs, being sure to leave the rightmost LED lead unbent.
- Starting with the leftmost LED from the top fret, bend the bottom, shorter, LED lead down toward the corresponding LED of fret 2. Again, the bend should be made about 1/8” above the fingerboard.
- Repeat step 7 with the rest of the LEDs. The LED of the fifth fret should be bent down similar to all the other LEDs.
Solder the Fret (Horizontal) LEDs
- Starting with the leftmost LED of the top fret, solder the bent upper lead to the adjacent LED’s bent lead.
- Repeat step 1 for all LEDs in the top row except the rightmost. The LED to the left of the rightmost LED should be soldered to the unbent longer lead of the rightmost LED.
- Repeat steps 1 and 2 with the LED of all the remaining frets.
- Trim the LED lead from the next to last LED so that it does not protrude beyond the rightmost LED.
Wire the String (Vertical) LEDs
Note that it is recommended to use the solid wires for the string (vertical) LEDs. This should make it easier to perform the following steps. However, any kind of wire will do in a pinch.
- Cut a piece of yellow wire about 1 ½” long, and make a small loop on each end. The picture above shows an example in which black wire was used.
- Carefully slide the jumper wire from step 1 over the first LED leads of fret 1 and fret 2 (see the top right jumper of the picture above).
- Insure that the jumper is about half way over the bent leads of the two LEDs and solder both ends.
- Repeat steps 1 through 3 for all other connections as shown in the picture above. Note how the black and yellow wires in the picture are slightly bent away from the edges of the fingerboard. This is to allow room for the connection supports on the neck back, which will be added later.
Install the String Connections
This section will install the connection wires and header that will connect the string (vertical) LED leads to the Arduino.
- Cut an 8” length of each color of stranded wire.
- Solder one end of the wires from step 1 to each of the corresponding colored fret 5 LEDs as shown in the picture. For example, the lower row of previously installed solid wires in the picture is yellow. Solder one end of the 8” wire from step 1 to the corresponding fret 5 LED lead.
- Repeat step 2 for each fret 5 LED lead (green, blue, white, red, black).
- Solder the other end of each of the wires from the preceding steps to a male 6-pin header, in the same order as the string LED wires (yellow, green, blue, white, red, black). See the wiring table picture above.
Install the Fret Connections
Use the picture from the preceding section as reference.
- If the 1K ohm resistors are taped together, cut the ends of the resistors to insure that the sticky stuff from the tape is removed. This sticky stuff will interfere with soldering the parts.
- Cut stranded wires as specified in the wiring table picture above table:
- Solder one end of each 1K ohm resistor to the LED lead that is unbent on each fret.
- Solder the wires that were cut in step 2 above to the other end of the resistors as specified in the table above.
- Solder the other end of each of the wires from the preceding step to a male 5-pin header, in the same order as the fret LED wires (yellow, green, blue, white, grey).
Check the LED Wiring
Visually inspect all connections for shorts and opens. Using the multimeter, check for shorts and opens. Shorts are most likely to occur on the header connections. Some voltmeters supply enough current in continuity mode to light an LED. If yours doesn’t do this, then a battery could be used in its place. A good test is to use the multimeter in continuity mode (or battery) to test the LED connections. While holding the black (common) probe on a string header pin, run the red (positive) probe over the fret header pins. You should see LEDs associated with the selected string light one-by-one down the frets. If any LED doesn’t light, then there is an open connection to that LED. If more than one LED lights up at a time, then there is a short. These conditions must be fixed before proceeding.
Test the LEDs
Plug the 5-pin fret header into pins A0-A4 of the Arduino, with the yellow wire associated with Arduino pin A0. Note that it might be necessary to file/sandpaper the 5-pin header and/or the 1 pin IR connector from Arduino pin A5. They might not mechanically fit in to the Arduino header socket without a little filing/sanding.
Plug the 6-pin string header into pins A8-A13 of the Arduino, with the yellow wire associated with Arduino pin A8.
Be sure that all the needed Arduino libraries have been installed as described earlier.
Load the GuitarChordChart sketch into the chord chart’s Arduino and apply power.
When the GuitarChordChart sketch starts, the LEDs should run a test cycle in which each LED successively turns on until all LEDs are lit, then the LEDs will successively turn off until all LEDs are unlit. Finally, the LEDs should light up in the pattern of a C major chord.
The LCD display should show "Chord-O-Matic", "V1.0 By JMC" as in the picture above until the LED test completes. Then the LCD should display the default chord: "C V:1 Fret: 1", "Major". This indicates a C Major chord, variation 1, starting on fret 1.
Step 9: Constructing the Neck and Headstock
Unplug the 6-pin string header and the 5-pin fret header from the Arduino.
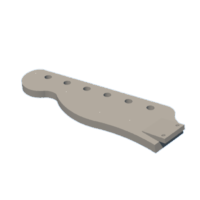
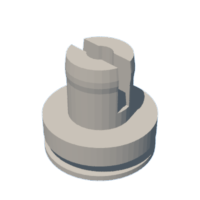
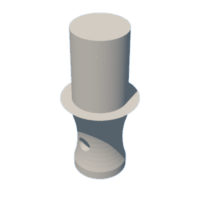
- Insert the 6 Tuner Posts into the Headstock. They must be inserted from the top of the Headstock (the side with the lettering). It may take a moderate amount of force to get the Tuner Posts seated properly into the Headstock. When properly seated, the flange on the Tuner Post should be flush with the top surface of the Headstock, and the Tuner Post should protrude from the bottom of the Headstock.
- Insert the 6 Tuner Shafts into the corresponding holes in the Tuner Assembly. A significant amount of force may be required to get the Tuner Shafts to insert into the Tuner Assembly.
- Attach the 6 Tuning Knobs to the ends of the 6 Tuner Shafts. A significant amount of force may be required to get the Tuning Knobs to seat correctly onto the Tuner Shafts.
- Attach the Tuner Assembly onto the end of the protruding Tuner Posts making sure that the holes for the Tuner Shafts face toward the near edge of the Headstock.
- Insert the 6 Tuner Shafts into the corresponding holes in the Tuner Assembly. A significant amount of force may be required to get the Tuner Shafts to insert into the Tuner Assembly. The Tuner Knobs should all end up at the same distance from the Tuner Assembly.
- Insert the Nut into the Fingerboard.
- Attach the Headstock to the Fingerboard.
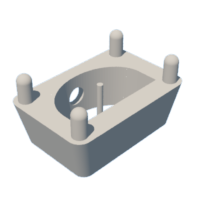
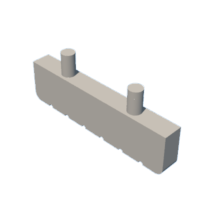
- Insert the Mating Posts into the Fingerboard. Not all of the Mating Posts are necessary. I recommend inserting one at each of the corners, and at least one in the middle of each side (a total of at least 6). Note that a good deal of force may be needed to get the Mating Posts to seat properly into the Fingerboard.
- Align the Mating Posts with the Mating Post Holes in the Neck Back, and force the Neck Back onto the Mating Posts. The middle of the Neck Back will not support a lot of force, so it is best to apply pressure to the edges when getting the Neck Back and the Fingerboard to mate properly.
Mount the Neck
- Insert the Neck Support into the Base. A significant amount of force is required to achieve this. Once the Neck Support is started, turn the Base over, and push the Base onto the Neck Support. This will keep from putting too much pressure on the top of the Base which may cause damage.
- Fish the string and fret headers and wires through the neck hole in the Base, and seat the Neck assembly into the Neck Support.
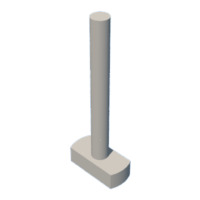
- Secure the Neck assembly to the Neck Support by inserting the Neck Support Pin into the Neck Support. The Neck Support Pin should be inserted all the way into the Neck Support so that it engages the Neck, and keeps it from sliding.
Wire the LEDs to the Arduino
- Plug the 5-pin fret header into pins A0-A4 of the Arduino, with the yellow wire associated with Arduino pin A0.
- Plug the 6-pin string header into pins A8-A13 of the Arduino, with the yellow wire associated with Arduino pin A8.
Test the LEDs
Load the GuitarChordChart Arduino sketch into the Guitar Chord Chart and apply power. The LEDs should run through their power-up sequence, and the LCD should display the messages shown in the previous “Test the LEDs” section.
Step 10: Program the Remote Control
All IR remote controls use different codes and different methods of programming. This section describes the code and programming method for the Vivitar 8-in-1 Remote Control that I got from Microcenter (Mfg. Part # VIV-URC-713).
After much testing, I settled on a Sony TV code 5321. To program the device, do the following:
- Press the button corresponding to the device you want to use for controlling your Guitar Chord Chart (TV, DVD, DVR, SAT, CBL, or AUX).
- Press and hold the SET button until the remote control’s red LED lights.
- Enter the 4-digit program code (5-3-2-1).
See the next section if you are using a different remote control. It describes how to determine the key values that are sent by your remote control, and how to modify the Arduino sketch to accommodate them.
Step 11: Modify the Arduino Sketch As Needed
There are 3 main reasons that you may wish to modify the Arduino sketch:
- You are using a different remote control than the one that has been specified.
- You are adding or modifying chord patterns.
- You want to add or modify the behaviour of the sketch.
Each of these is discussed in detail below.
Modify IR Codes
There are 2 steps required to change the IR codes that the Guitar Chord Chart responds to.
- Determine the key code values of that are sent by the remote control that you are using. The Guitar Chord Chart uses the keys in the following table. If your remote control does not contain any of the specified keys, then you’ll need to find another key to substitute for it. The following table can be used to help gather the IR key codes for your remote control. Use the IrTest Arduino sketch to gather the equivalent key codes for your device, and enter them into the table below. Only keys that are used in the sketch are required. The others are displayed to show which keys may be used if you want to modify the existing functionality. The data from the table picture above is reproduced below. The data consists of "IR Key", "Sketch Name", "Used?", "Current Code", and "Your Code".
- POWER POWER NO 0xf124b0b6
- MUTE MUTE NO 0x78f479a7
- REWIND REWIND NO 0x2bdc941f
- PLAY PLAY YES 0x633dd8c4
- FAST FORWARD FFWD YES 0xbd293f06
- STOP STOP NO 0xc502105e
- PAUSE PAUSE NO 0x36d87f5b
- MENU MENU NO 0x3ac82a07
- VOLUME UP VOL_UP YES 0xb44d8dfb
- VOLUME DOWN VOL_DOWN YES 0x43898cc0
- CHANNEL UP CH_UP YES 0xbc392255
- CHANNEL DOWN CH_DOWN YES 0xffafb8dc
- UP ARROW UP YES 0xec27d43d
- DOWN ARROW DOWN YES 0x086bd99c
- LEFT ARROW LEFT YES 0x1a422e43
- RIGHT ARROW RIGHT YES 0xa23bd824
- OK (SELECT) OK YES 0x7295a904
- INFO INFO YES 0xdc68e43f
- INPUT INPUT_CH NO 0xba00cb82
- BACK BACK YES 0x99c7ec8f
- GUIDE GUIDE YES 0xd1c67b61
- 1 NUM_1 YES 0x207bef0f
- 2 NUM_2 YES 0xe8455d8e
- 3 NUM_3 YES 0xcbb7e949
- 4 NUM_4 YES 0x2c1f3172
- 5 NUM_5 YES 0x905ed4f5
- 6 NUM_6 NO 0x8ce1e3fc
- 7 NUM_7 NO 0x315b1905
- 8 NUM_8 NO 0xc67c01b6
- 9 NUM_9 NO 0xb418d969
- 0 NUM_0 NO 0x3b0b8330
- - DASH NO 0xbe980a4b
- Now that you have collected the key codes for your remote control, you must enter them into the IrCodes.h file that can be found in the GuitarChordChart directory. The relevant portion of the existing code follows:
 static const uint32_t POWER = 0xf124b0b6; //
 static const uint32_t MUTE = 0x78f479a7; //
 static const uint32_t REWIND = 0x2bdc941f; //
 static const uint32_t PLAY = 0x633dd8c4; //
 static const uint32_t FFWD = 0xbd293f06; //
 static const uint32_t STOP = 0xc502105e; //
 static const uint32_t PAUSE = 0x36d87f5b; //
 static const uint32_t MENU = 0x3ac82a07; //
 static const uint32_t VOL_UP = 0xb44d8dfb; //
 static const uint32_t VOL_DOWN = 0x43898cc0; //
 static const uint32_t CH_UP = 0xbc392255; //
 static const uint32_t CH_DOWN = 0xffafb8dc; //
 static const uint32_t UP = 0xec27d43d; //
 static const uint32_t DOWN = 0x086bd99c; //
 static const uint32_t LEFT = 0x1a422e43; //
 static const uint32_t RIGHT = 0xa23bd824; //
 static const uint32_t OK = 0x7295a904; //
 static const uint32_t INFO = 0xdc68e43f; //
 static const uint32_t INPUT_CH = 0xba00cb82; //
 static const uint32_t BACK = 0x99c7ec8f; //
 static const uint32_t GUIDE = 0xd1c67b61; //
 static const uint32_t NUM_1 = 0x207bef0f; //
 static const uint32_t NUM_2 = 0xe8455d8e; //
 static const uint32_t NUM_3 = 0xcbb7e949; //
 static const uint32_t NUM_4 = 0x2c1f3172; //
 static const uint32_t NUM_5 = 0x905ed4f5; //
 static const uint32_t NUM_6 = 0x8ce1e3fc; //
 static const uint32_t NUM_7 = 0x315b1905; //
 static const uint32_t NUM_8 = 0xc67c01b6; //
 static const uint32_t NUM_9 = 0xb418d969; //
 static const uint32_t NUM_0 = 0x3b0b8330; //
 static const uint32_t DASH = 0xbe980a4b; //
Simply replace the existing hex code with the corresponding code for your remote control, and re-download the GuitarChordChart sketch into the device. Your remote controller should now be understood by the application.
Add or Modify Chords
The supplied source code supports only 2 variations of the M, m, 6, m6, 7, M7, m7, and 9 chord types. However, the code is written to be able to accommodate any number of variations of the following chord types:
M, m, 6,m6, 7, M7, m7, 9, O, +, sus2, 7sus2, sus4, 7sus4, 5, -5, 7b5, m7b5, 7#5, 7b9, 7#9, 7b9#5, 7/6, 9b5, 9#5, M9, m9, 9/6, m9/6, add9, 11, m11, 11+, 13, 13b9, and 13b9b5.
In order to extend the supported chords, two files will need to be modified. These files are ChordChartData.h and ChordChartData.cpp.
ChordChartData.h contains the following lines of code:
const unsigned NUM_COMMON_CHORDS = 8;
const unsigned NUM_COMMON_CHORD_VARIATIONS = 2;
const unsigned NUM_SUPP_CHORDS = 0;
const unsigned NUM_SUPP_CHORD_VARIATIONS = 0;
These lines will need to be modified to indicate the number of chords and variations that will be supported. For example, if the O, +, and sus2 types are added and each of them uses 2 variants, then the code would change to:
const unsigned NUM_COMMON_CHORDS = 8;
const unsigned NUM_COMMON_CHORD_VARIATIONS = 2;
const unsigned NUM_SUPP_CHORDS = 3;
const unsigned NUM_SUPP_CHORD_VARIATIONS = 2;
If, in addition, the number of common chord variations is changed to 4, then the code would change to:
const unsigned NUM_COMMON_CHORDS = 8;
const unsigned NUM_COMMON_CHORD_VARIATIONS = 4;
const unsigned NUM_SUPP_CHORDS = 3;
const unsigned NUM_SUPP_CHORD_VARIATIONS = 2;
The chords have been split into COMMON and SUPPLEMENTAL groups since in general it may be desired to have more variations of the COMMON types, and less variations of the SUPPLEMENTAL types.
Note that due to the architecture of the code, if chord types are added, they must be added in the following order:
O, +, sus2, 7sus2, sus4, 7sus4, 5, -5, 7b5, m7b5, 7#5, 7b9, 7#9, 7b9#5, 7/6, 9b5, 9#5, M9, m9, 9/6, m9/6, add9, 11, m11, 11+, 13, 13b9, and 13b9b5. In addition, all chords in the COMMON group must contain the same number of variations, and all chords in the SUPPLEMENTAL group must contain the same number of variations.
ChordChartData.cpp contains the array of Chord structures for each chord. The following is an excerpt of the data from the array:
static const uint8_t Keys[sizeof(Key) * NUM_KEYS] PROGMEM =
{
 // C Major
 1, 0x00, 0x02, 0x08, 0x30, 0x00, 0x00, 3, 0x00, 0x31, 0x00, 0x0e, 0x00, 0x00,
 // C Minor
 1, 0x30, 0x0a, 0x00, 0x01, 0x00, 0x00, 3, 0x00, 0x31, 0x02, 0x0c, 0x00, 0x00,
 // C Sixth
 1, 0x00, 0x02, 0x0c, 0x01, 0x00, 0x00, 5, 0x00, 0x0f, 0x00, 0x10, 0x20, 0x00,
 // C Minor Sixth
 1, 0x20, 0x0a, 0x00, 0x01, 0x00, 0x00, 4, 0x30, 0x02, 0x0d, 0x00, 0x00, 0x00,
 // C Seventh
 1, 0x00, 0x02, 0x08, 0x34, 0x00, 0x00, 3, 0x00, 0x35, 0x00, 0x0a, 0x00, 0x00,
 // C Major Seventh
 2, 0x00, 0x08, 0x30, 0x00, 0x00, 0x00, 3, 0x00, 0x31, 0x04, 0x0a, 0x00, 0x00,
 // C Minor Seventh
 1, 0x20, 0x0a, 0x00, 0x15, 0x00, 0x00, 3, 0x00, 0x35, 0x02, 0x08, 0x00, 0x00,
 // C Ninth
 2, 0x00, 0x08, 0x37, 0x00, 0x00, 0x00, 5, 0x20, 0x1e, 0x01, 0x00, 0x00, 0x00,


 // C Sharp Major
 1, 0x00, 0x25, 0x02, 0x08, 0x10, 0x00, 4, 0x00, 0x31, 0x00, 0x0e, 0x00, 0x00,
 // C Sharp Minor
 1, 0x30, 0x04, 0x0a, 0x00, 0x00, 0x00, 4, 0x00, 0x31, 0x02, 0x0c, 0x00, 0x00,
Each entry is composed of the 7 bytes of the Chord class:
 uint8_t m_Fret; // Starting fret of the chord.
 uint8_t m_Unplayed; // Bit pattern of unplayed strings.
 uint8_t m_Chord[NUM_CHORD_FRETS]; // Each element represents a fret.
So, for example, looking at the first C Sharp Minor entry above, the following is relevant:
- m_Fret = 1 – this is the base fret for the displayed chord.
- m_Unplayed = 0x30 – this is the bit pattern of strings that will not be played (the upper 2 strings).
- m_Chord[0] = 0x04 – this specifies the strings of the first fret. In this case, the G string (0x04) is specified.
- m_Chord[1 – 4] = 0x0a, 0x00, 0x00, 0x00 – these specify frets 1 through 5.
For m_Unplayed and m_Chord, the set bits indicate:
- E = 0x01
- B = 0x02
- G = 0x04
- D = 0x08
- A = 0x10
- E = 0x20
- The remaining bits (0x40 and 0x80) are unused.
Step 12: Modify Sketch Behavior
This section provides only high level information regarding the design of the GuitarChordChart sketch. A competent software person should be able to figure out how to modify it as desired.
The following table contains a list of files that comprise the GuitarChordChart application, and a brief description of each:
FileDescription
ChordChartData.h
Defines several classes and constants used to describe and save the chord pattern information. The main class that will interest most is the “Chord” class. It defines the chord pattern that is used in ChordChartData.cpp. Its data members are:
- m_Fret – the starting fret of the chord.
- m_Unplayed; - a bit pattern of unplayed strings.
- m_Chord[NUM_CHORD_FRETS] – the chord layout. Each element represents a fret starting at m_Fret.
The values used by m_Unplayed and m_Chord are bit patterns, with each bit representing a string:
- E => 0x01
- B => 0x02
- G => 0x04
- D => 0x08
- A => 0x10
- E => 0x20
The remainder of the bits are unused.
ChordChartData.cpp
This file contains the chord patterns for all the chords known by the chord chart. When adding chords, or modifying chords, this is the file that will need to be changed. The “Keys” array contains all of the known chords. It is implemented as an array of uint8_t instead of an array of Chord due to limitations in the Arduino tool set that don’t allow storing structures in non .ino files into PROGMEM (at least I couldn’t figure out how to make it work).
ChordFinderMode.cpp, ChordFinderMode.h
These files implement the Chord Finder Mode. This is the main mode of operation in which the user can traverse the Keys array and display the desired Chord information.
DemoMode.cpp, DemoMode.h
These files implement the Demo Mode. This mode displays various patterns on the fingerboard LEDs. It is mainly used to show off, or to verify that the LEDs are functioning correctly.
Display.cpp, Display.h
These files implement the Display class. It mainly contains methods to display data and strings on the LCD.
EepromConfig.cpp, EepromConfig.h
These files implement the EepromConfig class. This class is used to save and restore configuration information to/from the Arduino EEPROM memory.
GuitarChordChart.ino
This is equivalent to the “main” function of a C program. It contains the startup and loop code that implements the entire GuitarChordChart application.
IrCodeDisplayMode.cpp, IrCodeDisplayMode.h
These files implement the IR Code Display Mode. This mode reports the raw key codes that are received. This mode cannot be exited because it disables the decoding of IR keys. To exit this mode, power must be cycled.
IrCodes.cpp, IrCodes.h
These files are used to specify all the known IR codes. The .h file can be modified to adapt the application to other IR remote controls.
IrDriver.cpp, IrDriver.h
These files implement the IrDriver class. This class manages the decoding of IR input. It derives from the IRdecodeHash class that is part of the Arduino IRLib library.
LedDriver.cpp, LedDriver.h
These files implement the LedDriver class. This class manages the interface to the LEDs.
Mode.h
This file defines the abstract Mode class, from which all modes derive.
ModeManager.cpp, ModeManager.h
These files implement the ModeManager class. This class manages the selection and execution of the various modes supported by the application.
PolledDelay.h
This file implements the PolledDelay class. Rather than waiting while a timer times out, this class polls to determine whether or not a specified amount of time has expired.
ReverseChordFinderMode.cpp,ReverseChordFinderMode.h
These files implement the ReverseChordFinderMode class. This mode allows the user to specify the chord pattern of interest. It then looks it up the pattern in the Key table to report which chord, if any, it pertains to.
SettingsMode.cpp, SettingsMode.h
These files implement the SettingsMode class. This mode handles the setting of configurable values that are remembered across power cycles.
SpecialChars.cpp, SpecialChars.h
These files implement the SpecialChars class. This class defines and installs the special characters that get displayed on the LCD. These characters include the flat, augment, diminish, and sharp symbols.
Strings.cpp, Strings.h
These files implement the Strings class. This class is used to fetch strings from FLASH memory. Strings are stored in FLASH in order to save limited RAM space.
TimerOne.cpp, TimerOne.h
These files are from the Arduino TimerOne library. I was not able to ever get them to work as a library. I needed to include them in the application’s source directory instead. These are the only files listed that were not written by me.
Step 13: Run the Final Test
Download the (possibly modified) GuitarChordChart sketch and verify that it powers up correctly and that your remote control works correctly with it. See the Appendix of the PDF file for information on using the application.
Step 14: Final Touches
- Attach the 4 rubber feet to the base.
- Clean up the wiring by using zip ties. Secure the wires to the base by using the zip tie support posts inside the base.
Step 15: Possible Enhancements
As previously mentioned, this is an old project. In the mean time, new hardware has been developed that could improve the functionality of the project and possibly decrease the cost. Here are a few ideas:
- Replace the Arduino with a Raspberry Pi Pico. This processor is faster, has much more memory and can be had for under $5 US.
- Replace the LED array with color NeoPixels. This would simplify the wiring, reduce the number of GPIO pins needed, and add color capability. For example, a red color might denote a string that is not played.
- Replace the LCD display with a small OLED or TFT color display. These are cheap and would improve the user experience and using a SPI interface would reduce wiring.
- Add audio to play a selected chord in addition to displaying the fingering. A processor like the Raspberry Pi Pico could easily handle this.
- Add intelligence to recognize a played chord via audio input and display the name of the chord and finger positions.
- Add the ability to help tune the guitar via audio input.
- Add an internet or Bluetooth interface for use with a cell phone. (This seems like overkill since if you're already on the internet or cell phone you can easily look up chords).
Step 16: Finally
This project is fully documented on my Guitar-Chord-Chart git site. It contains the latest version of all 3D and firmware files. It should be used as the official archive for the project.
Step 17: Guitar Chord Chart Firmware
Here are all of the source files for the finished Guitar Chord Chart.
Attachments
 DemoMode.h
 Display.cpp
 Display.h
 EepromConfig.cpp
 EepromConfig.h
 GuitarChordChart.ino
 IrCodeDisplayMode.cpp
 IrCodeDisplayMode.h
 IrCodes.cpp
 IrCodes.h
 IrDriver.cpp
 IrDriver.h
 LedDriver.cpp
 LedDriver.h
 Mode.h
 ModeManager.cpp
 ModeManager.h
 PolledDelay.h
 ReverseChordFinderMode.cpp
 ReverseChordFinderMode.h
 SettingsMode.cpp
 SettingsMode.h
 SpecialChars.cpp
 SpecialChars.h
 Strings.cpp
 Strings.h
 ChordChartData.cpp
 ChordChartData.h
 ChordFinderMode.cpp
 ChordFinderMode.h
 COPYING.txt
 DemoMode.cpp
Step 18: Test Code
Here are the files for the IR test, LCD test, and LED test that were mentioned above.
Step 19: 3D Files
Here are the STL files for the completed project. Note that the project's git site also contains the OpenSCAD files that were used to generate the STL files. This project was my first experience with OpenSCAD and the source is pretty rough, but is functional.


