Introduction: HackerBoxes 0014: Cache the Planet


CACHE THE PLANET: This month, HackerBox Hackers are exploring Geocaching. This Instructable contains information for working with HackerBoxes #0014. If you would like to receive a box like this right to your mailbox each month, now is the time to subscribe at HackerBoxes.com and join the revolution!
Topics and Learning Objectives for this HackerBox:
- Exploring the Hobby of Geocaching
- Configuring the Arduino Beetle Microcontroller Board
- Encoding Messages (Morse Code)
- Programming the Beetle with Encoded Messages
- Configuring the Arduino Nano Microcontroller Board
- Using RFID/NFC Technology
- Interfacing an RFID/NFC Reader Module for Arduino
- Exploring NFC-Based Geocaches
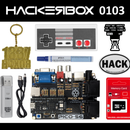
Step 1: HackerBoxes 0014: Box Contents


- HackerBoxes #0014 Collectable Reference Card
- CJMCU Arduino Beetle (ATmega32U4)
- Arduino Nano V3 (ATmega328P)
- MFRC522 RFID Module with card and keyfob
- USB Borescope Camera
- USB to microUSB Adapter
- Sugru tin with two packs of "Mouldable Glue"
- Exclusive CACHE THE PLANET Decals
- Exclusive HackerBoxes branded NFC Cards
Some other things that will be helpful:
- Soldering iron and solder
- Female DuPont jumpers
- microUSB Cable
- NFC-enabled Smart Phone or Tablet
- Computer with Arduino IDE
Most importantly, you will need a sense of adventure, DIY spirit, and hacker curiosity. Hardcore hobbyist electronics isn't always easy, but when you persist and enjoy the adventure, a great deal of satisfaction may be derived from persevering and getting your projects working. Just take each step slowly, mind the details, and don't hesitate to ask for help.
Step 2: Geocaching - an Introduction

Geocaching (Wikipedia) is an outdoor recreational activity, in which participants use a Global Positioning System (GPS) receiver or mobile device and other navigational techniques to hide and seek containers, called "geocaches" or "caches", at specific locations marked by coordinates all over the world.
A typical geocache is a small waterproof container containing a logbook. The geocacher enters the date they found it and signs it with their established code name. After signing the log, the cache must be placed back exactly where the person found it. Larger containers such as plastic storage containers or ammunition boxes can also contain items for trading, such as toys or trinkets, usually of more sentimental worth than financial. HackerBox hackers may wish to introduce trading items such as electronic modules, RF tokens, or hacker stickers.
Links:
Step 3: CJMCU Arduino Beetle


The Beetle is a miniaturized and minimalized version of the Arduino Leonardo. It has all the same powerful functionalities as the Arduino Leonardo. It is ideal for various DIY projects including wearable projects.
Beetle Features:
- Direct Programmable via USB Trace Connector
- Tiny 18mm x 20mm dimensions
- Fully compatible with Arduino Tools
- Microcontroller: ATmega32U4
- Clock Speed: 16 MHz
- Operating Voltage: 5V DC
- Digital I/O Pins: 10
- PWM Channels: 4
- Analog Input Channels: 5
- UART: 1
- I2C: 1
- Flash Memory: 32 KB (4KB Bootloader)
- SRAM: 2.5 KB
- EEPROM: 1 KB
- Blue LED wired to D13
To initially apply power to the Beetle, simply plug it into a USB port on a computer or simply plug it into a USB power pack like those used for mobile phones. The Beetle is pre-programmed with the blink.ino example sketch, so when power is initially applied, the blue LED will blink about once every two seconds.
If you do not yet have the Arduino IDE installed, you can download it from Arduino.cc
Basic introductory information for working in the Arduino ecosystem is available in the instructions for the HackerBoxes Starter Workshop.
The Arduino IDE can be set to work with the Beetle by simply selecting the Arduino Leonardo:
tools > board > Arduino Leonardo
As a first "Hello World" test of the Beetle, load up the "blink" sketch under the examples menu. This is the program that is already pre-loaded on the Beetle. Change it so that you can see the effect. Edit the values of the delay() calls from 1000 to 100. This will make the LED blink ten times fast, right? Load the sketch onto the Beetle and give it a try. You have just hacked your first code!
Step 4: The Beetle's Hidden Message


"Be sure to drink your Ovaltine"
The Beetle is the perfect delivery mode for a message. It can be programmed to provide some output, such as blinking an LED or activating a speaker/buzzer. Then the tiny, self-contained Beetle can be hidden (for example, in a Geocache) with the simple instructions that it only needs to be plugged it into a 5V power supply to reveal its secrets.
The example code in the led_beacon.ino file blinks the Beetle's on-board LED to transmit the message specified in the loop() function using Morse Code. This program was slightly modified from the very elegant Morse Beacon originally created by Mark VandeWettering of brainwagon.
What else could this tiny micro be programmed to do that would inform or entertain a lucky individual who might find it?
Attachments

Step 5: Arduino Nano

The Arduino Nano is a surface-mount, breadboard-friendly, miniaturized Arduino board with integrated USB. It is amazingly full-featured and easy to hack.
Features:
- Microcontroller: Atmel ATmega328P
- Voltage: 5 V
- Digital I/O Pins: 14 (6 PWM)
- Analog Input Pins: 8
- DC Current per I/O Pin: 40 mA
- Flash Memory: 32 KB (2KB for bootloader)
- SRAM: 2 KB
- EEPROM: 1 KB
- Clock Speed: 16 MHz
- Dimensions: 17mm x 43mm
This particular variant of the Arduino Nano is the black Robotdyn design. While traditional Nano boards feature the less-common miniUSB connector, these connect via an on-board microUSB. The microUSB connector is compatible with the same cable that is used for almost all Android phones and tablets. They are very readily available and inexpensive.
Arduino Nanos feature a built-in USB/Serial bridge chip. For these Nano's the bridge chip is the CH340G. Note that there are various other types of USB/Serial bridge chips used on the various types of Arduino boards. These chips allow the computers USB port to talk to the serial interface on the processor ship of the UNO.
A computer's operating system requires a Device Driver to communicate with the USB/Serial chip. The driver allows the IDE to communicate with the Arduino board. The specific device driver that is needed depends upon both the OS version and also the type of USB/Serial chip. For the CH340 USB/Serial chips, there are drivers available for many operating systems (UNIX, Mac OS X, or Windows). The maker of the CH340 supplies those drivers here.
As discussed with the Beetle, it is a good initial test of an Arduino module to load and/or modify the "blink.ino" sketch found under the examples menu. This shows us, using a simple example, that the IDE is configured to flash programs into the Nano board and that everything is hooked up correctly.
Step 6: NFC and RFID Technology

RFID (Radio-Frequency IDentification) is a process by which items may be identified using radio waves. NFC (Near Field Communication) is a specialized subset within the family of RFID technology. Specifically, NFC is a branch of HF (High-Frequency) RFID, and both operate at the 13.56 MHz frequency. NFC is designed to be a secure form of data exchange, and an NFC device is capable of being both an NFC reader and an NFC tag. This unique feature allows NFC devices to communicate peer-to-peer.
At a minimum, an RFID system comprises a tag, a reader, and an antenna. The reader sends an interrogating signal to the tag via the antenna, and the tag responds with its unique information. RFID tags are either Active or Passive.
Active RFID tags contain their own power source giving them the ability to broadcast with a read range of up to 100 meters. Their long read range makes active RFID tags ideal for many industries where asset location and other improvements in logistics are important.
Passive RFID tags do not have their own power source. Instead, they are powered by the electromagnetic energy transmitted from the RFID reader. Because the radio waves must be strong enough to power the tags, passive RFID tags have a read range from near contact and up to 25 meters.
Passive RFID tags come in all shapes and sizes. They primarily operate at three frequency ranges:
- Low Frequency (LF) 125 -134 kHz
- High Frequency (HF)13.56 MHz
- Ultra High Frequency (UHF) 856 MHz to 960 MHz
Near-field communication devices operate at the same frequency (13.56 MHz) as HF RFID readers and tags. As a version of HF RFID, near-field communication devices have taken advantage of the short range limitations of its radio frequency. Because NFC devices must be in close proximity to each other, usually no more than a few centimeters, it has become a popular choice for secure communication between consumer devices such as smartphones.
Peer-to-peer communication is a feature that sets NFC apart from typical RFID devices. An NFC device is able to act both as a reader and as a tag. This unique ability has made NFC a popular choice for contactless payment, a key driver in the decision by influential players in the mobile industry to include NFC in newer smartphones. Also, NFC smartphones pass along information from one smartphone to the other by tapping the two devices together, which turns sharing data such as contact info or photographs into a simple task.
If you have a smartphone that is not made by Apple, it can probably read and write NFC chips. There are a lot of cool apps including some that let you use NFC chips to launch other apps, trigger calendar events, set alarms, and store various bits of information. Here is a table of which type of NFC tags are compatible with which mobile devices.
Note regarding NFC tag types:
The Black HackerBoxes branded NFC cards contain NTAG213 chips (datasheet)
The plain white cards and the blue key fobs contain Mifare S50 chips (datasheet)
Step 7: RFID Communications Module

The MFRC522 module is based on the MFRC522 chip (datasheet) for reading/writing RFID tokens/tags/cards. The module includes a loop antenna implemented of copper PCB traces within the module. A microcontroller (such as the one on the Nano module) can communicate with the MFRC522 module using the SPI bus. The card module communicates to the tags using a 13.56MHz electromagnetic field (ISO 14443A standard RFID tags).
The MRFC522 module and the Arduino Nano can be interconnected as shown. Also install the Arduino Library for RFID using the MFRC522. This library includes example arduino programs for reading and writing the tags/tokens. Start with the DumpInfo example and see the information stored within each of the tokens. The first values read out (Card UID) make up the unique identifier which is different for each tag/token. Note that different chip types have more storage space available.
Step 8: NFC in Geocaching

There are some documented geocaches that incorporate NRC/RFID technology. If you enjoy geocaching, you may wish to create your own cache using some hacker-friendly electronics technology.
A cool example is an ammo can with a combination lock. An RFID tag is affixed to the outside of the can. The combination to the lock can then be stored within the RFID tag. Be sure to leave a hint that a mobile device with an NFC app will be needed to unlock the cache.
Step 9: USB Borescope

This borescope is an electronic device consisting of a flexible USB cable with a camera on one end for viewing a remote object. It also features LEDs around the camera for illuminating the remote object. The borescope is powered by USB and also relays images and video over the USB channel as though it were a typical USB camera. Accordingly, it is compatible with any computer or mobile device that supports typical USB cameras.
Borescopes are used for visual inspection work where the area to be inspected is inaccessible by other means or where accessibility would require time consuming, expensive, or destructive disassembly.
The USB borescope can be a lot of fun for peering into various man-made and natural structures (such as pipes or tree trunks) while exploring the environment around geocache locations.
It would be amazing to see some creative use of the USB borescope as input to an OpenCV (Open Source Computer Vision Library) project. OpenCV is an open source computer vision and machine learning software library. The library has more than 2500 optimized algorithms, which includes a comprehensive set of both classic and state-of-the-art computer vision and machine learning algorithms.
Borescopes used in medical applications are referred to as endoscopes. This USB device is clearly not for use in medical applications.
These USB borescope devices are often supplied with a CD-ROM. Various problems have been noted with these discs. We strongly suggest discarding these CD-ROMs and simply using standard USB video camera drivers and software for your particular hardware and operating system.
Step 10: Sugru Mouldable Glue

Sugru is the extraordinary new mouldable glue designed for fixing, making, and improving just about anything. It sticks to most materials, moulds like play-dough, and then cures overnight into a durable silicone rubber. Once cured, Sugru has some pretty amazing properties, making it perfect for use for all types of DIY and Maker projects.
Sugru is a patented, multi-purpose, non-slumping brand of silicone rubber that resembles modeling clay. It is malleable when removed from its airtight, moisture-proof packaging, retains its plasticity for thirty minutes, and is self-curing at room temperature in approximately 24 hours. The material adheres to aluminium, steel, copper, ceramics, glass, fabric, brass, leather, plywood, and other materials, including ABS plastics. Once cured, Sugru has a 'soft touch' or slightly flexible, grippable texture. It is waterproof, dishwasher-safe, and thermally insulating, with a service temperature range between −50 and 180 °C.
Sugru contains 30% silicone (polysiloxane) and 20–50% talc. Here is the technical datasheet.
Step 11: Cache the Planet

Thank you for sharing our adventure into Geocaching. If you have enjoyed this Instrucable and would like to have a box of electronics projects like this delivered right to your mailbox each month, please join us by SUBSCRIBING HERE.
Reach out and share your success in the comments below and/or on the HackerBoxes Facebook page. Certainly let us know if you have any questions or need some help with anything. Thank you for being part of HackerBoxes. Please keep your suggestions and feedback coming. HackerBoxes are YOUR boxes. Let's make something great!


