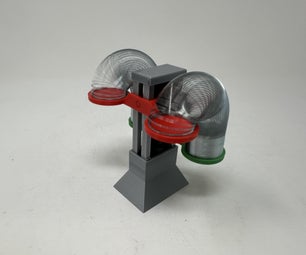
Introduction: Heavy Duty Wave Lift (Experimental Lift)
Hello there again! As my second Instructable so far, I am glad to present my most recent project. A heavy duty wave lift, capable of lifting up to 10 balls at a time. This originally started out as a small science gadget I wanted to make for a video. In the process, I got slightly bored with just a small concept, so I began developing a much larger scaled version; In other words, what you see in the picture. All steps will be listed below, and feel free to take a look at the video and download the 3D file.
DISCLAIMER: This Lift was made as a pure experiment and design challenge, so It is not recommended to use in an actual ball machine unless you have a really large amount of knex.
Step 1: Overview and Resources
Parts list: Heavy Duty Wave Lift
---Motors---
12V Electric Motors: 2
12V Electric Motor Adapters: 1
12V Electric Motor Adapters (reverse polarity): 1
Extension Cord or any way to power bot motors at the same time: 1
---Gears---
Custom 3D Printed Large Gears: 1
Black 82 Teeth Large Gears: 3
Yellow 82 Teeth Large Gears: 1
Yellow 34 Teeth Medium Gears: 23
Grey 34 Teeth Medium Gears: 1
Red 34 Teeth Medium Gears: 42
Grey 14 Teeth Small Gears: 1
Blue 14 Teeth Small Gears: 6
White Worm Gears: 2
---Rods---
Grey 190mm Rods: 106
Orange 190mm Rods: 24
Black 190mm Rigid Rods: 21
Red 128mm Rods: 41
Metallic Green 128mm Rods: 395
Beige 128mm Rigid Rods: 17
Yellow 86mm Rods: 32
Grey 86mm Rods: 126
Blue 54mm Rods: 1198
White/Grey/Black 32mm Rods: 1976
Green/Black 16mm Rods: 2151
---Spacers---
Grey Spacers: 410
Light Blue Spacers: 339
Rod End Caps (Round): 2
---Connectors---
8-way Connectors: 433
7-way 3D-Connectors: 637
5-way Connectors: 452
4-way 3D-Connectors: 1350
4-way Connectors: 112
3-way Connectors: 275
2-way Connectors: 78
2-way Ladder-Connectors: 107
1-way Connectors: 1047
Tan Lock Clips: 45
Metallic Blue Clips: 39
Rod End Clips: 38
Ball Clips: 16
Socket Clips: 16
---Panels---
128mm x 128mm Square Panels: 4
86mm x 86mm Square Panels: 1
86mm x 86mm Triangle Panels: 1
54mm x 54mm Triangle Panels: 2
32mm x 32mm Triangle Panels: 4
---Wheels---
Large Tires: 9
Large Tires (Hollow): 7
Medium Tires: 14
Large Pulleys: 30
Small Tires: 66
Small Pulleys: 72
---Miscellaneous---
Chain Links: 688
Big Ball Factory Ball Halves: 4-20 (2-10 balls)
-Some Lubricant for the mechanisms
Total: 12,470-12,486 Pieces
Step 2: Power Cell 1
Note: Be sure to add some sort of lubrication to the gears for better movement as the weight of some of the pistons and the friction combined could cause the motors to become out of sync, or jam.
Step 3: Completing the Rotating Segments
Note: -Make sure the counterweights are placed on the direct opposite of the rotating disc
-each segment will be offset 45 degrees from the previous in order to form the spiral pattern ( 360/8 )
-I made a pattern in the color of the discs so the instructions may not be too disorienting
Step 4: Power Cell 2
Step 5: Adding the Bearings and Counterweights for Rotating Mechanism
Note: when placing the bearings and counterweights make sure that the white rods are aligned
Step 6: Attaching Motors
-To find out if your motor is reverse polarity, you may want to check out this link: https://jaknatoo.blogspot.com/2015/02/how-to-ident...
-If you lack a Reverse polarity adapter, then by all means, feel free to reposition the motor so that it is circulating in the right direction
-WARNING: Please make sure to test out the motors before installing them to avoid breaking any pieces or the motors themselves. I almost made that mistake myself so I want to make sure the problem is avoided as much as possible
Step 7: Placing the Base for the Pistons
Note: The position of the chain matters in the counterweight system so please make sure to follow the images exactly to avoid the chain breaking
Step 8: Making the Frame for the 8 Towers
Step 9: Placing the Platforms and the First 4 Transition Bridges
Step 10: Placing the Last 4 Transition Bridges and the Remainder of the Framework
Step 11: Building the 8 Counterweight Towers
Note: make sure to connect the chain to where it faces inward of the build before passing the first set of gears, if done correctly, the chain will be upside down by the time it is connected to the counterweights
Step 12: Completion
If you enjoyed this build, let me know and have a good day! :D


