Introduction: How to Control Servo With Flysky FS-i6 and Crossflight Flight Controller
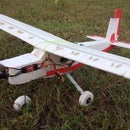
We will guide you on using Flysky FS-i6 and Crossflight/APM/Pixhawk Flight Controller to drop medical kits using drones accurately. Learn the step-by-step process for reliable and efficient delivery to help bring healthcare where it's needed most.
What is a Flight Controller?
A drone flight controller plays a crucial role as it acts as the drone's brain. It processes data from onboard sensors and interprets user commands to stabilize the drone. Advanced controllers can improve the drone's functionality, allowing autonomous flight and integration with other peripherals for more sophisticated and versatile drone operations.
Supplies
Step 1: Download and Install Mission Planner
Step 2: Overview of Cross Flight Controller
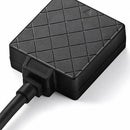
The Radiolink Crossflight Flight Controller is an advanced and reliable system designed to control drones and unmanned aerial vehicles (UAVs). This cutting-edge solution combines high-performance hardware with intelligent software to provide precise flight control and enhanced aerial capabilities. With 10 channels of PWM output, it can be adapted to 3-8 axis multi-rotors, airplanes, helicopters, cars, boats, and multiple industries.
The Radiolink Crossflight Flight Controller has a compact and lightweight design, built with high-quality materials for durability and long-lasting performance. It is suitable for both hobbyists and professional drone pilots who aim to push the boundaries of their aerial missions.
Step 3: Servo Connection With Crossflight Flight Controller
Radiolink Crossflight has 10 channels of PWM output. For quadcopter, channels 1 to 4 are connected to the 4 main motors/ESC. We connect a servo motor to channel 6 of the flight controller.
Step 4: Setup Flysky FS-i6 for Servo and Assign Switch
1) press ok button for 3 seconds.
2) Go to setup using the up and down button and press ok.
3) Go down to Aux. channels using the down button and press ok.
4) Choose channel 6 by pressing ok
5) Change the source to SWD using up and down button.
Step 5: Mission Planner Setup
1. Connect the mission planner with the flight controller.
2. Click on the "Setup" button located at the top of the window.
3. Navigate to the "Mandatory Hardware" section.
4. Search for the "Servo Output" option and select it.
5. For channel 6, change the function from "disabled" to "SERVOn_min".


