Introduction: How to Create a Magic Interactive Mirror Experience

Welcome to the enchanting world of the "Magic Interactive Mirror Experience" project! This extraordinary endeavor has been designed to enrich children's school experience by providing them with a captivating and interactive journey into the realm of art and creativity.
Powered by the versatile Raspberry Pi computer and equipped with a camera, our project transforms children's photos into marvelous works of art, inspired by renowned masterpieces.
Why transform children's photos into works of art? The Magic Mirror Experience offers several benefits to children. Firstly, it actively engages them in play and stimulates their imagination, allowing them to explore fantastic worlds and embark on incredible adventures
The Magic Interactive Mirror Experience project allows children to see themselves as famous characters, immersing them in a whole new dimension. Their faces come to life, adorned with virtual brushstrokes and captivating colors, in a magical and engaging experience that fuels their curiosity and desire to delve deeper into the world of art.
We are confident that this project will open children's minds, inspiring them to explore the world of art and nurture their creative talents. Let's ignite their imagination and encourage them to embrace the power of art in shaping a more beautiful and stimulating future.
Welcome to the realm of the Magic Interactive Mirror Experience, where children transform into living artworks, and creativity becomes a true enchantment!
Supplies

The realization of this project requires the following materials:
- Raspberry Pi 3B+(or newer version with WI-Fi module)
- Raspberry Pi Camera
- Monitor
- SD Card
- HDMI cable
- Buttons
As for the software part we need:
- Python3 install on your Raspberry
- OpenCV library install on your Raspberry
- DLIB library install on your Raspberry
- Flask library install on your Raspberry
Step 1: Configure the Raspberry OS

The first step is install the proper operating system on the raspberry. The easier way is install Raspberry Pi OS using Raspberry Pi Imager in your pc and install the OS in the SD. You can go to the raspberry officiali site https://www.raspberrypi.com/software/ and download the Raspberry Pi Imager.
Once the image is installed, a window will open where we can choose which operating system we want to install. It is recommended to install the 'Raspberry Pi OS Buster' version. After that we choose on which SD install the operating system.
By clicking on the gear icon we can view the advanced settings. In this way we could directly enable the ssh connection to the raspberry and configure which WI-FI network to connect to. This phase is essential if we do not have a screen and a keyboard directly connected to the raspberry. By enabling ssh and Wi-Fi we could remotely connect to the rasperry (for example using VNC viewer) and use it without the need for a screen
After that click on "write" and wait for the writing process finish. When the process is completed wed can insert the SD card on our raspberry
Step 2: Setup the Raspberry Camera

Once the operating system is correctly installed we are ready to configure our Raspberry by turning it on.
Firs we connect then Raspberry Pi camera in its appropriate slot
We can connect the raspberry to a screen and a keyboard or if we prefer to use it remotely it is possible to connect via SSH. In the second case, to connect via ssh, open any terminal and type:
ssh pi@pi
This is the default name of our raspberry, if during the installation of the OS we change the name we must change the command and replace with the new name,.
Once connected to the raspberry it is necessary to enable the use of the camera from the Raspberry settings. We open the menu setting--> preferences --> Raspberry Pi configuration --> interfaces and we click on enable the camera interface. You will need to restart the Raspberry Pi for the changes to take effect.
Alternatively, it is possible to enable the camera interface from the terminal
sudo raspi-config
The Raspberry Pi setup menu will appear. Use the arrow keys to navigate the menu. Select "Interfacing Options" and press Enter.
In the next menu, select "Camera" and press Enter.
A dialog will appear asking if you want to enable the camera. Select "Yes" and press Enter.
The camera will now be enabled. You will need to restart the Raspberry Pi for the changes to take effect. You can do this by selecting "Finish" in the setup menu and then selecting "Yes" when asked if you want to restart the Raspberry Pi.
Once the Raspberry Pi restarts, the camera will be ready to use. You can use the appropriate code and libraries to access the camera and capture images or videos.
Step 3: Install the Python Library

After correctly configuring the raspberry camera, the next step is to install the libraries that we will need in our python script.
First we check if we have already install the right version of python:
python --version
If no version is installed, proceed with the python installation
sudo apt update
sudo apt install python3
Install Flask
sudo pip3 install flask
Install OpenCV
At this point we proceed with the installation of OpenCV. We open a terminal and type:
sudo apt update
sudo apt install python3-opencv
To verify the installation, import the cv2 module and print the OpenCV version:
python3 -c "import cv2; print(cv2.__version__)"
Output
3.2.0
Install DLIB
The installation require a few steps
 sudo apt-get update
 sudo apt-get install build-essential cmake
 sudo apt-get install libgtk-3-dev
 sudo apt-get install libboost-all-dev
 pip3 install numpy
 pip3 install scipy
 pip3 install scikit-image
 pip3 install dlib
We can check if we install correctly:
python3
Python 3.6.9 (default, Nov  7 2019, 10:44:02)
[GCC 8.3.0] on linux
Type "help", "copyright", "credits" or "license" for more information.
>>> import dlib
>>>
Step 4: Setup the Button


In this step we see how connect a button to our Raspberry Pi.
First of all we connect the two terminals of the button respectively to the ground and one to an input pin of the raspberry. To see how the raspberry pins are set you can visit the site https://pinout.xyz/ and check how the pins are arranged for each type of raspberry. For our project we will use the GND6 pin and the GPIO20 pin
Step 5: Run the Code
Once the hardware installation is finished we can concentrate on the software implementation
The main idea behind the development of the software is to create a python script that allows you to view the content of the camera shot in real time and, after pressing a button, a photo is taken. Once the photo has been taken, by accessing the webapp it will be possible to view the new photo with the effect applied:
In the code, two separate threads are created: capture_button_thread and capture_image_thread. Next, a Flask server is started using the app object. The server is started by specifying the host as '0.0.0.0' and the port as 5000.
# Creazione dei thread
capture_button_thread = threading.Thread(target=capture_button)
capture_button_thread.start()

capture_image_thread = threading.Thread(target=capture_image)
capture_image_thread.start()


# Avvio del server Flask
app.run(host='0.0.0.0', port=5000)

# Attendi la terminazione dei thread
capture_image_thread.join()
For more information regarding the source code there are attached 2 python files with all the necessary information
- main.py
- face_swapping.py
To run the code we open the terminal and execute the following command
python3 main.py
To access the web app you will need to open a browser and go to http://<ipRaspberryPI:5000> and you can access to the menu that allow you to select the filter
Attachments

Step 6: Final Result
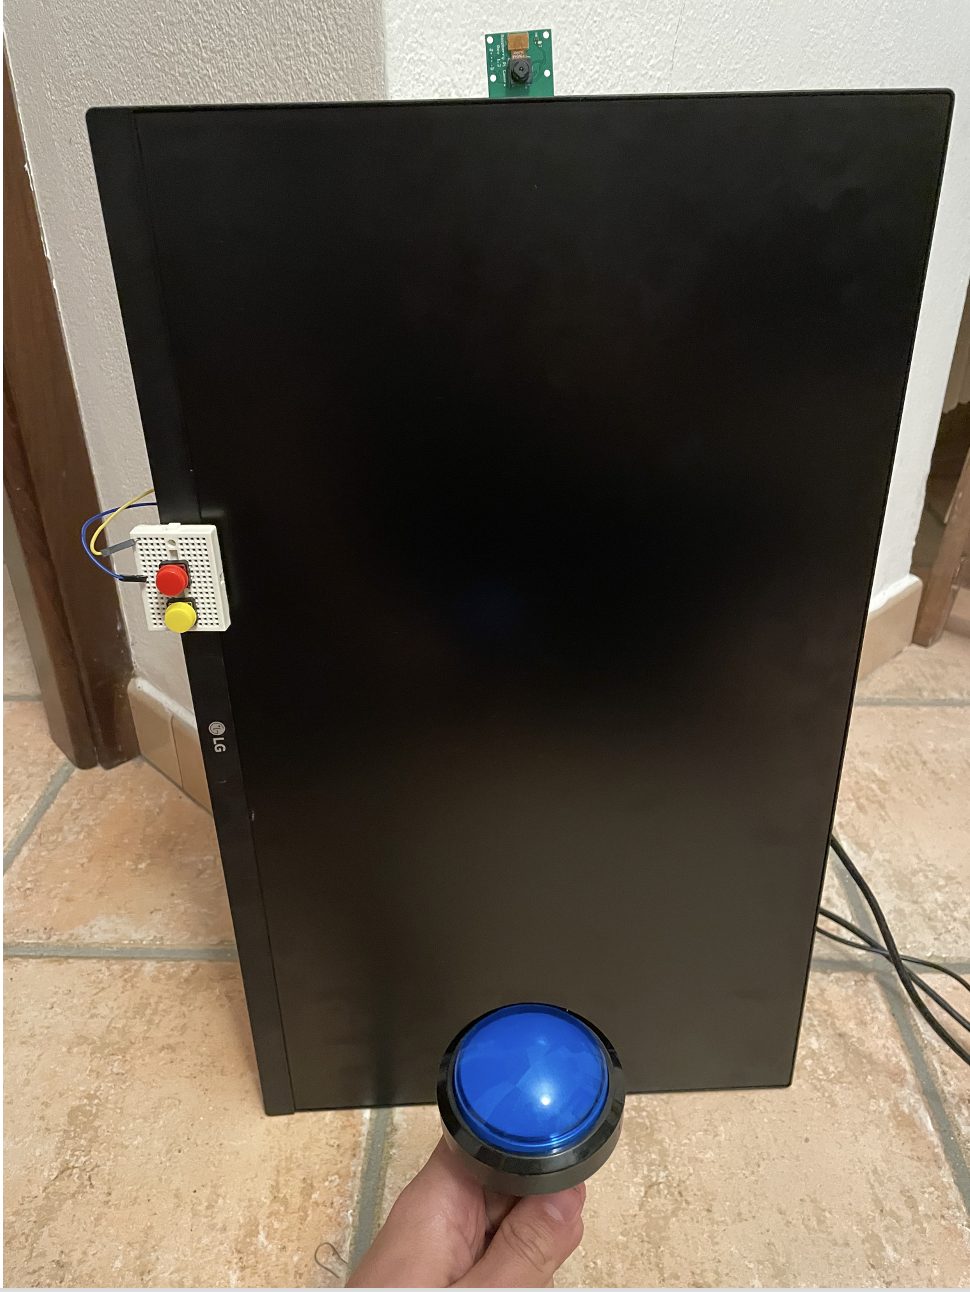
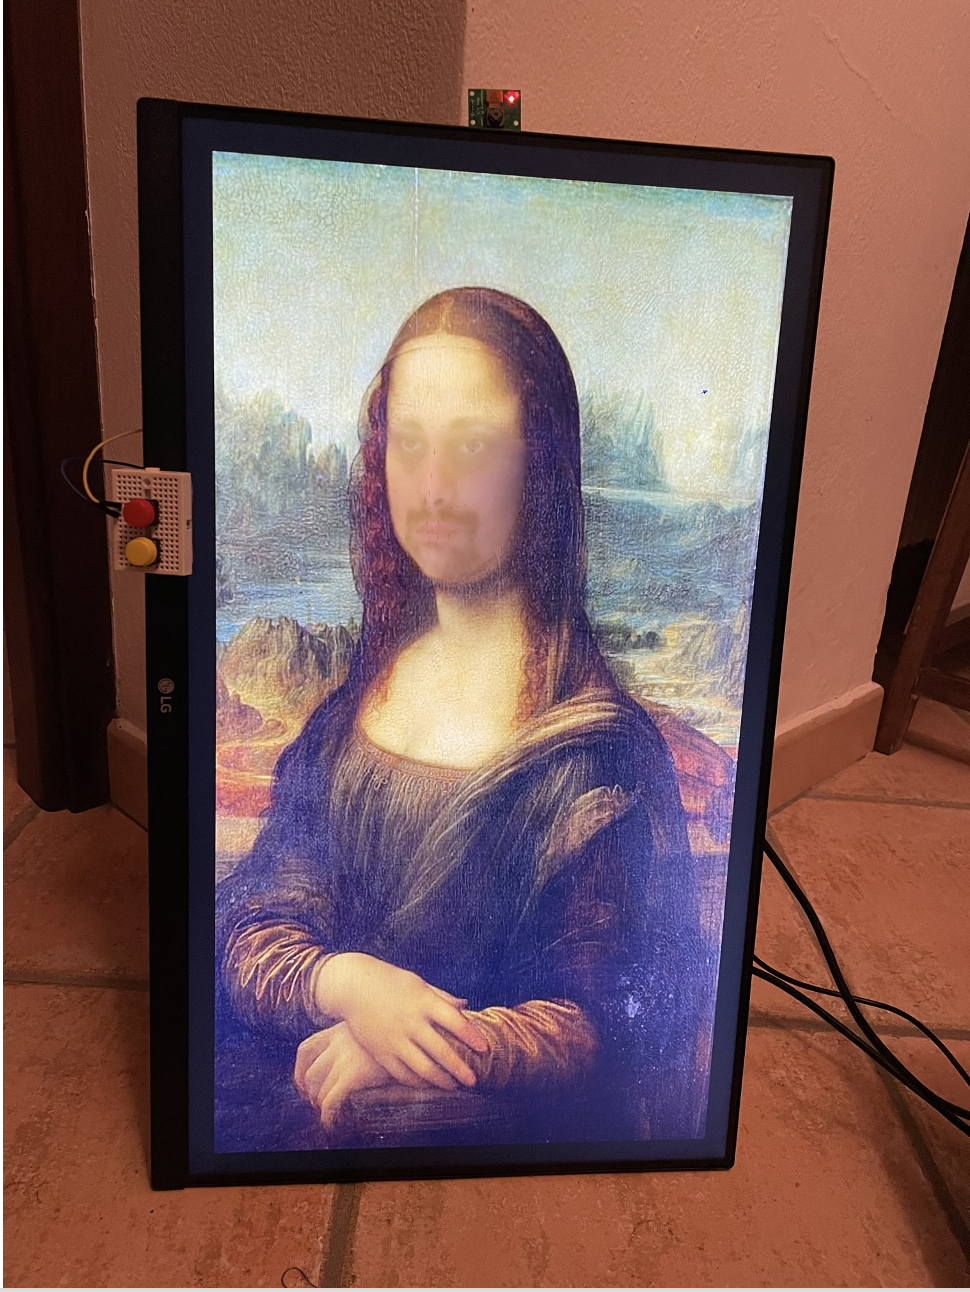


We can see some pictures that show how the final result should look like. We can see an image that shows the complete implementation, an image that shows the final effect and an image that shows the webapp of our system


