

Introduction: How to Design a Basket Using SelfCAD


Learn how to design a basket using SelfCAD with the help of this tutorial
Step 1:
How to Design a Basket with SelfCAD
Welcome to this tutorial on designing a basket with SelfCAD. Baskets have been integral to human civilization for centuries, serving practical and decorative purposes. In this tutorial, we'll guide you through crafting your own unique basket design using SelfCAD, a versatile 3D modeling software. Whether you're aiming for traditional charm or modern innovation, SelfCAD equips you with the tools to shape forms and add intricate details, empowering you to unleash your creativity. Join us as we explore the art of basket design and master 3D modeling techniques, culminating in your ability to craft stunning baskets for any occasion.
To access the interactive tutorial to this article, visit https://www.selfcad.com/tutorials/3w3d6q3h3h4p1o1fg6x4t5wi3uf3o6lf7642
Once you’ve launched the editor;
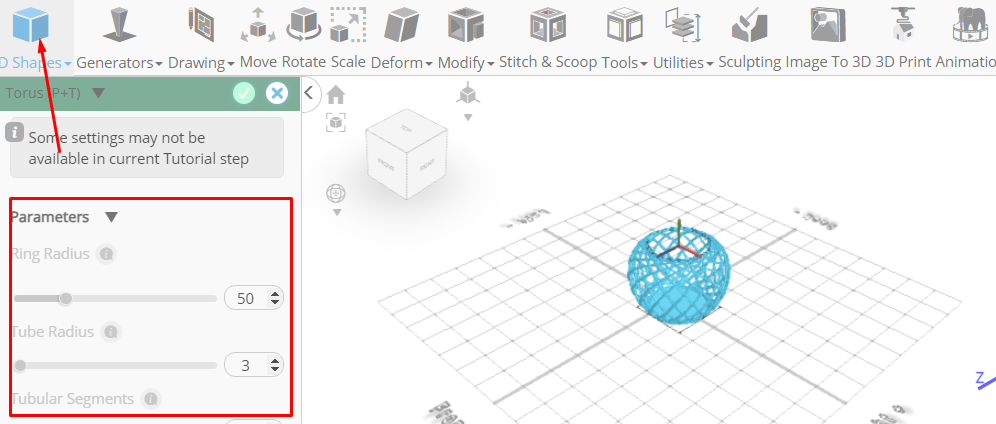
From the 3D Shapes Category on the Toolbar choose Torus. Set Ring Radius to 80, Tube Radius to 2, Rotation z to -30

Click to finalize Torus
From the Deform Category on the Toolbar choose Bend. Set x to 39

Click ‘x’ to close Transformation panel
From the Tools category on the Toolbar choose Copy Offsets
Set Operation to Rotate. Set y to 100. Set Amount of copies to 20
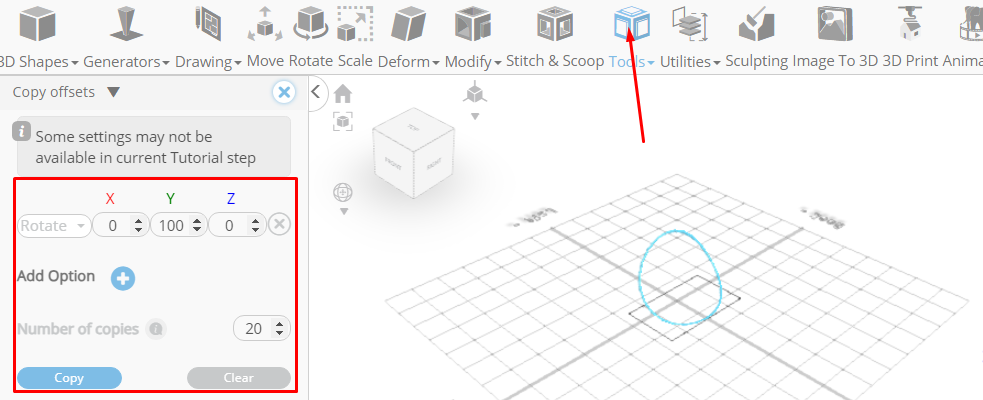
Click Copy button to create copies
![]()
Click ‘x’ to close copy offsets panel
Click Rotate on the Toolbar. Set z to 180
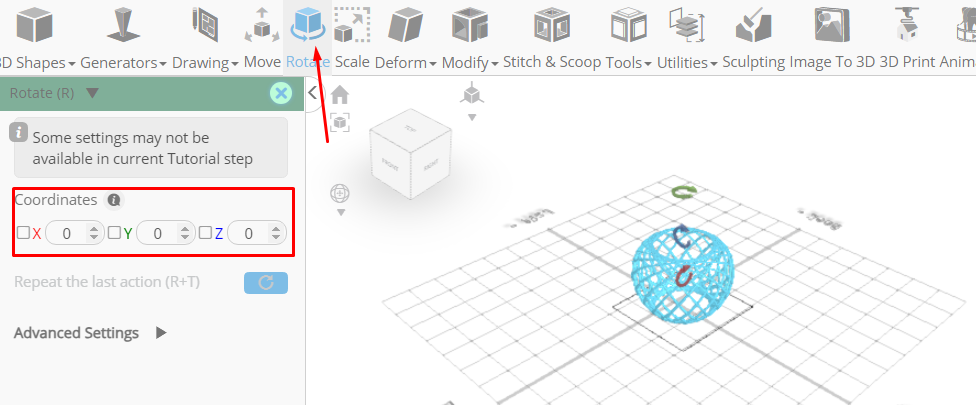
Click ‘x’ to close Transformation panel
From the 3D Shapes Category on the Toolbar choose Cylinder. Set Height to 5, Position x to 21

Click to finalize Cylinder
From the 3D Shapes Category on the Toolbar choose Torus. Set Tube Radius to 3, Tubular segments to 16, Position x to 20, Position y to 119
Click to finalize Torus
Click on mesh 8, mesh 4(17, 6, 10, 3, 13, 14, 20, 7, 9, 18, 16, 11, 5, 4, 12, 15, 19, 8) to select them
Click Stitch & Scoop on the Toolbar. From the Tool panel choose Union

Click to finalize Union
Click Isolate button to isolate selected objects
Click Color picker button to change color of selected object. Click Brown button

Click OK to confirm color change

As you continue honing your design skills, remember that SelfCAD offers a wealth of resources to support your learning journey. To deepen your understanding and explore more advanced features, consider checking out the interactive tutorials (https://www.selfcad.com/tutorials) available on the SelfCAD website. The tutorials page provides a treasure trove of guides, tips, and tricks that cater to designers of all levels.
More structured learning experience can also be accessed at the SelfCAD Academy (https://www.selfcad.com/academy/curriculum/), https://www.youtube.com/@3dmodeling101, and 3D Modeling 101 series (https://www.youtube.com/playlist?list=PL74nFNT8yS9DcE1UlUUdiR1wFGv9DDfTB). This comprehensive resource offers in-depth courses taught by industry experts, allowing you to master the intricacies of SelfCAD at your own pace.


![Tim's Mechanical Spider Leg [LU9685-20CU]](https://content.instructables.com/FFB/5R4I/LVKZ6G6R/FFB5R4ILVKZ6G6R.png?auto=webp&crop=1.2%3A1&frame=1&width=306)


