

Introduction: How to Design a Desk Buddy With SelfCAD


Learn how to design a desk buddy using SelfCAD with the help of this video
Step 1:
How to Design a Desk Buddy with SelfCAD
Welcome to this tutorial on designing a Desk Buddy using SelfCAD. A Desk Buddy is a delightful companion that sits on your desk, adding a touch of personality and charm to your workspace. Whether you're looking for a playful mascot, a functional organizer, or a decorative accent, creating your own Desk Buddy with SelfCAD allows you to unleash your creativity and tailor it to your unique style and preferences. In this tutorial, we'll guide you through the process of designing a Desk Buddy from scratch, empowering you to craft a companion that brings joy and functionality to your desk environment.
To access the interactive tutorial to this article, visit https://www.selfcad.com/tutorials/5c4v5mh9z222q731y20714j3a555z4u1n2r5
Once you’ve launched the editor;
From the 3D Shapes category on the Toolbar choose Cylinder
Set Bottom Radius to 73, Height to 115, Horizontal Segments to 13
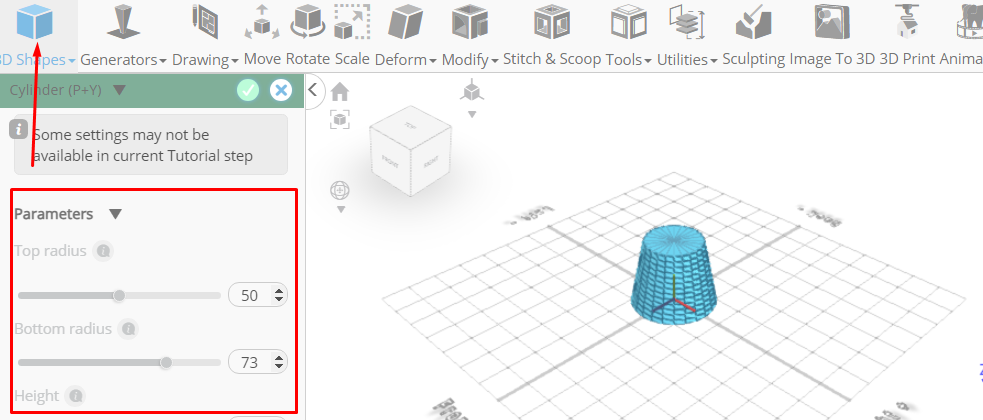
Click to finalize Cylinder
Click to activate Polygon selection. Click on highlighted region to select it
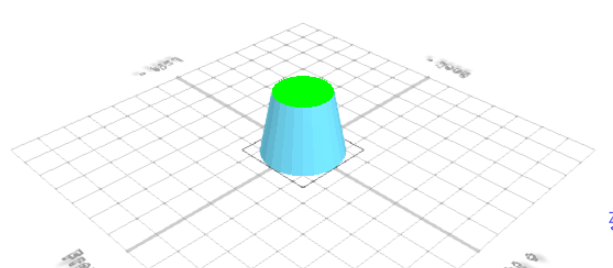
Click Delete button to delete selected object
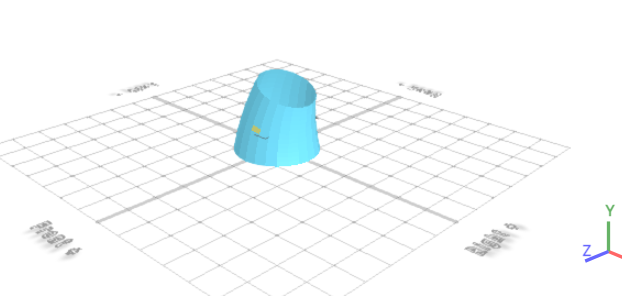
From the Deform category on the Toolbar choose Bend. Set x to 22
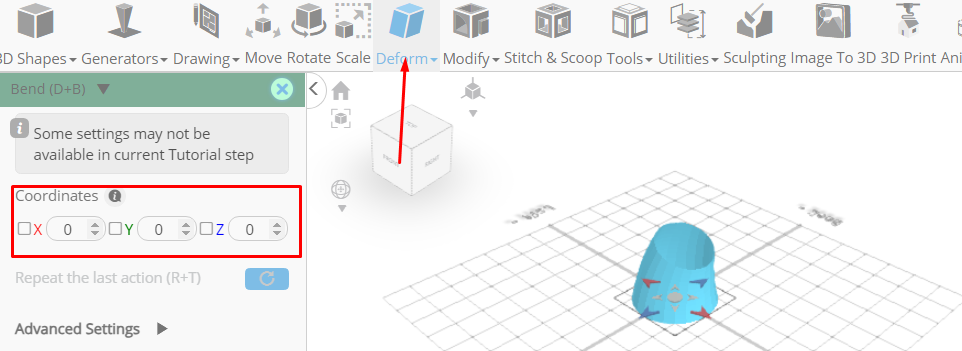
Click ‘x’ to close Transformation panel
Click on highlighted region to select it
From the Modify Category on the Toolbar choose Extrusion
Set Is Individual to true, Extrusion Amount to 70
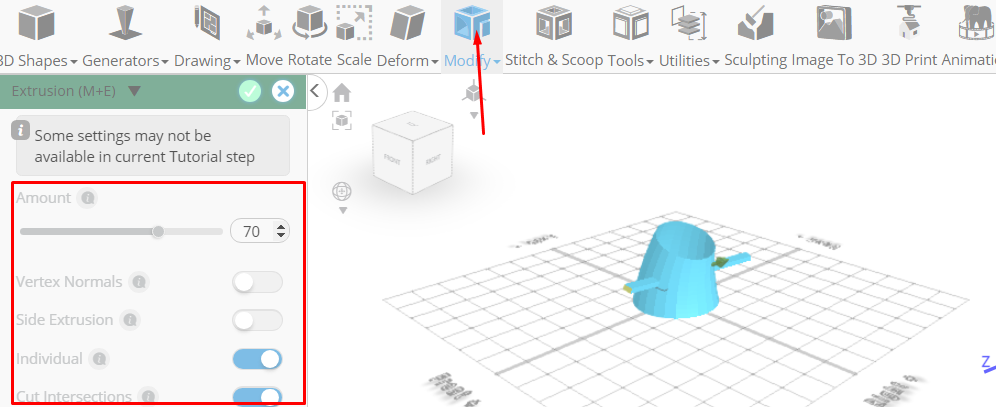
Tick the checkmark to finalize Extrusion
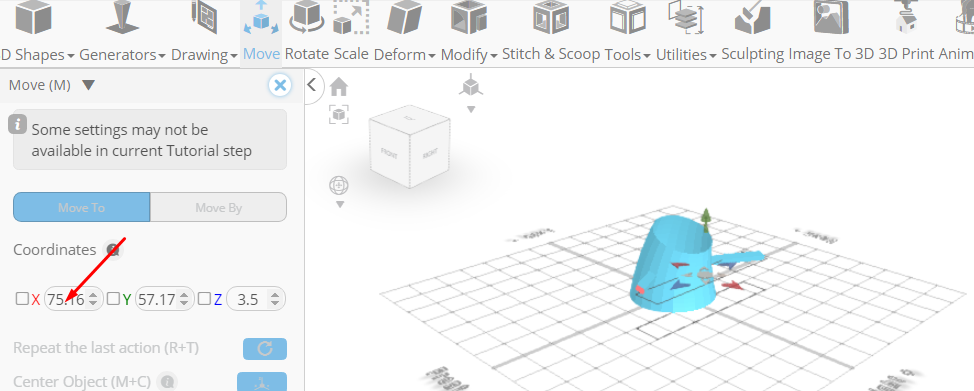
Click Move on the Toolbar. Set X to 75.16 using highlighted gizmo
Click on highlighted region to deselect it
Set z to -71.62 using highlighted gizmo
Click ‘x’ to close Transformation panel
Click on highlighted region to deselect it

Click on highlighted region to select it
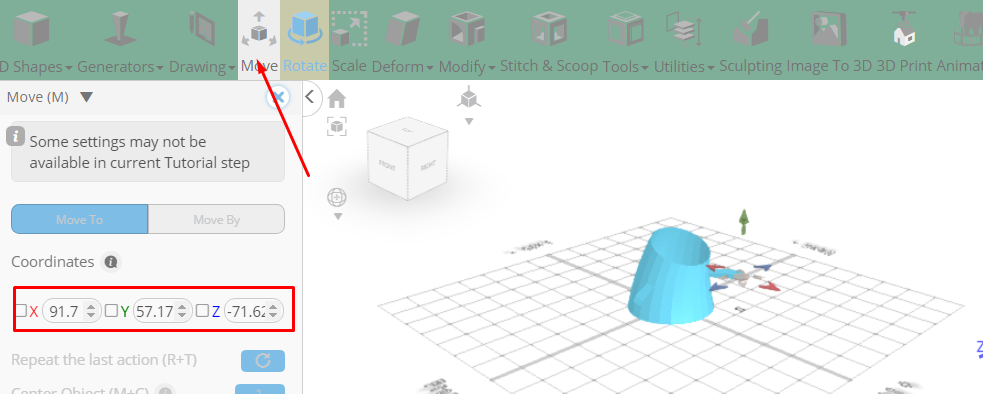
Click Move on the Toolbar
Set X to 91.23, z to 96.76 using highlighted gizmo
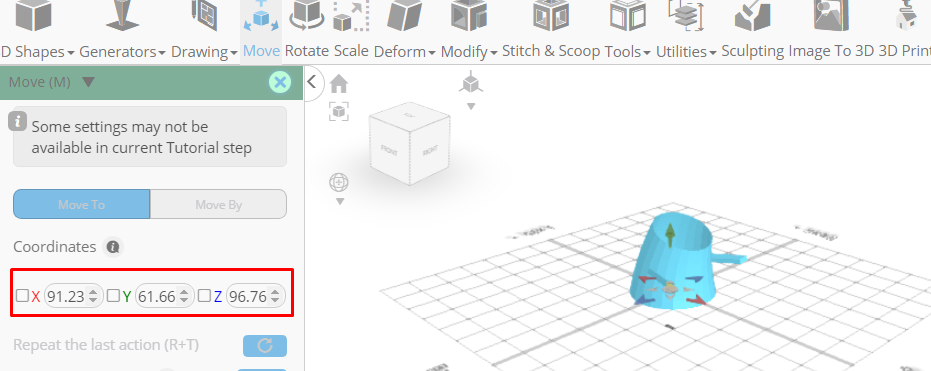
Click ‘x’ to close Transformation panel
Click Rotate on the Toolbar. Set y to 270
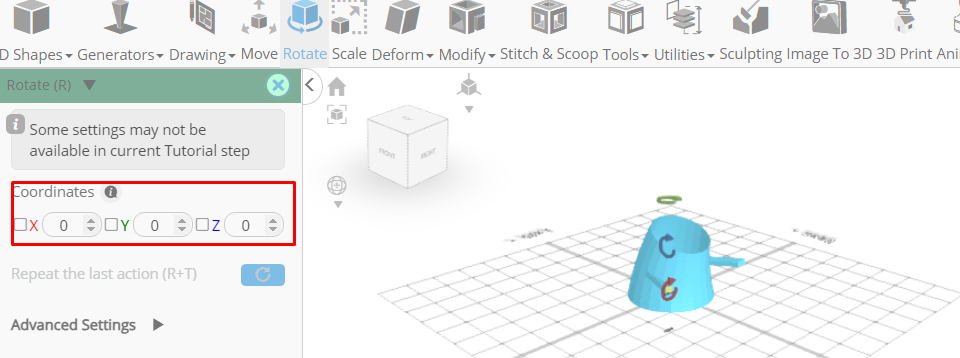
Click ‘x’ to close Transformation panel
Click on highlighted region to select it

From the Modify Category on the Toolbar choose Extrusion. Set Extrusion Amount to 17
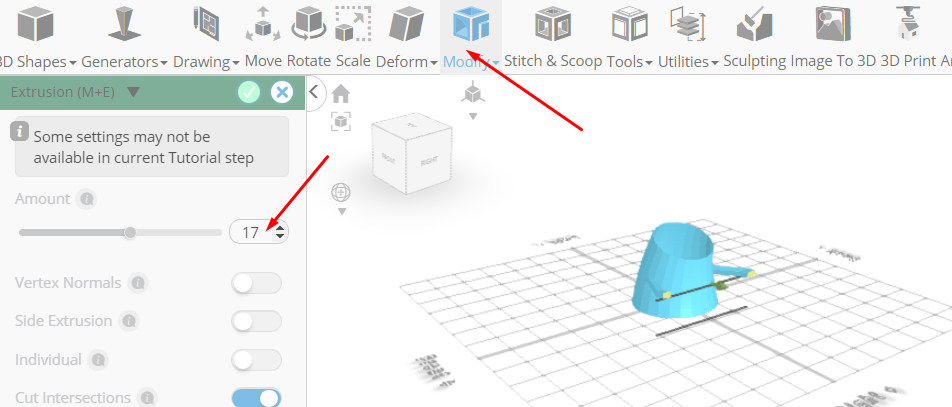
Tick the checkmark to finalize Extrusion
Click Move on the Toolbar. Set y to 75.81 using highlighted gizmo. Set x to 98.17 using highlighted gizmo

Click ‘x’ to close Transformation panel
Click on highlighted region to deselect it
Click on highlighted region to select it
From the Modify Category on the Toolbar choose Extrusion
Set Extrusion Amount to 10
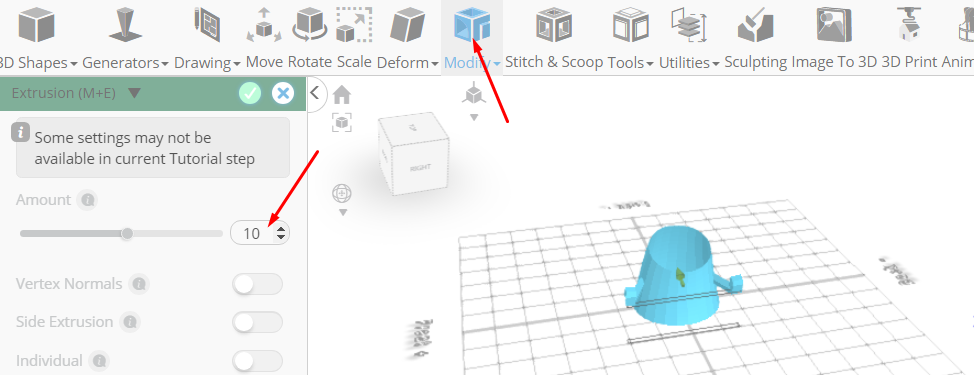
Tick the checkmark to finalize Extrusion
Click on highlighted region to deselect it
From the Modify Category on the Toolbar choose Add Thickness. Set Thickness to 1
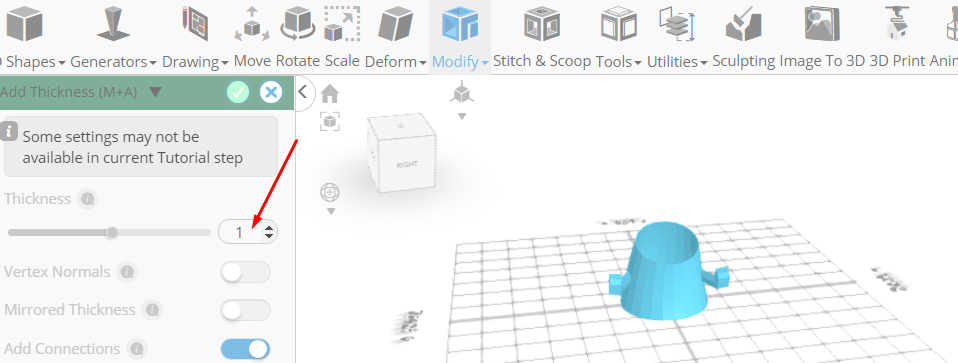
Click to finalize Add Thickness
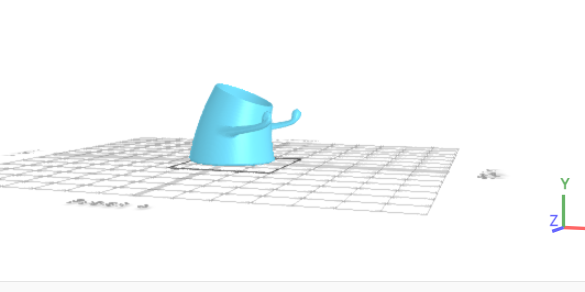
From the Modify Category on the Toolbar choose Round Object. Set Smoothness to 3
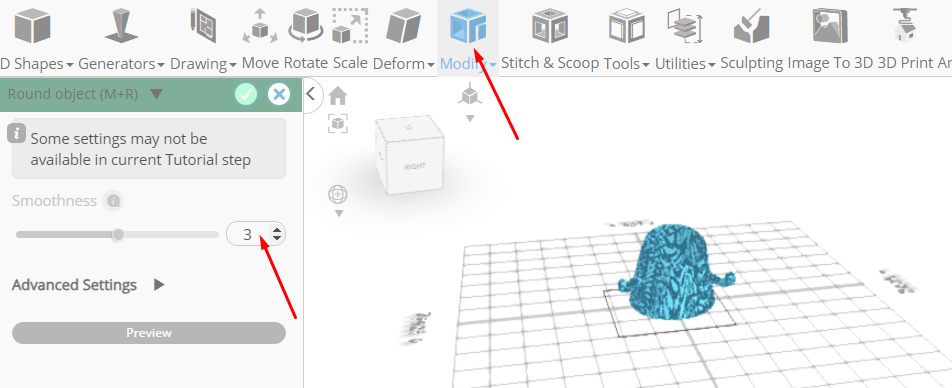
Click to finalize Round object
As you continue honing your design skills, remember that SelfCAD offers a wealth of resources to support your learning journey. To deepen your understanding and explore more advanced features, consider checking out the interactive tutorials (https://www.selfcad.com/tutorials) available on the SelfCAD website. The tutorials page provides a treasure trove of guides, tips, and tricks that cater to designers of all levels.
More structured learning experience can also be accessed at the SelfCAD Academy (https://www.selfcad.com/academy/curriculum/), https://www.youtube.com/@3dmodeling101, and 3D Modeling 101 series (https://www.youtube.com/playlist?list=PL74nFNT8yS9DcE1UlUUdiR1wFGv9DDfTB). This comprehensive resource offers in-depth courses taught by industry experts, allowing you to master the intricacies of SelfCAD at your own pace.


