

Introduction: How to Design a Popsicle Key Chain With SelfCAD


Learn how to design a Popsicle key chain using SelfCAD with the help of this tutorial
Step 1:
How to Design a Popsicle KeyChain with SelfCAD
Welcome to this tutorial where we'll guide you through the process of designing a charming popsicle keychain using SelfCAD. Whether you're a seasoned designer or just starting out, SelfCAD offers a user-friendly interface equipped with powerful tools, making it an ideal platform for unleashing your creativity.
Keychains are not only functional but also serve as personal statements or even small tokens of affection. By the end of this tutorial, you'll have crafted your very own popsicle keychain, tailored to your unique style or as a thoughtful gift for someone special.
SelfCAD is a comprehensive 3D modeling software that combines modeling, sculpting, and printing capabilities into one intuitive platform. From simple shapes to intricate designs, SelfCAD empowers users to bring their ideas to life with ease.
To access the interactive tutorial to this article, visit https://www.selfcad.com/tutorials/1e31386h5r7w5g1i151486p6o3596k2n5f4j
Once you’ve launched the editor;
From the 3D Shapes Category on the Toolbar, choose Capsule. Set Top Radius to 60, Bottom Radius to 60, Height to 250
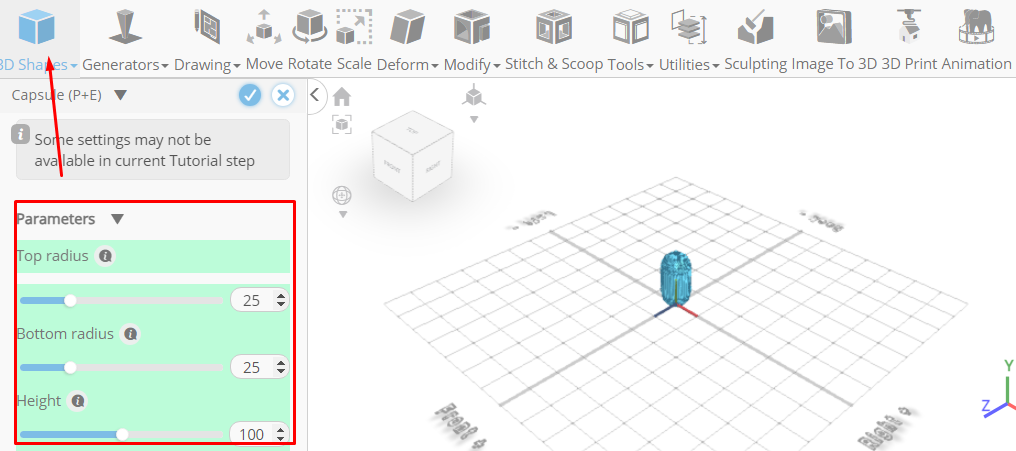
Click to finalize Capsule
Click to activate Face selection
Click on highlighted region to select it
Click Delete button to delete selected object
From the Tools category on the toolbar choose fill polygons
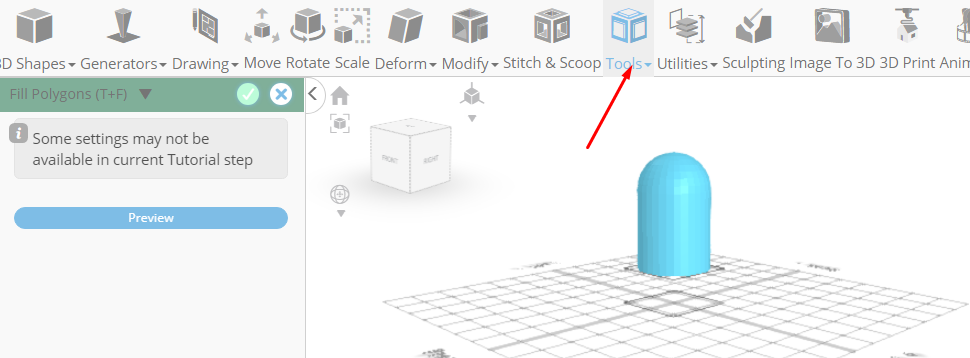
Click to finalize fill polygons
Click Scale on the Toolbar. Set z to 42 using highlighted gizmo
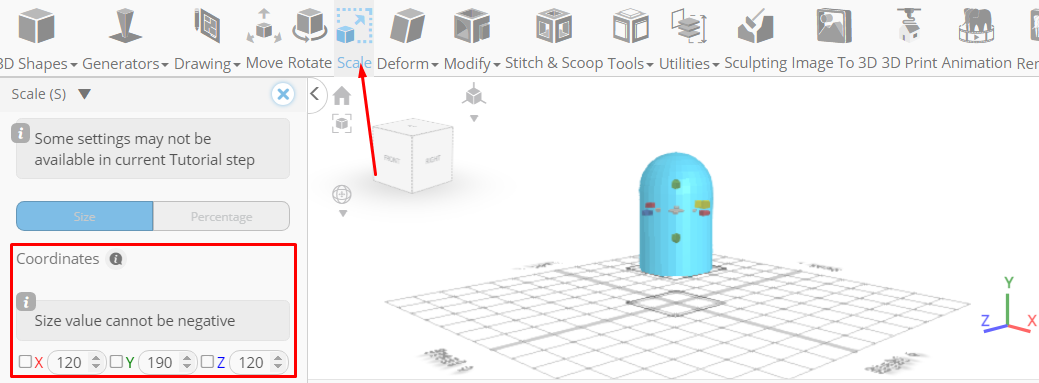
Click ‘x’ to close transformation panel
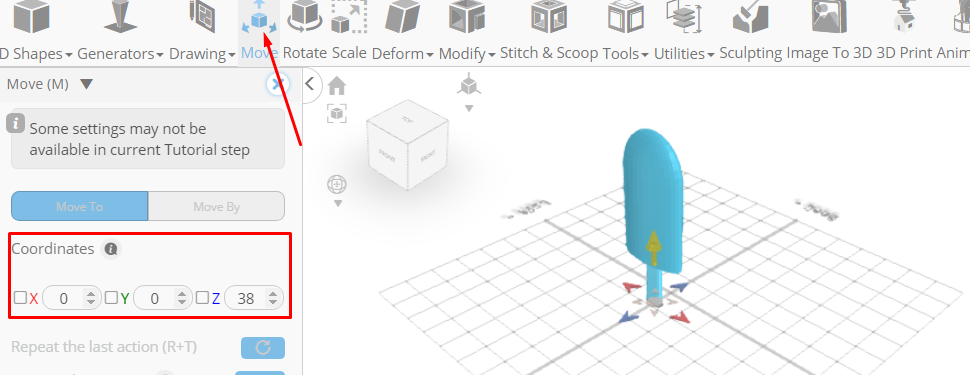
From the 3D Shapes Category on the Toolbar, choose Cube. Set Width to 30, Height to 150, Depth to 10, Position z to 38
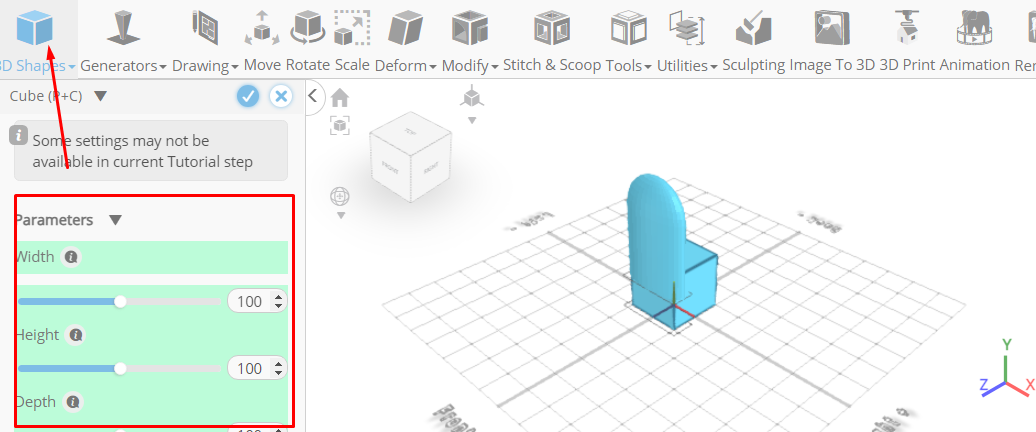
Click to finalize Cube
From the Modify Category on the Toolbar, choose Fillet. Set Intensity to 4
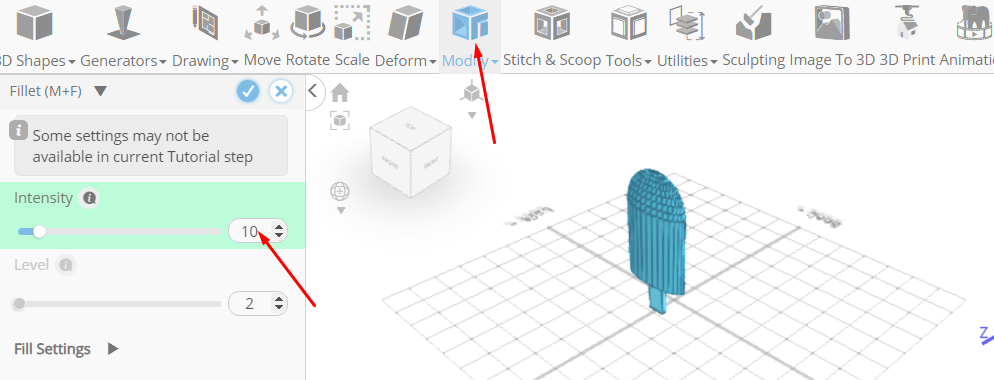
Click to finalize Fillet
Click highlighted part on selection cube to turn off region selection
Click on mesh 4 to select it. Click on mesh 8 to deselect it
Click Move on the Toolbar. Set y to 112 using highlighted gizmo
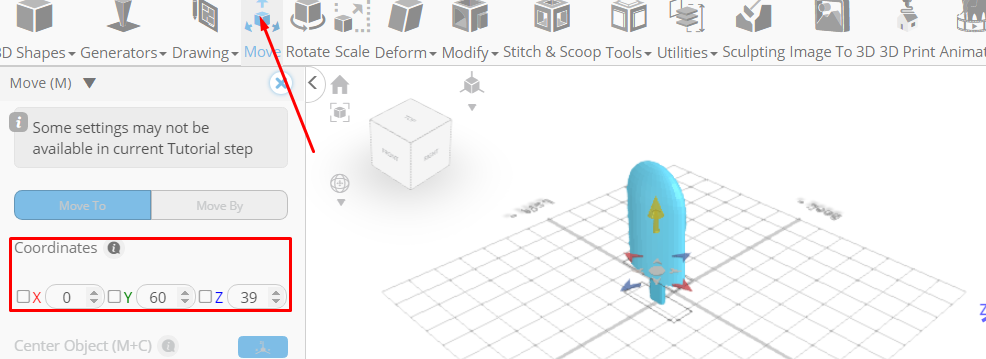
Click ‘x’ to close transformation panel
Click Scale on the Toolbar. Set y to 214 using highlighted gizmo
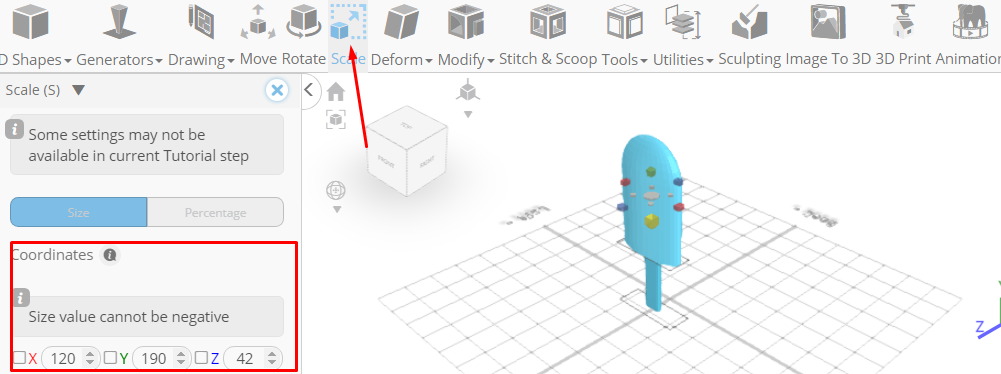
Click ‘x’ to close transformation panel
Click on mesh 4 to deselect it. Click on mesh 8 to select it
Click Copy button to copy selected object
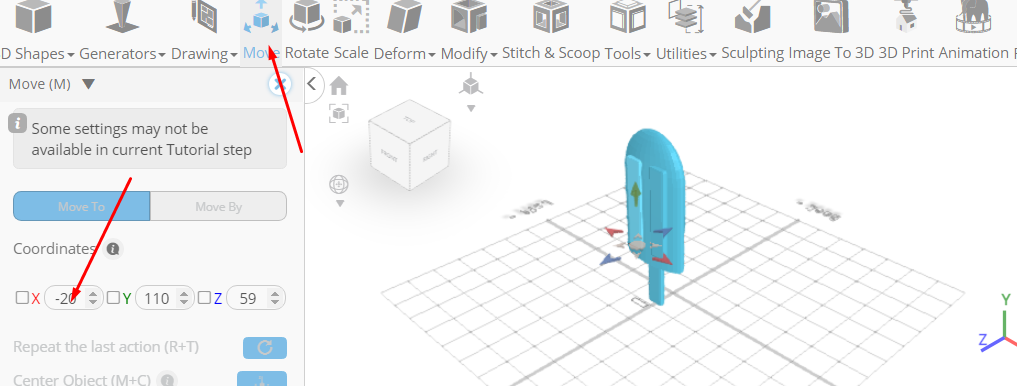
Click Move on the Toolbar. Set y to 110 using highlighted gizmo. Set z to 59 using highlighted gizmo. Set x to 29 using highlighted gizmo
Click Copy button to copy selected object
Set x to -20 using highlighted gizmo
Click on mesh 8(1) to select it
Click Copy button to copy selected object
Set z to 20 using highlighted gizmo
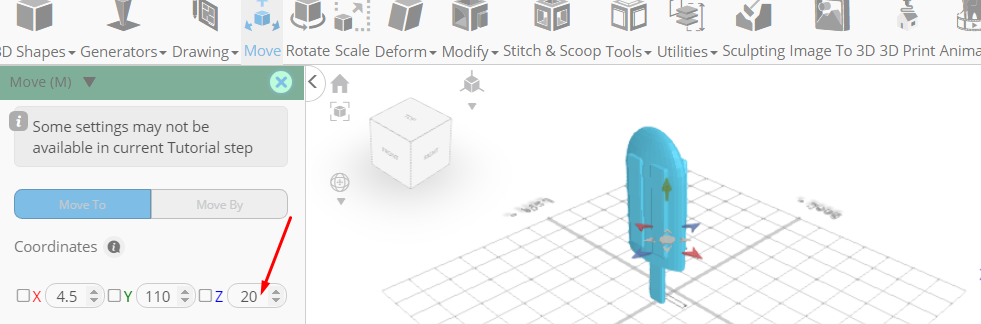
Click ‘x’ to close transformation panel
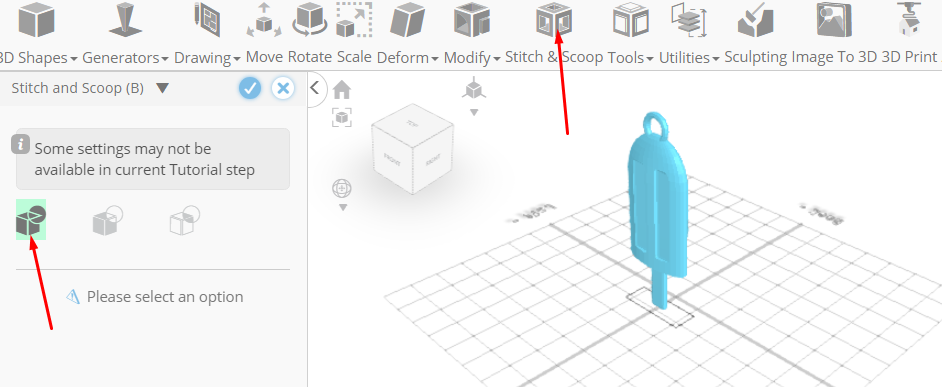
Click on mesh 8(1), 8(2), and 4 to select it
Click Stitch & Scoop on the Toolbar. From the Tool panel choose Difference. Choose mesh 8(1), 8(2), 8(3), 8(4) to subtract
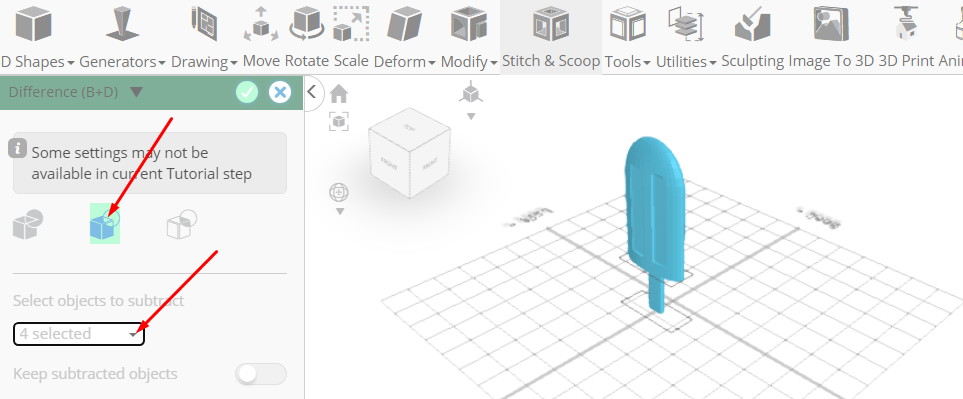
Click to finalize Difference
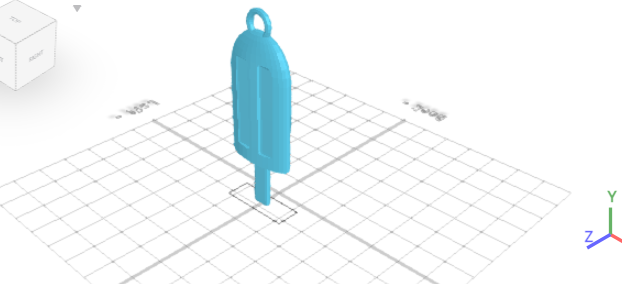
From the 3D Shapes Category on the Toolbar, choose Torus. Set Ring Radius to 19, Tube Radius to 5, Position y to 287, Position z to 40, Rotation y to 90, Rotation z to 90

Click to finalize Torus
Click on Difference 1, mesh 8 to select it
Click Stitch & Scoop on the Toolbar. From the Tool panel choose Union
Click to finalize Union
As you continue honing your design skills, remember that SelfCAD offers a wealth of resources to support your learning journey. To deepen your understanding and explore more advanced features, consider checking out the interactive tutorials (https://www.selfcad.com/tutorials) available on the SelfCAD website. The tutorials page provides a treasure trove of guides, tips, and tricks that cater to designers of all levels.
More structured learning experience can also be accessed at the SelfCAD Academy (https://www.selfcad.com/academy/curriculum/), https://www.youtube.com/@3dmodeling101, and 3D Modeling 101 series (https://www.youtube.com/playlist?list=PL74nFNT8yS9DcE1UlUUdiR1wFGv9DDfTB). This comprehensive resource offers in-depth courses taught by industry experts, allowing you to master the intricacies of SelfCAD at your own pace.


