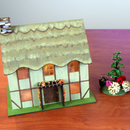
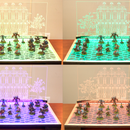
Introduction: How to Design and Laser Cut a Scale Model Building for Tabletop Terrain
In this tutorial I show how to use Adobe Illustrator to design a scale model building for 28mm tabletop war-gaming and cut it on a laser cutter. I give painting and assembly tips as well.
Step 1: Tools and Materials
Tools:
Access to a laser cutter (I use mine at my makerspace)
Access to vector drawing software (I use Adobe Illustrator)
Materials:
1/8" birch plywood
acrylic paints (I use Citadel)
Acrylic glazing liquid
Scraps of leather
Puck lights
Step 2: Establish Design Goals
It's always good to decide upfront what you want to achieve.
I want to design a terrain building for my WarmaHordes army, which requires about a 1:50 scale. For reference, that means an 8" x 6" model is equivalent to a 33' x 25' building and a 2.5" to 3" wall height is equivalent to floors with a 10' to 12' ceiling. This gives me a ballpark idea of the size of building I want to design. My actual dimensions will be driven by the look and style of the building I create, based on reference photos.
I want a modular design that allows me to remove the roof and even the second floor of the building, for easy access during game play.
I like a clean style, not the sawtooth joins that you see in so many laser cut models, so I will opt for top and bottom tabs that are hidden where possible by the facade pieces.
I decided I wanted an art deco style, so I created a folder of reference photos of actual art deco buildings.
My plan is to use the puck lights I've used in my other terrain projects to light this building as well. That way all of the terrain turns on and off with a single remote.
Step 3: Optimize Repetitive Engraving Patterns
The walls of my building will be brick and the brick engraving pattern will be the most time consuming part of the laser cutting - I need to make a special effort to make that as efficient as possible. That means NOT building it with stacked rectangles, which will double engrave every line, but building it up from single lines that don't repeat.
For similar reasons, when I get to the ornate facade, I need to make sure my engraving eliminates duplicate lines whenever possible.
I've created an in-depth tutorial of the full design process here: How to Design Scale Models in Adobe Illustrator, but I'll provide a quick overview in the next few steps.
Step 4: Design the First Floor
First, a note about my laser cutter. It recognizes red lines as cut lines, blue lines as engraving, and green lines are ignored and therefore useful as reference lines.
A critical part of my design process is that I do virtual testing and assembly. When I draw a wall, I immediately create a top-down view of that wall that includes the tabs that will need to be placed in slots. I make these top-down views green, so they act as references that do not affect the laser cutter. I create two walls: a longer front and back wall and a shorter side wall.
I then pull the top views of the four walls into a new layer for the floor. I rotate and arrange the four top views into a rectangle with butt joints. This shows me how the walls will look when assembled. I then use the rectangle tool to draw a red rectangle that will be the actual floor, and since this is the ground floor I make the rectangle about an inch larger all around -- the sidewalk, so to speak.
My final step is to select all the tabs in the top-down views and turn them red. This changes them to cut slots that will be perfectly aligned with the tabs on the walls. I get perfect fitment, without doing any math.
To use my wood efficiently, I fill the open center of the floor with an assortment of accessory pieces: skylight frames and doors for the first floor.
Note: I let the brick engraving run right across the cutouts for the windows and doors in the walls. This is because I have learned from experience that masking, the most common way to 'cutout' the brick in the drawing, confuses my laser cutter. That is because those lines are really still there, they are just hidden from view. I have found it best to just accept the inefficiency of the engraving over cutouts, and I actually use those pieces for paint testing later in the process.
Step 5: Design the Second Floor and Roof
The walls of the second floor are very similar to those of the first, except the tabs are an 1/8th of an inch longer so they can go through the floor and into the slots on the top of the first floor walls.
The second floor has balconies front and back, and the open space in the center is filled with balcony railings that need to be cut. Once again, reference my in-depth tutorial to see how the balconies were designed.
The roof walls are only an inch high, and the front wall has an ornate design drawn over a reference photo, using the pen tool.
The roof itself has four skylights, each with a frame that will be glued inside the blue engraved lines around the cut opening. Note that the cut opening is smaller than the acrylic rectangles that will be cut for the skylights, to prevent the skylights from falling in.
Step 6: Design the Facade
Using a facade allows you to take a basic building design, like the brick building that I've done so far, and dress it up to look like a lot of different buildings. I'm making this an art deco building, but it could just as easily be an Old West saloon - all it takes is a different facade!
My facade includes some non-functioning full length french doors and wall panels containing an art deco thistle design. Both of these are based on reference photos, the doors being drawn with a pen tool and the thistle being created using image trace on black and white clip art.
Step 7: Laser Cut the Pieces
Laser cutters are setup to execute engraving before cutting, so the brick will engrave before the windows and doors are cut and the walls are cut out. The single longest cut time in this design is for the facade sheet, which took about 45 minutes.
I cut several different options for my skylights: 1/8" florescent green, 1/4" clear and 1/8" frosted. I always like to test different things just to see what I like best during final assembly.
Step 8: Paint the Pieces
After all the time and effort that went into the brick pattern, it would be a shame to cover it all up with paint! I tested several different paint-to-acrylic-glaze ratios before settling on one that gave me a nice golden glaze that let the engraving shine through.
The floor and the roof were painted with a gray and white mixture that I applied directionally, giving the surface a slate or metallic look.
The facade and ornate roof front were painted with full strength Citadel paints. I use Citadel paints to paint my miniature WarmaHordes models, so I used a color palette that matched my army.
Step 9: Assemble the Model
The first thing I did is glue the facades onto the walls.
Next I built the first floor, gluing the tabs into the floor and the butt joints on the walls.
You want the floors to remain detached and modular, so I built the second floor separate from the first. Because the tabs stick through the bottom, I placed shims under the balconies so they had something to rest on while I built the balcony railings. The tabs, when eventually slotted into the walls of the first floor, will be hidden by the facade on the first floor walls.
Then I assembled the roof.
Finally, I glued the two functioning doors in place by using scraps of leather as hinges.
Step 10: The Model Is Finished!
After trying the three skylight options, my favorite was the frosted skylights (though all were nice).
The puck lights fit easily inside the building and look great when lit.
I made a video of the whole process. Please check it out if you would like to learn more!


